Mortal Shell 2: Sanguine Caverns walkthrough (Part 15)
πŸ–₯ PlayStation, Xbox, PCGuides / Walkthroughs
#Action Adventure#Xbox Series X/S#Single Player#Playstack#Third person

Mortal Shell 2: Sanguine Caverns walkthrough (Part 15)

Rock Paper Shotgun » Guides✍ Ollie Toms⏱ 28 min read(about 1 hour ago)

Overview & Key Takeaways

The Sanguine Caverns can be found at the very northmost point of the Mortal Shell 2 map, and contains the game's third major boss: the frightful Lost Child. With everything else in Fainweald now conquered, it's time for us to journey to these far north reaches and cleanse the land of its last scant bits of corruption.

Below, I've put together an easy to follow step-by-step guide to the entire region of the Sanguine Caverns, including every dungeon, every foe and boss encounter, and every tucked away valuable item - of which there are several in this area of Fainweald! So, let's begin the last stage of your cleanup of Fainweald with our 100% Sanguine Caverns walkthrough.

Read more

The Sanguine Caverns can be found at the very northmost point of the Mortal Shell 2 map, and contains the game's third major boss: the frightful Lost Child. With everything else in Fainweald now conquered, it's time for us to journey to these far north reaches and cleanse the land of its last scant bits of corruption.

Below, I've put together an easy to follow step-by-step guide to the entire region of the Sanguine Caverns, including every dungeon, every foe and boss encounter, and every tucked away valuable item - of which there are several in this area of Fainweald! So, let's begin the last stage of your cleanup of Fainweald with our 100% Sanguine Caverns walkthrough.

Want the walkthrough for a different area of the game? You'll find the full list of all our guides on our Mortal Shell 2 walkthrough hub page!

Sanguine Caverns walkthrough steps:

  1. Cross the north bridge by the Cavern Entrance Beacon.
  2. Reach the Abandoned Camp.
  3. Clear out the west side.
  4. Cleanse the Hidden Keep.
  5. Enter the Legacy Dungeon.
  6. Acquire the Deadeye Stone.
  7. Reach the Pulsing Caves Beacon.
  8. Cleanse Mawbreak Cavern.
  9. Obtain Mether's Flesh.
  10. Activate the Sanguine Shoreline Beacon.
  11. Cleanse Hermit's Pass.
  12. Explore the lower areas around the Beacon.
  13. Defeat the Tarblighted Stoner.
  14. Defeat the Lost Child.
  15. Cleanse the Child's Feeding Grounds.
  16. Give Mether's Flesh to the Nightfish.

To see this content please enable targeting cookies.

Manage cookie settings

1. Cross the north bridge by the Cavern Entrance Beacon.

Head back to the nearest Beacon from where we left off, and use Mether's Breath to fast travel back to the Cavern Entrance Beacon - the same Beacon from which you started the previous part of the walkthrough.

A Mortal Shell 2 screenshot showing the perfect path the player should take through the Sanguine Caverns according to Rock Paper Shotgun's full walkthrough of the game. A Mortal Shell 2 screenshot showing the perfect path the player should take through the Sanguine Caverns according to Rock Paper Shotgun's full walkthrough of the game.

Image credit: Rock Paper Shotgun/Playstack

Now cross the bridge north, right next to the Beacon, into the cold, white region of the Sanguine Caverns.

Mark step as completed.

2. Reach the Abandoned Camp.

The moment you set foot on the white rock of the Sanguine Caverns, a group of horrible demon babies (called Children Of Gloom) will unburrow and attack you. A single shot with the Forgotten Crossbow each will deal with them, as will a single strike of your melee weapon.

A Mortal Shell 2 screenshot showing the perfect path the player should take through the Sanguine Caverns according to Rock Paper Shotgun's full walkthrough of the game. A Mortal Shell 2 screenshot showing the perfect path the player should take through the Sanguine Caverns according to Rock Paper Shotgun's full walkthrough of the game.

A Mortal Shell 2 screenshot showing the perfect path the player should take through the Sanguine Caverns according to Rock Paper Shotgun's full walkthrough of the game. A Mortal Shell 2 screenshot showing the perfect path the player should take through the Sanguine Caverns according to Rock Paper Shotgun's full walkthrough of the game.

Image credit: Rock Paper Shotgun/Playstack

Head into the blood-red area ahead of you and an Infested Stalker will approach. Kill it and continue on ahead. Ignore the slope down to your left. Go past it and at the end of the path you'll find a Gloom Tentacle guarded by another lone Child Of Gloom.

Once you've harvested the Tentacle, take a few steps back and you'll see a suspicious row of stalagmites rising from the ground. Attack them to dispel the wall of stalagmites, revealing a bloated corpse you can loot for a Glimpse.

A Mortal Shell 2 screenshot showing the perfect path the player should take through the Sanguine Caverns according to Rock Paper Shotgun's full walkthrough of the game. A Mortal Shell 2 screenshot showing the perfect path the player should take through the Sanguine Caverns according to Rock Paper Shotgun's full walkthrough of the game.

A Mortal Shell 2 screenshot showing the perfect path the player should take through the Sanguine Caverns according to Rock Paper Shotgun's full walkthrough of the game. A Mortal Shell 2 screenshot showing the perfect path the player should take through the Sanguine Caverns according to Rock Paper Shotgun's full walkthrough of the game.

Image credit: Rock Paper Shotgun/Playstack

Now turn around and take the slope downwards. Kill the Netopyrs in the tree at the bottom, and then turn around and kill the three Lithopods on the cliff edge. Loot the tree they were guarding for a Ventrium.

Continue along the main path, past two more Children Of Gloom, and drop down into the air current below. This is the site of an Abandoned Camp. There are no enemies, but a stone slab you can loot to the left for some Gloom and an Egon's Stone. One of the tents also has a Common Moonshine next to it.

A Mortal Shell 2 screenshot showing the perfect path the player should take through the Sanguine Caverns according to Rock Paper Shotgun's full walkthrough of the game. A Mortal Shell 2 screenshot showing the perfect path the player should take through the Sanguine Caverns according to Rock Paper Shotgun's full walkthrough of the game.

Image credit: Rock Paper Shotgun/Playstack

Towards the northwest side of the camp, you can also loot a Synaptic Vessel by a bunch of boxes.

Mark step as completed.

3. Clear out the west side.

There are two paths from the Abandoned Camp (not including the air current back the way you came). The middle path is blood-red, and leads you to the legacy dungeon. But before taking that path, head along the left-hand path instead so you can clear the west side of the region of enemies too.

A Mortal Shell 2 screenshot showing the perfect path the player should take through the Sanguine Caverns according to Rock Paper Shotgun's full walkthrough of the game. A Mortal Shell 2 screenshot showing the perfect path the player should take through the Sanguine Caverns according to Rock Paper Shotgun's full walkthrough of the game.

A Mortal Shell 2 screenshot showing the perfect path the player should take through the Sanguine Caverns according to Rock Paper Shotgun's full walkthrough of the game. A Mortal Shell 2 screenshot showing the perfect path the player should take through the Sanguine Caverns according to Rock Paper Shotgun's full walkthrough of the game.

Image credit: Rock Paper Shotgun/Playstack

Go up the slope and turn left to find a sitting spot. There's also a tree next to the sitting spot; look around the far side of the tree for another Common Moonshine.

Now turn around and proceed along the main path. Kill the Children Of Gloom and the Stalker ahead, and loot the 2x Laterite next to each other by the wall of blood.

Head down the adjoining slope, and collect the Tooth Of Nochte to your right at the bottom. Then turn around and dispatch the Headsman and three Brigands ahead.

A Mortal Shell 2 screenshot showing the perfect path the player should take through the Sanguine Caverns according to Rock Paper Shotgun's full walkthrough of the game. A Mortal Shell 2 screenshot showing the perfect path the player should take through the Sanguine Caverns according to Rock Paper Shotgun's full walkthrough of the game.

A Mortal Shell 2 screenshot showing the perfect path the player should take through the Sanguine Caverns according to Rock Paper Shotgun's full walkthrough of the game. A Mortal Shell 2 screenshot showing the perfect path the player should take through the Sanguine Caverns according to Rock Paper Shotgun's full walkthrough of the game.

Image credit: Rock Paper Shotgun/Playstack

A Mortal Shell 2 screenshot showing the perfect path the player should take through the Sanguine Caverns according to Rock Paper Shotgun's full walkthrough of the game. A Mortal Shell 2 screenshot showing the perfect path the player should take through the Sanguine Caverns according to Rock Paper Shotgun's full walkthrough of the game.

Image credit: Rock Paper Shotgun/Playstack

Drop down to the lower platform ahead, and kill all the Children Of Gloom that spawn as you explore this clearing. To the left you'll also find bits of another abandoned camp, with a 350x Coin Pouch and 2x Common Moonshine to loot. Slightly further ahead, still on the left side, is a Ventrium in an alcove.

At the far end is a stone bridge guarded by a Brigand Stoner. Kill it, but don't bother going further. This bear-trap-riddled bridge, as you can see from your map, simply leads back towards Gloomshade Grove.

Mark step as completed.

4. Cleanse the Hidden Keep.

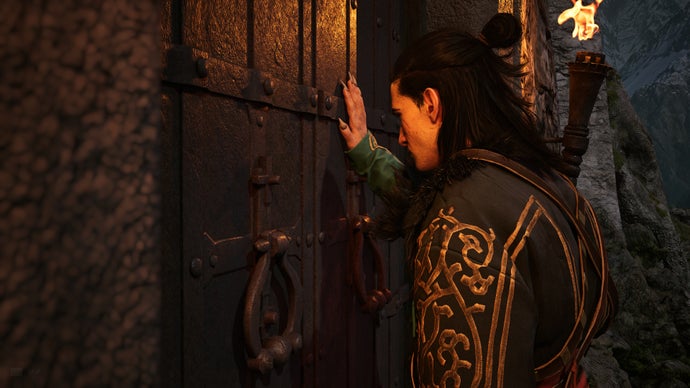
Turn around and make your way back to the Abandoned Camp. Once there, head through the central blood-red path north. There's nothing of interest along this path until the end, where you'll find the Stonebled Gate Beacon in front of the closed gateway to this region's legacy dungeon.

A Mortal Shell 2 screenshot showing the perfect path the player should take through the Sanguine Caverns according to Rock Paper Shotgun's full walkthrough of the game. A Mortal Shell 2 screenshot showing the perfect path the player should take through the Sanguine Caverns according to Rock Paper Shotgun's full walkthrough of the game.

A Mortal Shell 2 screenshot showing the perfect path the player should take through the Sanguine Caverns according to Rock Paper Shotgun's full walkthrough of the game. A Mortal Shell 2 screenshot showing the perfect path the player should take through the Sanguine Caverns according to Rock Paper Shotgun's full walkthrough of the game.

Image credit: Rock Paper Shotgun/Playstack

Activate the Beacon and enter it to reach the Hidden Keep inside. Take the first left after the elevator, and squeeze through the gap in the wall behind the crates. Kill the Nocteserper in this next room and loot the Bone Statue for a Laterite.

A Mortal Shell 2 screenshot showing the perfect path the player should take through the Sanguine Caverns according to Rock Paper Shotgun's full walkthrough of the game. A Mortal Shell 2 screenshot showing the perfect path the player should take through the Sanguine Caverns according to Rock Paper Shotgun's full walkthrough of the game.

A Mortal Shell 2 screenshot showing the perfect path the player should take through the Sanguine Caverns according to Rock Paper Shotgun's full walkthrough of the game. A Mortal Shell 2 screenshot showing the perfect path the player should take through the Sanguine Caverns according to Rock Paper Shotgun's full walkthrough of the game.

Image credit: Rock Paper Shotgun/Playstack

Retrace your steps back to the entrance, then head to the end of the path, turn right, and destroy the crates around the corner. Kill the Nocteserper here, and then press the stone button on the wall to reveal a path forward.

A Mortal Shell 2 screenshot showing the perfect path the player should take through the Sanguine Caverns according to Rock Paper Shotgun's full walkthrough of the game. A Mortal Shell 2 screenshot showing the perfect path the player should take through the Sanguine Caverns according to Rock Paper Shotgun's full walkthrough of the game.

Image credit: Rock Paper Shotgun/Playstack

On the bridge ahead of you, a group of Brigands fights off a group of Nocteserpers. Kill them all, and push ahead to the circular platform - where you'll be ambushed by a miniboss called Lucian, the Thirsting Knight.

A Mortal Shell 2 screenshot showing the perfect path the player should take through the Sanguine Caverns according to Rock Paper Shotgun's full walkthrough of the game. A Mortal Shell 2 screenshot showing the perfect path the player should take through the Sanguine Caverns according to Rock Paper Shotgun's full walkthrough of the game.

A Mortal Shell 2 screenshot showing the perfect path the player should take through the Sanguine Caverns according to Rock Paper Shotgun's full walkthrough of the game. A Mortal Shell 2 screenshot showing the perfect path the player should take through the Sanguine Caverns according to Rock Paper Shotgun's full walkthrough of the game.

Image credit: Rock Paper Shotgun/Playstack

Lucian has a similar moveset to a Gloom Seeker: all dual-wielded blades and fast-flowing combos. He also has an annoying habit of striking past you with the first hit (baiting you into mistiming your parry), before locking on properly with the follow-up attacks in his combo.

Fortunately, Lucian doesn't have too much health, and will disappear as he approaches half-health. Once he's gone, teleport up to the Bone Gate ahead of you and follow the path until you reach a gap to squeeze through on your left.

A Mortal Shell 2 screenshot showing the perfect path the player should take through the Sanguine Caverns according to Rock Paper Shotgun's full walkthrough of the game. A Mortal Shell 2 screenshot showing the perfect path the player should take through the Sanguine Caverns according to Rock Paper Shotgun's full walkthrough of the game.

A Mortal Shell 2 screenshot showing the perfect path the player should take through the Sanguine Caverns according to Rock Paper Shotgun's full walkthrough of the game. A Mortal Shell 2 screenshot showing the perfect path the player should take through the Sanguine Caverns according to Rock Paper Shotgun's full walkthrough of the game.

Image credit: Rock Paper Shotgun/Playstack

After squeezing through the gap, you'll find yourself in the final room of the Hidden Keep, where Lucian will reappear - this time using claws instead of knives. He's also largely invisible, forcing you to predict his movements and react more quickly to his attacks.

Again, Lucian hasn't got a huge health bar, so just take your time and know that each strike you land on him is of great value. Once he dies, you'll acquire a Glimpse and also the Serpent Stone, which allows you to infuse the Axe and Dagger (and another as-yet unknown weapon) with Poison.

With Lucian dead, cleanse the corruption in the room and return to the overworld with 3x Ova and an extra Glimpse.

Mark step as completed.

5. Enter the Legacy Dungeon.

A Mortal Shell 2 screenshot showing the perfect path the player should take through the Sanguine Caverns according to Rock Paper Shotgun's full walkthrough of the game. A Mortal Shell 2 screenshot showing the perfect path the player should take through the Sanguine Caverns according to Rock Paper Shotgun's full walkthrough of the game.

A Mortal Shell 2 screenshot showing the perfect path the player should take through the Sanguine Caverns according to Rock Paper Shotgun's full walkthrough of the game. A Mortal Shell 2 screenshot showing the perfect path the player should take through the Sanguine Caverns according to Rock Paper Shotgun's full walkthrough of the game.

Image credit: Rock Paper Shotgun/Playstack

Cleansing the Beacon, as expected, opens up the gateway beyond. You've conquered the rest of the region, so head straight through the gateway and into the legacy dungeon.

Down the steps, you'll find a Burnt Effigy to your right. Otherwise just forge on ahead until you reach daylight, at which point you'll have properly entered the Sanguine Caverns legacy dungeon.

Mark step as completed.

7. Reach the Pulsing Caves Beacon.

A Mortal Shell 2 screenshot showing the perfect path the player should take through the Sanguine Caverns according to Rock Paper Shotgun's full walkthrough of the game. A Mortal Shell 2 screenshot showing the perfect path the player should take through the Sanguine Caverns according to Rock Paper Shotgun's full walkthrough of the game.

A Mortal Shell 2 screenshot showing the perfect path the player should take through the Sanguine Caverns according to Rock Paper Shotgun's full walkthrough of the game. A Mortal Shell 2 screenshot showing the perfect path the player should take through the Sanguine Caverns according to Rock Paper Shotgun's full walkthrough of the game.

Image credit: Rock Paper Shotgun/Playstack

Drop down the hole beside the wooden platform in the ground, and kill the group of Brigands (Crossbowmen and Shield Brigands) below. Turn around and destroy the crates to reach a Laterite in the corner; then head up the slope and kill the two Infested Stalkers and two Netopyrs that approach you.

As you head forward, more Children Of Gloom will unburrow from the ground, so kill them as well. You should see the path ahead, but to the left of that path is another wall of stalagmites. Strike the wall to dispel it, and loot the Synaptic Vessel behind it.

A Mortal Shell 2 screenshot showing the perfect path the player should take through the Sanguine Caverns according to Rock Paper Shotgun's full walkthrough of the game. A Mortal Shell 2 screenshot showing the perfect path the player should take through the Sanguine Caverns according to Rock Paper Shotgun's full walkthrough of the game.

A Mortal Shell 2 screenshot showing the perfect path the player should take through the Sanguine Caverns according to Rock Paper Shotgun's full walkthrough of the game. A Mortal Shell 2 screenshot showing the perfect path the player should take through the Sanguine Caverns according to Rock Paper Shotgun's full walkthrough of the game.

Image credit: Rock Paper Shotgun/Playstack

Now continue along the main path in front of you. You'll see a Beacon on the other side of a bridge from you, but as you cross the bridge it will fall, sending you plummeting downward. This is meant to happen, so let it happen.

A Mortal Shell 2 screenshot showing the perfect path the player should take through the Sanguine Caverns according to Rock Paper Shotgun's full walkthrough of the game. A Mortal Shell 2 screenshot showing the perfect path the player should take through the Sanguine Caverns according to Rock Paper Shotgun's full walkthrough of the game.

Image credit: Rock Paper Shotgun/Playstack

Dodge to your left as you land, because you're surrounded by bloated corpses that will explode as you near them. Kill the Child Of Gloom down here and then carefully rid your surroundings of the bloated corpses. You can then loot the statue by the wall for a Ventrium.

The path now leads along a succession of bridges. Be careful - as you approach each platform between the bridges, you'll aggro a group of special exploding Netopyrs, which can easily knock you off the bridge to your death if you're not careful. Bait them from afar and shoot them with your Crossbow.

A Mortal Shell 2 screenshot showing the perfect path the player should take through the Sanguine Caverns according to Rock Paper Shotgun's full walkthrough of the game. A Mortal Shell 2 screenshot showing the perfect path the player should take through the Sanguine Caverns according to Rock Paper Shotgun's full walkthrough of the game.

A Mortal Shell 2 screenshot showing the perfect path the player should take through the Sanguine Caverns according to Rock Paper Shotgun's full walkthrough of the game. A Mortal Shell 2 screenshot showing the perfect path the player should take through the Sanguine Caverns according to Rock Paper Shotgun's full walkthrough of the game.

Image credit: Rock Paper Shotgun/Playstack

Proceed in this manner until you reach the Bone Gate at the end. Use it to traverse the gap ahead, then turn and loot the nearby Ventrium from the patch of bloody ground to your left. As you approach the Ventrium, more Children Of Gloom will unburrow, so kill them too.

A Mortal Shell 2 screenshot showing the perfect path the player should take through the Sanguine Caverns according to Rock Paper Shotgun's full walkthrough of the game. A Mortal Shell 2 screenshot showing the perfect path the player should take through the Sanguine Caverns according to Rock Paper Shotgun's full walkthrough of the game.

A Mortal Shell 2 screenshot showing the perfect path the player should take through the Sanguine Caverns according to Rock Paper Shotgun's full walkthrough of the game. A Mortal Shell 2 screenshot showing the perfect path the player should take through the Sanguine Caverns according to Rock Paper Shotgun's full walkthrough of the game.

Image credit: Rock Paper Shotgun/Playstack

A Mortal Shell 2 screenshot showing the perfect path the player should take through the Sanguine Caverns according to Rock Paper Shotgun's full walkthrough of the game. A Mortal Shell 2 screenshot showing the perfect path the player should take through the Sanguine Caverns according to Rock Paper Shotgun's full walkthrough of the game.

Image credit: Rock Paper Shotgun/Playstack

Opposite this area, you'll pass by a large group of 7 Lithopods around a red hole in the ground. You can kill them if you like, but you're about to respawn them anyway, so I'd suggest just running past them and activating the Pulsing Caves Beacon ahead of you.

Mark step as completed.

8. Cleanse Mawbreak Cavern.

A Mortal Shell 2 screenshot showing the perfect path the player should take through the Sanguine Caverns according to Rock Paper Shotgun's full walkthrough of the game. A Mortal Shell 2 screenshot showing the perfect path the player should take through the Sanguine Caverns according to Rock Paper Shotgun's full walkthrough of the game.

Image credit: Rock Paper Shotgun/Playstack

Rest at the Beacon and Cleanse it to enter Mawbreak Cavern. There's no elevator, so just head straight through and kill the Child Of Gloom in your way. The path splits in two, going either side of a large hole. Both ways are blocked by bloated corpses, so bait them carefully and then head past them.

Kill all the Netopyrs and Children Of Gloom in sight, and cross the next two bridges. Loot the Bone Statue for a Laterite. Then follow the path through the cave, past another Child Of Gloom, until you reach a chest guarded by Lithopods. Kill them and open the chest to obtain the Blackblood Stone - a Tarstone which is only used for the Naylshotte.

A Mortal Shell 2 screenshot showing the perfect path the player should take through the Sanguine Caverns according to Rock Paper Shotgun's full walkthrough of the game. A Mortal Shell 2 screenshot showing the perfect path the player should take through the Sanguine Caverns according to Rock Paper Shotgun's full walkthrough of the game.

A Mortal Shell 2 screenshot showing the perfect path the player should take through the Sanguine Caverns according to Rock Paper Shotgun's full walkthrough of the game. A Mortal Shell 2 screenshot showing the perfect path the player should take through the Sanguine Caverns according to Rock Paper Shotgun's full walkthrough of the game.

Image credit: Rock Paper Shotgun/Playstack

Turn around and you'll see the corruption at the end of the dungeon. It's surrounded by bloated corpses, so just carefully detonate them and then loot the Ovum within to return to the Beacon. As usual, you'll also earn a Glimpse for your troubles.

Mark step as completed.

13. Defeat the Tarblighted Stoner.

Now return to the air current and use it to return to the Sanguine Shoreline Beacon. Rest there if you need, then use the Bone Gate to traverse the gap.

A Mortal Shell 2 screenshot showing the perfect path the player should take through the Sanguine Caverns according to Rock Paper Shotgun's full walkthrough of the game. A Mortal Shell 2 screenshot showing the perfect path the player should take through the Sanguine Caverns according to Rock Paper Shotgun's full walkthrough of the game.

Image credit: Rock Paper Shotgun/Playstack

As you stride onward, towards the mouth of the cave to your left, your way will be blocked by a fearsome miniboss: the Tarblighted Stoner.

The Tarblighted Stoner is, as you'd expect, much more aggressive than a regular Brigand Stoner. With each of its attacks it will unleash not just one but 3-4 boulders in quick succession, both in melee and at range.

A Mortal Shell 2 screenshot showing the perfect path the player should take through the Sanguine Caverns according to Rock Paper Shotgun's full walkthrough of the game. A Mortal Shell 2 screenshot showing the perfect path the player should take through the Sanguine Caverns according to Rock Paper Shotgun's full walkthrough of the game.

A Mortal Shell 2 screenshot showing the perfect path the player should take through the Sanguine Caverns according to Rock Paper Shotgun's full walkthrough of the game. A Mortal Shell 2 screenshot showing the perfect path the player should take through the Sanguine Caverns according to Rock Paper Shotgun's full walkthrough of the game.

Image credit: Rock Paper Shotgun/Playstack

To make matters worse, the floor around the boss will darken and Tarred Corpses will periodically rise from the sludge to harass you. They're slow-moving enough that I tend to just ignore and evade them while focusing on the Stoner. Once the Stoner dies, all the minions will instantly be killed as well.

The real key to the fight is simply learning not to panic and chain dodges together wildly to counter its combos. You do have time to react accordingly to each attack, be it blockable or unblockable. Stay calm and patient.

With the Tarblighted Stoner's death, you'll receive the Tarred Fragment, an Ability Tarstone used with the Salvaged Trebuchaxe.

Mark step as completed.

14. Defeat the Lost Child.

A Mortal Shell 2 screenshot showing the perfect path the player should take through the Sanguine Caverns according to Rock Paper Shotgun's full walkthrough of the game. A Mortal Shell 2 screenshot showing the perfect path the player should take through the Sanguine Caverns according to Rock Paper Shotgun's full walkthrough of the game.

Image credit: Rock Paper Shotgun/Playstack

If you've sustained a fair bit of damage and used up your heals, then go back to the Beacon and rest. The Tarblighted Stoner won't respawn. Then head to the back of the boss's arena and use the air current to reach the upper ledge.

Follow this path and you'll find Ruk, again warning you of the proximity of a major game boss. Just before Ruk you'll also find the blue shade of Tiel, whom you can summon if you wish in order to make the upcoming fight easier. I don't find it necessary, however.

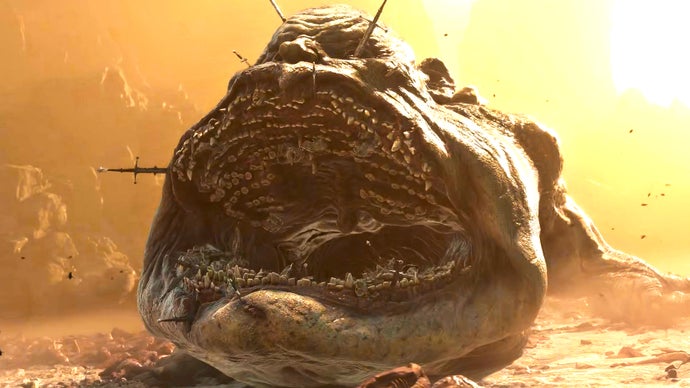
Squeeze through the gap behind Ruk, and you'll trigger a cutscene introducing you to Mortal Shell 2's third major boss: The Lost Child.

A Mortal Shell 2 screenshot showing the perfect path the player should take through the Sanguine Caverns according to Rock Paper Shotgun's full walkthrough of the game. A Mortal Shell 2 screenshot showing the perfect path the player should take through the Sanguine Caverns according to Rock Paper Shotgun's full walkthrough of the game.

Image credit: Rock Paper Shotgun/Playstack

This monstrous boss is actually, at this stage of the game, a little easier than the Nameless Captive in my opinion. Up close, its attacks are fairly straightforward. Leaps and lunges are clearly telegraphed and easy to dodge, and its claw strike is also easy to spot and parry.

What may easily trip you up at first are its two ranged attacks. With the first, it fires a stream of projectiles from its rear end in a line which follows you for a couple of seconds. Simply spam-dodge to the side from a reasonable distance to evade it.

A Mortal Shell 2 screenshot showing the perfect path the player should take through the Sanguine Caverns according to Rock Paper Shotgun's full walkthrough of the game. A Mortal Shell 2 screenshot showing the perfect path the player should take through the Sanguine Caverns according to Rock Paper Shotgun's full walkthrough of the game.

A Mortal Shell 2 screenshot showing the perfect path the player should take through the Sanguine Caverns according to Rock Paper Shotgun's full walkthrough of the game. A Mortal Shell 2 screenshot showing the perfect path the player should take through the Sanguine Caverns according to Rock Paper Shotgun's full walkthrough of the game.

Image credit: Rock Paper Shotgun/Playstack

With the second attack, The Lost Child sucks in air for a couple of seconds, before unleashing it towards you. The solution to this attack is to get right up close to the boss while it's sucking in the air, and then just run around it to evade the actual attack.

There really isn't much more to this boss than the above. It might take you a couple of tries to learn these various attacks, but the fact that they all have fairly reliable counters makes this a more straightforward fight than you might expect.

A Mortal Shell 2 screenshot showing the perfect path the player should take through the Sanguine Caverns according to Rock Paper Shotgun's full walkthrough of the game. A Mortal Shell 2 screenshot showing the perfect path the player should take through the Sanguine Caverns according to Rock Paper Shotgun's full walkthrough of the game.

Image credit: Rock Paper Shotgun/Playstack

Once The Lost Child finally succumbs to your onslaught, you'll receive the Lost Clotstone as a reward, as well as around 11000x Gloom.

Mark step as completed.

15. Cleanse the Child's Feeding Grounds.

At The Lost Child's death, a Beacon will rise from the ground in the centre of the arena. Activate the Child's Feeding Grounds Beacon, and then enter it.

A Mortal Shell 2 screenshot showing the perfect path the player should take through the Sanguine Caverns according to Rock Paper Shotgun's full walkthrough of the game. A Mortal Shell 2 screenshot showing the perfect path the player should take through the Sanguine Caverns according to Rock Paper Shotgun's full walkthrough of the game.

Image credit: Rock Paper Shotgun/Playstack

A Mortal Shell 2 screenshot showing the perfect path the player should take through the Sanguine Caverns according to Rock Paper Shotgun's full walkthrough of the game. A Mortal Shell 2 screenshot showing the perfect path the player should take through the Sanguine Caverns according to Rock Paper Shotgun's full walkthrough of the game.

A Mortal Shell 2 screenshot showing the perfect path the player should take through the Sanguine Caverns according to Rock Paper Shotgun's full walkthrough of the game. A Mortal Shell 2 screenshot showing the perfect path the player should take through the Sanguine Caverns according to Rock Paper Shotgun's full walkthrough of the game.

Image credit: Rock Paper Shotgun/Playstack

Inside, cleanse the corruption barring you from all the Ova. But before you collect them, head past the Ova and through the doorway at the back of the room. Just beyond is another smaller room containing a chest. Open the chest to receive a Blackmarrow Key.

What are Blackmarrow Keys used for? An extra tip from Ollie

Remember the elevator that takes you to the top of the Marrow Keep? At the bottom of the elevator, there are several chests spread about the circumference of the room. Each one requires a Blackmarrow Key to open, and each one will unlock a new skin (a new visual appearance) for one of your Shells. It's purely cosmetic, but there are some good-looking skins inside!

Now return to the main room and collect the 26x Ova to be transported back to the Marrow Keep. Because this is the last of the three major bosses in Fainweald, you'll be treated to another short communion with your goddess, the UnderMether, who speaks once more of the Foul Passenger corrupting the world.

A Mortal Shell 2 screenshot showing the perfect path the player should take through the Sanguine Caverns according to Rock Paper Shotgun's full walkthrough of the game. A Mortal Shell 2 screenshot showing the perfect path the player should take through the Sanguine Caverns according to Rock Paper Shotgun's full walkthrough of the game.

A Mortal Shell 2 screenshot showing the perfect path the player should take through the Sanguine Caverns according to Rock Paper Shotgun's full walkthrough of the game. A Mortal Shell 2 screenshot showing the perfect path the player should take through the Sanguine Caverns according to Rock Paper Shotgun's full walkthrough of the game.

Image credit: Rock Paper Shotgun/Playstack

Mark step as completed.

16. Give Mether's Flesh to the Nightfish.

Once you're back at the Marrow Keep, you can use the Gloom Siphon to collect your earnings - which in this case also includes 3x Glimpse and 12x Dorsalite. Very handy!

Now there's one more thing to do, and it concerns the Mether's Flesh item you picked up earlier from the Sanguine Caverns. Use Mether's Breath to fast travel to the Outskirts Of Nochte Beacon inside the Ruins Of Nochte region.

A Mortal Shell 2 screenshot showing the perfect path the player should take through the Sanguine Caverns according to Rock Paper Shotgun's full walkthrough of the game. A Mortal Shell 2 screenshot showing the perfect path the player should take through the Sanguine Caverns according to Rock Paper Shotgun's full walkthrough of the game.

Image credit: Rock Paper Shotgun/Playstack

Once you're there, head south through the archways, killing the Skulks and Rootbound Lurks in your way. Head to the left and enter the cave of the Nightfish. As you might remember, you entered this cave earlier in your playthrough to loot the valuables inside, and also to introduce yourself to the Nightfish and its shop which converts Coin into Gloom.

Now, however, you can interact with the Nightfish to hand over Mether's Flesh. The moment you do this, the Nightfish will swallow you whole, and transport you to a secret area called the Mango Sanctuary.

A Mortal Shell 2 screenshot showing the perfect path the player should take through the Sanguine Caverns according to Rock Paper Shotgun's full walkthrough of the game. A Mortal Shell 2 screenshot showing the perfect path the player should take through the Sanguine Caverns according to Rock Paper Shotgun's full walkthrough of the game.

A Mortal Shell 2 screenshot showing the perfect path the player should take through the Sanguine Caverns according to Rock Paper Shotgun's full walkthrough of the game. A Mortal Shell 2 screenshot showing the perfect path the player should take through the Sanguine Caverns according to Rock Paper Shotgun's full walkthrough of the game.

Image credit: Rock Paper Shotgun/Playstack

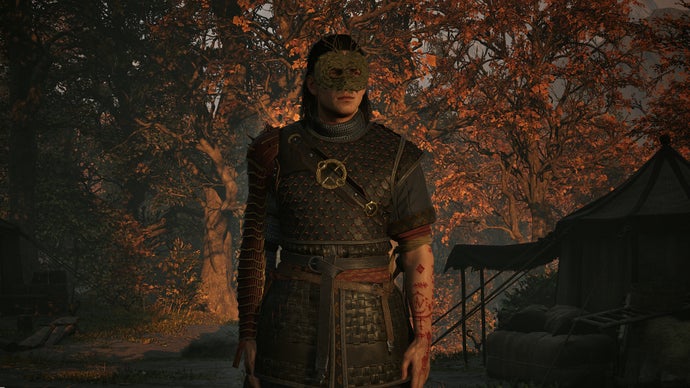
Inside the cave, simply follow the path and you'll reach a lit clearing, where a strikingly beautiful tree grows. At the base of the tree is a truly gigantic mango. Interact with it to receive a Mango item. This PP Item can be actively used to restore 50% health instantly, or it can be passively used to enable the use of a cosmetic Mango Mask.

A Mortal Shell 2 screenshot showing the perfect path the player should take through the Sanguine Caverns according to Rock Paper Shotgun's full walkthrough of the game. A Mortal Shell 2 screenshot showing the perfect path the player should take through the Sanguine Caverns according to Rock Paper Shotgun's full walkthrough of the game.

Image credit: Rock Paper Shotgun/Playstack

Once you're done marvelling at the strangeness of this game, interact with the glowing orb behind the tree to transport yourself back out into the Nightfish's cave, and make your way back to the Outskirts Of Nochte Beacon. From there, fast travel back to Marrow Keep, where the next stage of your journey awaits.

Mark step as completed.

Huge congratulations to all of you who have reached this stage: you've successfully and entirely conquered Fainweald! We've left no stone unturned in our quest to cleanse this land of bosses, dungeons, corruptions, and valuables. Now, before we head to the south, it's time to take on the special hidden dungeon found inside the Marrow Keep itself. Join us in Part 16 for our full Mortal Shell 2 Desolate Keep walkthrough!
Share:

More in PlayStation, Xbox, PC

The Blood of Dawnwalker: All endings explainedπŸ–₯ PlayStation, Xbox, PC

The Blood of Dawnwalker: All endings explained

!(https://assetsio.gnwcdn.com/TBODCoenEnding.jpg?width=690&quality=85&format=jpg&auto=webp) The Blood of Dawnwalker(https://www.rockpapershotgun.com/games/the-blood-of-dawnwalker) has one main goal for Coen – to save his family. You spend 30 days (and nights) figuring out your best defence against Brencis, levelling up skills, collecting armour and teaming up with allies. But it turns out defeating him isn't the only way to get everyone home safe. In fact, sometimes defeating him might still lead to the demise of your nearest and dearest. I played through the game's four full story endings to see what would happen and, unfortunately, it's bad news for Lunka at almost every turn. There's also three additional early endings you can try on for size, which we'll cover at the end. In this guide I'll fully explain how to get all endings in The Blood of Dawnwalker, and what can happen to your family along the way in each case. Read more(https://www.rockpapershotgun.com/the-blood-of-dawnwalker-endings)

RockGuides / Walkthroughsabout 1 hour ago
The Blood of Dawnwalker: All Sanzhana locationsπŸ–₯ PlayStation, Xbox, PC

The Blood of Dawnwalker: All Sanzhana locations

!(https://assetsio.gnwcdn.com/sanzhana-blood-of-dawnwalker.jpg?width=690&quality=85&format=jpg&auto=webp) Across Vale Sangora, there are little moth-like creatures called Sanzhana who possess a very special skill, one of utmost importance – the ability to gift you time. With only 30 days (and nights) to come up with a plan to eliminate Brencis and save your family, the promise of extra time will undoubtedly sound like a very enticing offer. And if you're also embarking on the Arbiter Suit of Armour quest, you'll have already heard mention of the Sanzhani for an important quest item, Silk Threads. But in order to receive these riveting rewards, you'll need to help out the Sanzhana first. In fact, there are five different quests to complete before you can stretch time to your advantage. And as you complete each quest, you also have the opportunity to send messages to Lunka and receive replies. In this guide, we'll reveal all five Sanzhana locations in The Blood of Dawnwalker and what you must do to complete their quests. Read more(https://www.rockpapershotgun.com/the-blood-of-dawnwalker-all-sanzhana-locations)

RockGuides / Walkthroughs2 days ago
The Blood of Dawnwalker: How to defeat BakirπŸ–₯ PlayStation, Xbox, PC

The Blood of Dawnwalker: How to defeat Bakir

!(https://assetsio.gnwcdn.com/TBODLunarTournament.jpg?width=690&quality=85&format=jpg&auto=webp) As one of Brencis's three Boyars in The Blood of Dawnwalker(https://www.rockpapershotgun.com/games/the-blood-of-dawnwalker), Bakir is a force to be reckoned with. Defeating him before you get to Brencis though is a wise idea. It's likely you'll have already taken down Xanthe and Ambrus before you've found yourself here, but there's something a little more puzzling about the battle with Bakir. The Mad Khan is not as easy to get to, hiding behind his own cohort and a rather strange tournament. Plus, if you find yourself following one particular route, you might choose not to kill him at all (though we strongly advise that you do). In this guide, we'll reveal how to defeat Bakir in The Blood of Dawnwalker, and what can happen if you choose to veer from our guidance. Read more(https://www.rockpapershotgun.com/the-blood-of-dawnwalker-how-to-defeat-bakir)

RockGuides / Walkthroughs2 days ago