Mortal Shell 2: Temple Of Vatra walkthrough (Part 13)
Overview & Key Takeaways
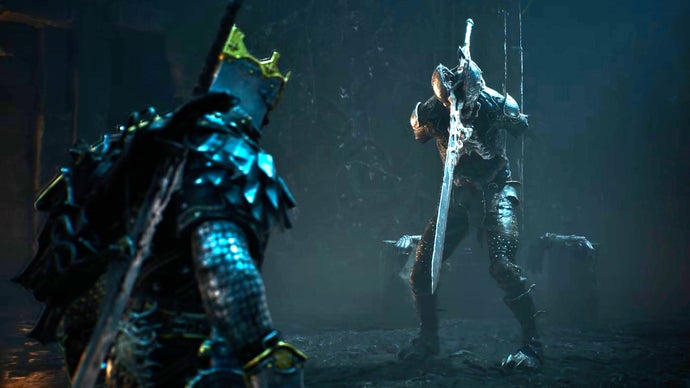
It's time to fill in the last portions of our map of Fainweald in Mortal Shell 2. In Part 13 of our walkthrough below, I'll guide you through the path to the final map piece, as well as the One-Legged Wolf Tavern and the mysterious Temple Of Vatra, where you can find the means to obtain yet another Shell. Let's begin!
It's time to fill in the last portions of our map of Fainweald in Mortal Shell 2. In Part 13 of our walkthrough below, I'll guide you through the path to the final map piece, as well as the One-Legged Wolf Tavern and the mysterious Temple Of Vatra, where you can find the means to obtain yet another Shell. Let's begin!
Want the walkthrough for a different area of the game? You'll find the full list of all our guides on our Mortal Shell 2 walkthrough hub page!
Temple Of Vatra walkthrough steps:
- Open the path to the One-Legged Wolf.
- Acquire the Map Of Fainweald [5].
- Obtain the Troubadour's Lute.
- Obtain the Heart Of Vatra.
- Unlock Gragu's Shell.
- Activate the Matka's Monument Beacon.
- Conquer the Overrun Quarry.
To see this content please enable targeting cookies.
Manage cookie settings
2. Acquire the Map Of Fainweald [5].
Head just beyond the One-Legged Wolf Beacon, and you'll find Ruk at one of his map statues, overlooking a broken bridge.

Image credit: Rock Paper Shotgun/Playstack
Interact with the statue to obtain the Map Of Fainweald [5]. This is the last remaining map for Fainweald, so you can now see (more or less) every part of the lands north of the Marrow Keep. Congratulations!
Mark step as completed.
3. Obtain the Troubadour's Lute.
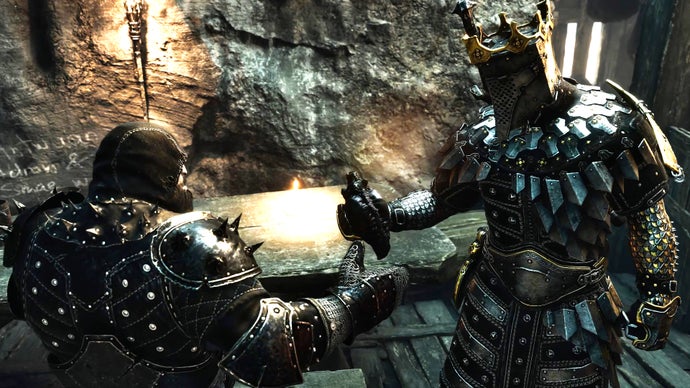
Now head back to the Beacon, and take the other path past it. On your right, you'll find a tavern by the cliff edge. This is the One-Legged Wolf.
Look around the right-hand side of the tavern first. Nestled between the tree at the end and the cart next to it, there's an easily-overlooked 300x Coin Pouch.


Image credit: Rock Paper Shotgun/Playstack
Now enter the tavern, and systematically exhaust the dialogue of everyone in the place. It's up to you whether to give the Belligerent Drunk a Common Moonshine; you won't get anything back for it. Either way, speaking with the Friendly Drunk will earn you a Common Moonshine back.
You can also speak with the Bartender and access his shop, which contains 5x Common Moonshine and the Hand Of Rock Tarstone (costing 1500x Coin). Buy it if you like.


Image credit: Rock Paper Shotgun/Playstack
The key character here is Gragu, who - if you push past his brusque responses - is after an item called the Heart Of Vatra. This is your next step.
But before you exit the tavern, head onto the stage where the musician is playing. In the corner, resting against the wall, you'll find a new Sidearm - the Troubadour's Lute.

Image credit: Rock Paper Shotgun/Playstack
The Troubadour's Lute is quite special, and many consider it to be one of the strongest Sidearms in Mortal Shell 2. It deals very low damage, but inflicts Confusion on enemies, forcing them to momentarily attack their allies instead of you. This makes it an excellent way to deal with groups of enemies from relative safety. Just let them tear each other apart.
Mark step as completed.
4. Obtain the Heart Of Vatra.


Image credit: Rock Paper Shotgun/Playstack
Now exit the One-Legged Wolf, and cross the bridge furthest to your right. Head through the field of petrified cultists, and know, in your heart, that on the way back they'll unpetrify and attack you. For now you're safe though.
Kill the Netopyrs that appear just beyond the petrified cultists, and then use the Bone Gate at the end of the path to cross the gap beyond.

Image credit: Rock Paper Shotgun/Playstack
Welcome to the Temple Of Vatra. Head down the path in front of you until you reach the steps upward. At the top of the steps, turn right and you'll find three more petrified cultists around a stone monument. Loot the base of the stone monument for a Synaptic Vessel.
Look around the back of the stone monument, and you'll find a Sheep. Kill it to obtain a Sheephead Totem.


Image credit: Rock Paper Shotgun/Playstack
Now return to the main path and keep ascending the stairs. Halfway up there's a left turn. Take it, and light the three candles in the vicinity (two on the left, one on the right). You can then open the Offerings Chest in the centre for the Berserker's Stone.

Image credit: Rock Paper Shotgun/Playstack
Return to the steps and ascend to the very top. Ahead of you is a statue, surrounded by corruption on the ground. Interact with the statue to obtain the Heart Of Vatra.


Image credit: Rock Paper Shotgun/Playstack
Mark step as completed.
5. Unlock Gragu's Shell.
The moment you pick up the Heart Of Vatra, the entrance will seal behind you, and all petrified cultists in the region will become primed. Once primed, approaching them will cause them to spring to life.


Image credit: Rock Paper Shotgun/Playstack
Kill the Cultists immediately around you as you turn around, and then take the right-hand path, dropping down into the area with the Offerings Chest. You can kill or avoid the Cultists from this point on; it's up to you.
Retrace your footsteps back out of the Temple Of Vatra, and use the Bone Gate to cross the gap once again. On your way back all those other petrified Cultists will of course spring to life as well, so kill or bypass them on your way back to the One-Legged Wolf Tavern.


Image credit: Rock Paper Shotgun/Playstack
Once you reach the Tavern, speak with Gragu and hand over the Heart Of Vatra. This will prompt a short cutscene where Gragu takes a bite from the Heart, and instantly dies. Now he's just a Shell, waiting to be inhabited! Interact with him to unlock Gragu's Shell.

Image credit: Rock Paper Shotgun/Playstack
Doing so will begin Gragu's first Memory - "The Child" - which, interestingly, shows that Gragu was on your (the Harbinger's) trail, and is back at the Forlorn Village you encountered at the very start of the Prologue. Follow the prompts to complete the memory.
As for Gragu himself, he's a challenging Shell at first, because he has an entirely unique healing system which replaces Mether's Pulse. He can eat Revered Hearts to restore a small amount of health (much smaller than a regular Mether's Pulse). The upside is that killing enemies replenishes Revered Hearts, so as long as you keep killing, you'll never run out of heals.
Gragu's other ability, Staggering Blow, is a great offensive move that can deal very high damage when fully charged. I leave it up to you to decide whether that's enough to outweigh the challenge of Gragu's unique system of healing.
Mark step as completed.
6. Activate the Matka's Monument Beacon.
Speak with the Barkeep and the Drunkard beside Gragu for some new unique dialogue as Gragu's Shell, if you like. Then return to the One-Legged Wolf Beacon and rest there if needed.

Image credit: Rock Paper Shotgun/Playstack


Image credit: Rock Paper Shotgun/Playstack
While we're here, we might as well clear out the small fort area north of the One-Legged Wolf before moving on to the neighbouring region in the next part of our walkthrough. So, head back towards the bridge you took that led to the Temple Of Vatra. But instead of crossing it, turn left beforehand and take the shorter bridge there. Head all the way to the left to reach a Bone Statue on the wooden platform. Destroy the Statue for a Laterite.
Now return to the near end of the bridge you crossed, and head up the stairs next to you. Kill the Nocteserper on the stone bridge at the top. You may notice that next to him, on the wall, there's a small pouch with a prompt to "Touch". Don't touch it. All it does is teleport you into one of the cells back in the Citadel Of Penance, forcing you to break out and reach the nearest Beacon before teleporting back here.


Image credit: Rock Paper Shotgun/Playstack
Head straight on, into the grassy clearing beyond. Kill all the Nocteserpers and Mycellian Skulks in the vicinity, and then look to your left to find the Matka's Monument Beacon. Activate and rest at it; the nearby enemies won't respawn.


Image credit: Rock Paper Shotgun/Playstack
Mark step as completed.
7. Conquer the Overrun Quarry.
Go back to the small stone bridge where the mysterious pouch is, and drop off the opposite side onto the ground below. You can kill the Skulks behind you, but then head forward and around the corner to find a dungeon entrance. Head inside it to enter the Overrun Quarry.


Image credit: Rock Paper Shotgun/Playstack
This dungeon is filled with Tarblighted Miners, which you'll only have encountered one of far earlier in the game. They're not too taxing at this stage, but you do have to be wary of their relentless swinging combos.
Kill the first Miner in your way, and head past him. Intentionally stand on the centre of the wooden platform ahead to cause it to collapse, sending you down onto a lower ledge.


Image credit: Rock Paper Shotgun/Playstack
Looking below, drop down onto the next platform, and kill the Miner on this walkway too. Then drop to the ground and kill all three Miners in the room.
Loot the Synaptic Vessel from the other side of the rock, and then destroy the illusory wall opposite (marked with a white symbol). Another Miner awaits you on the other side; kill him too, and another further up.


Image credit: Rock Paper Shotgun/Playstack
Loot the Bone Statue at the top of the path for a Laterite, and then open the chest just beyond it for a Winterglass Gem (a valuable priced at 1000x Coin).

Image credit: Rock Paper Shotgun/Playstack
Attack the next illusory wall by the chest, and you'll find yourself back at the start of the dungeon. That's it! Head out into the overworld again, and return to the Matka's Monument Beacon, ready to tackle the remaining couple of regions in Fainweald.
Mark step as completed.
That wraps up our 100% walkthrough of the area containing the One-Legged Wolf Tavern and the Temple Of Vatra in Mortal Shell 2. Next up, it's time to conquer the large neighbouring region, preparing us for our third legacy dungeon. Join us in Part 14 for our Mortal Shell 2 Stones Of Remembrance walkthrough!