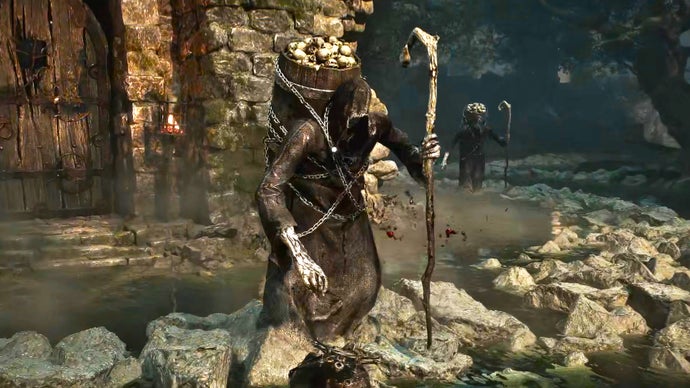
Mortal Shell 2: Ruins Of Nochte walkthrough (Part 11)
🖥 PlayStation, Xbox, PCGuides / Walkthroughs
#Cold Symmetry#Playstack#PC#PS5#Third person

Mortal Shell 2: Ruins Of Nochte walkthrough (Part 11)

Rock Paper Shotgun » GuidesOllie Toms49 min read(about 3 hours ago)

Overview & Key Takeaways

Where last we left off in our Mortal Shell 2 walkthrough, you had reached the end credits! Sort of. It was in fact the joke ending received at the end of Baghead's questline in Desolate Peak. But now that's done, it's time to get serious again as we venture towards the Ruins Of Nochte.

In a similar manner to Mushroom Village, the Ruins Of Nochte have to be traversed in order to reach the next major legacy dungeon (and major boss) of the game. But it's also home to a great many hidden secrets, collectibles, dungeons, and bosses - as well as a brand new Shell! Follow along with our guide below for a step-by-step 100% walkthrough of the entire region of the Ruins Of Nochte.

Read more

Where last we left off in our Mortal Shell 2 walkthrough, you had reached the end credits! Sort of. It was in fact the joke ending received at the end of Baghead's questline in Desolate Peak. But now that's done, it's time to get serious again as we venture towards the Ruins Of Nochte.

In a similar manner to Mushroom Village, the Ruins Of Nochte have to be traversed in order to reach the next major legacy dungeon (and major boss) of the game. But it's also home to a great many hidden secrets, collectibles, dungeons, and bosses - as well as a brand new Shell! Follow along with our guide below for a step-by-step 100% walkthrough of the entire region of the Ruins Of Nochte.

Want the walkthrough for a different area of the game? You'll find the full list of all our guides on our Mortal Shell 2 walkthrough hub page!

Ruins Of Nochte walkthrough steps:

  1. Travel from Desolate Peak into the Ruins Of Nochte.
  2. Enter Prophet's Rest and unlock Smert.
  3. Reach the Outskirts Of Nochte Beacon.
  4. Conquer the Infested Den.
  5. Obtain the Map Of Fainweald [1].
  6. Make your way across the Hag's Path.
  7. Clear out the Disciple's Stash.
  8. Obtain the Clerik's Stone.
  9. Fast Travel to Widow's Overlook.
  10. Enter Nochte from the east side.
  11. Clear out the Brigand Camp.
  12. Clear out the Waterfall Camp.
  13. Visit the Nightfish.
  14. Reach the Nochtean Gate Beacon.
  15. Conquer the Thieves Retreat.
  16. Kill everything on ground level.
  17. Clear out the Ravaged Tomb.
  18. Cleanse the Abandoned Shrine.
  19. Defeat Vrago, Solikar Champion.

To see this content please enable targeting cookies.

Manage cookie settings

1. Travel from Desolate Peak into the Ruins Of Nochte.

After completing Baghead's questline at the end of the last part of our walkthrough, you most likely have been sent back to the last Beacon. From there, head back to the Desolate Peak, and then cross the bridge beyond Baghead to the Bone Gate on the south side.

A Mortal Shell 2 screenshot showing the perfect path the player should take through the Ruins Of Nochte according to Rock Paper Shotgun's full walkthrough of the game. A Mortal Shell 2 screenshot showing the perfect path the player should take through the Ruins Of Nochte according to Rock Paper Shotgun's full walkthrough of the game.

Image credit: Rock Paper Shotgun/Playstack

This Bone Gate, unusually, connects to two other Bone Gates, and you can choose between them just by looking at the one you want to go to. Head to the right-most Bone Gate.

Mark step as completed.

2. Enter Prophet's Rest and unlock Smert.

Welcome to the Ruins Of Nochte! You're actually right near the main fort of this region, where the next legacy dungeon is located - but we'll save that until last.

A Mortal Shell 2 screenshot showing the perfect path the player should take through the Ruins Of Nochte according to Rock Paper Shotgun's full walkthrough of the game. A Mortal Shell 2 screenshot showing the perfect path the player should take through the Ruins Of Nochte according to Rock Paper Shotgun's full walkthrough of the game.

A Mortal Shell 2 screenshot showing the perfect path the player should take through the Ruins Of Nochte according to Rock Paper Shotgun's full walkthrough of the game. A Mortal Shell 2 screenshot showing the perfect path the player should take through the Ruins Of Nochte according to Rock Paper Shotgun's full walkthrough of the game.

Image credit: Rock Paper Shotgun/Playstack

Kill the Brigands and Stoners who accost you after passing through the Bone Gate, and loot the lone Ventrium from their camp. Then take the right-hand path (as opposed to the bridge, which leads into the fort).

At the bottom of the winding slope you'll find a Mycellian Skulk fighting a Torch Cultist. Kill the winner, and destroy the Gloom Tentacle they were fighting beside. Now continue on, taking the right-hand path around the rock. You'll find two Devout's Chalices in the mouths of statues on this side.

A Mortal Shell 2 screenshot showing the perfect path the player should take through the Ruins Of Nochte according to Rock Paper Shotgun's full walkthrough of the game. A Mortal Shell 2 screenshot showing the perfect path the player should take through the Ruins Of Nochte according to Rock Paper Shotgun's full walkthrough of the game.

A Mortal Shell 2 screenshot showing the perfect path the player should take through the Ruins Of Nochte according to Rock Paper Shotgun's full walkthrough of the game. A Mortal Shell 2 screenshot showing the perfect path the player should take through the Ruins Of Nochte according to Rock Paper Shotgun's full walkthrough of the game.

Image credit: Rock Paper Shotgun/Playstack

Make your way around to the other side of the rock, and you'll be faced with Prophet's Rest - a ritual area guarded by a number of groups of Cultists (including a Faceless Clerik).

There are three rings on the ground around the ritual area. These three rings must be filled with blood: you can either kill enemies on top of (or very near to) a ring to fill it up, or you can interact with the ring to fill it with your own blood. Be aware that doing it yourself will instantly deplete your current health bar to zero, so only do this if you still have your Shell intact.

A Mortal Shell 2 screenshot showing the perfect path the player should take through the Ruins Of Nochte according to Rock Paper Shotgun's full walkthrough of the game. A Mortal Shell 2 screenshot showing the perfect path the player should take through the Ruins Of Nochte according to Rock Paper Shotgun's full walkthrough of the game.

A Mortal Shell 2 screenshot showing the perfect path the player should take through the Ruins Of Nochte according to Rock Paper Shotgun's full walkthrough of the game. A Mortal Shell 2 screenshot showing the perfect path the player should take through the Ruins Of Nochte according to Rock Paper Shotgun's full walkthrough of the game.

Image credit: Rock Paper Shotgun/Playstack

A Mortal Shell 2 screenshot showing the perfect path the player should take through the Ruins Of Nochte according to Rock Paper Shotgun's full walkthrough of the game. A Mortal Shell 2 screenshot showing the perfect path the player should take through the Ruins Of Nochte according to Rock Paper Shotgun's full walkthrough of the game.

Image credit: Rock Paper Shotgun/Playstack

Once the enemies are all dead and the rings are filled with blood, approach the centre of the area and you'll find a brand new Shell. Interact with it to unlock Smert.

As usual you'll immediately enter a new Memory - "The Convert". Follow the prompts as usual, and then attack the Hierarch once Smert says "Then I will encourage you". Whether you parry or take the responding strikes from the Hierarch, the Memory will progress to its end shortly after, giving you access to your new Smert Shell.

Should you switch to Smert? An extra tip from Ollie

Smert is an unusual one: he can enter a Fight Stance where he halts time and pummels enemies with unarmed attacks, building up stacks of "Chaos". Once time resumes, the Chaos stacks turn into a random status effect (Burn, Freeze, Poison, etc). It's a playstyle that takes some getting used to, but it's a powerful ability - particularly when you inflict Freeze!

The downside is that the ability sacrifices a lot of your health, so I've always felt like I needed to get a lot of value out of each use to make it worthwhile. As always, you can switch between any Shell (and any weapons) you like during this walkthrough - I'll occasionally make recommendations based on an area, but you can keep following this walkthrough with any character. So try Smert out and see if his style suits you!

Mark step as completed.

3. Reach the Outskirts Of Nochte Beacon.

Just for reference, if you turn around and look towards the north, you'll see a Bone Gate on the edge of the cliff. That's the other of the two destinations you could have picked from the Desolate Peak Bone Gate. We're not going back anytime soon though!

A Mortal Shell 2 screenshot showing the perfect path the player should take through the Ruins Of Nochte according to Rock Paper Shotgun's full walkthrough of the game. A Mortal Shell 2 screenshot showing the perfect path the player should take through the Ruins Of Nochte according to Rock Paper Shotgun's full walkthrough of the game.

Image credit: Rock Paper Shotgun/Playstack

Now that you have Smert, look to the opposite side of Prophet's Rest to the direction you entered from. Head down the slope into the water. Ignore all the Skulks and Rootbound Lurks you see ahead of you. Instead, turn left and head through the archways to find the Outskirts Of Nochte Beacon.

A Mortal Shell 2 screenshot showing the perfect path the player should take through the Ruins Of Nochte according to Rock Paper Shotgun's full walkthrough of the game. A Mortal Shell 2 screenshot showing the perfect path the player should take through the Ruins Of Nochte according to Rock Paper Shotgun's full walkthrough of the game.

Image credit: Rock Paper Shotgun/Playstack

Mark step as completed.

4. Conquer the Infested Den.

Inside the Outskirts Of Nochte Beacon, you'll find the Infested Den. It's an area absolutely crawling with Skulks, so you may wish to switch to Tiel (if you've given him Poison Immunity) for this dungeon.

A Mortal Shell 2 screenshot showing the perfect path the player should take through the Ruins Of Nochte according to Rock Paper Shotgun's full walkthrough of the game. A Mortal Shell 2 screenshot showing the perfect path the player should take through the Ruins Of Nochte according to Rock Paper Shotgun's full walkthrough of the game.

A Mortal Shell 2 screenshot showing the perfect path the player should take through the Ruins Of Nochte according to Rock Paper Shotgun's full walkthrough of the game. A Mortal Shell 2 screenshot showing the perfect path the player should take through the Ruins Of Nochte according to Rock Paper Shotgun's full walkthrough of the game.

Image credit: Rock Paper Shotgun/Playstack

The moment you come out of the elevator, watch for the ambushing Skulk on your left. Then strike the wall directly behind the campfire on the ground to dispel it.

In the expansive room beyond, kill the Skulk and Leechtongue in front of you, then head around the back-left, past another Skulk, and up the wooden stairs.

Three more Skulks await you on the upper platform. Kill them, then head to the end of the platform and shoot the vertical wooden surface across the gap to bring it down, forming a bridge across which you can walk.

A Mortal Shell 2 screenshot showing the perfect path the player should take through the Ruins Of Nochte according to Rock Paper Shotgun's full walkthrough of the game. A Mortal Shell 2 screenshot showing the perfect path the player should take through the Ruins Of Nochte according to Rock Paper Shotgun's full walkthrough of the game.

A Mortal Shell 2 screenshot showing the perfect path the player should take through the Ruins Of Nochte according to Rock Paper Shotgun's full walkthrough of the game. A Mortal Shell 2 screenshot showing the perfect path the player should take through the Ruins Of Nochte according to Rock Paper Shotgun's full walkthrough of the game.

Image credit: Rock Paper Shotgun/Playstack

Kill the next two Skulks across the bridge, and collect the 500x Coin Pouch on the left side before continuing on. Break the Bone Statue for a Laterite, then traverse the air current to a higher ledge with yet more Skulks.

A Mortal Shell 2 screenshot showing the perfect path the player should take through the Ruins Of Nochte according to Rock Paper Shotgun's full walkthrough of the game. A Mortal Shell 2 screenshot showing the perfect path the player should take through the Ruins Of Nochte according to Rock Paper Shotgun's full walkthrough of the game.

Image credit: Rock Paper Shotgun/Playstack

Open the chest once the Skulks are dead, and you'll get the Hag Stone - a Tarstone which infuses your Forgotten Crossbow (and one undiscovered Sidearm) with Poison. Then progress through the cave until you're overlooking the final room - containing four more Skulks and a Leechtongue.

A Mortal Shell 2 screenshot showing the perfect path the player should take through the Ruins Of Nochte according to Rock Paper Shotgun's full walkthrough of the game. A Mortal Shell 2 screenshot showing the perfect path the player should take through the Ruins Of Nochte according to Rock Paper Shotgun's full walkthrough of the game.

Image credit: Rock Paper Shotgun/Playstack

You can kill off the Skulks from up here using your Sidearm. Then drop down and kill the Leechtongue before cleansing the corruption at the far side for a Glimpse and an Ovum!

Mark step as completed.

6. Make your way across the Hag's Path.

A Mortal Shell 2 screenshot showing the perfect path the player should take through the Ruins Of Nochte according to Rock Paper Shotgun's full walkthrough of the game. A Mortal Shell 2 screenshot showing the perfect path the player should take through the Ruins Of Nochte according to Rock Paper Shotgun's full walkthrough of the game.

Image credit: Rock Paper Shotgun/Playstack

Now backtrack down the slope and take the left-hand path this time. There are six "sleeping" Lithopods clustered around a Bone Statue on the cliff edge; kill them all carefully and loot the Statue for a Laterite.

Keep going around the corner, past a couple more Lithopods and another Rootbound Lurk, and you'll come to a rather unpleasant sub-region of the Ruins Of Nochte simply called the Hag's Path.

One thing to understand about the Hag's Path right from the start: the vast majority of it is a central swamp filled with enemies, and aside from being the densest source of Tarspores in the game, there's pretty much nothing of interest here. For that reason, I'll just walk you through the path around the edge which hits all the areas of actual value, and leave you to optionally clear out the swamp yourself if you want to do so.

A Mortal Shell 2 screenshot showing the perfect path the player should take through the Ruins Of Nochte according to Rock Paper Shotgun's full walkthrough of the game. A Mortal Shell 2 screenshot showing the perfect path the player should take through the Ruins Of Nochte according to Rock Paper Shotgun's full walkthrough of the game.

Image credit: Rock Paper Shotgun/Playstack

A Mortal Shell 2 screenshot showing the perfect path the player should take through the Ruins Of Nochte according to Rock Paper Shotgun's full walkthrough of the game. A Mortal Shell 2 screenshot showing the perfect path the player should take through the Ruins Of Nochte according to Rock Paper Shotgun's full walkthrough of the game.

A Mortal Shell 2 screenshot showing the perfect path the player should take through the Ruins Of Nochte according to Rock Paper Shotgun's full walkthrough of the game. A Mortal Shell 2 screenshot showing the perfect path the player should take through the Ruins Of Nochte according to Rock Paper Shotgun's full walkthrough of the game.

Image credit: Rock Paper Shotgun/Playstack

So, as you step into the swamp, kill the three Skulks and the Tarred Vestige approaching you. Then hug the left-hand wall until you come to a clearing with several explosive/Poison ritual totems, and a Wortbinder Witch. Ignore the Witch at first, and head around the left corner through the archway. This will take you to a slope where three Frog Cultists are waiting.

Kill the Frog Cultists, then return to the ritual circle and kill the Witch. Upon the Witch's death, a Tarred Vestige will spawn in the centre of the circle. Kill it too. Kill everything! Kill kill kill!

A Mortal Shell 2 screenshot showing the perfect path the player should take through the Ruins Of Nochte according to Rock Paper Shotgun's full walkthrough of the game. A Mortal Shell 2 screenshot showing the perfect path the player should take through the Ruins Of Nochte according to Rock Paper Shotgun's full walkthrough of the game.

A Mortal Shell 2 screenshot showing the perfect path the player should take through the Ruins Of Nochte according to Rock Paper Shotgun's full walkthrough of the game. A Mortal Shell 2 screenshot showing the perfect path the player should take through the Ruins Of Nochte according to Rock Paper Shotgun's full walkthrough of the game.

Image credit: Rock Paper Shotgun/Playstack

Go back around where you found the Frog Cultists, just past the archway. Loot the Ventrium from the statue, and then follow the upper walkway to the end, where you'll find another Laterite.

Now go back to the ritual circle, and cross the river over to the other side, where two Batushka and a Cannibal Knight can be found patrolling. There are also two Rootbound Lurks which unburrow in the river as you pass. Slay all these enemies, and loot the Bone Statue to your left for yet another Laterite.

A Mortal Shell 2 screenshot showing the perfect path the player should take through the Ruins Of Nochte according to Rock Paper Shotgun's full walkthrough of the game. A Mortal Shell 2 screenshot showing the perfect path the player should take through the Ruins Of Nochte according to Rock Paper Shotgun's full walkthrough of the game.

Image credit: Rock Paper Shotgun/Playstack

Head around the path beside the giant rock which the Bone Statue was next to, collecting the 150x Coin Pouch from the cart along the way. You'll come to a clearing with a couple of large gnarled trees.

A Mortal Shell 2 screenshot showing the perfect path the player should take through the Ruins Of Nochte according to Rock Paper Shotgun's full walkthrough of the game. A Mortal Shell 2 screenshot showing the perfect path the player should take through the Ruins Of Nochte according to Rock Paper Shotgun's full walkthrough of the game.

Image credit: Rock Paper Shotgun/Playstack

A Mortal Shell 2 screenshot showing the perfect path the player should take through the Ruins Of Nochte according to Rock Paper Shotgun's full walkthrough of the game. A Mortal Shell 2 screenshot showing the perfect path the player should take through the Ruins Of Nochte according to Rock Paper Shotgun's full walkthrough of the game.

A Mortal Shell 2 screenshot showing the perfect path the player should take through the Ruins Of Nochte according to Rock Paper Shotgun's full walkthrough of the game. A Mortal Shell 2 screenshot showing the perfect path the player should take through the Ruins Of Nochte according to Rock Paper Shotgun's full walkthrough of the game.

Image credit: Rock Paper Shotgun/Playstack

Head to the cliff edge, and follow it to the left to find a lower pathway guarded by Lithopods, which leads to a Bone Gate. We won't be using it, but this is the Bone Gate that leads to the east side of Gloomshade Grove, very near where you found the Bloodcursed Lithopod miniboss. Loot the Laterite next to the Bone Gate, and then turn around and head back up.

Mark step as completed.

7. Clear out the Disciple's Stash.

A Mortal Shell 2 screenshot showing the perfect path the player should take through the Ruins Of Nochte according to Rock Paper Shotgun's full walkthrough of the game. A Mortal Shell 2 screenshot showing the perfect path the player should take through the Ruins Of Nochte according to Rock Paper Shotgun's full walkthrough of the game.

A Mortal Shell 2 screenshot showing the perfect path the player should take through the Ruins Of Nochte according to Rock Paper Shotgun's full walkthrough of the game. A Mortal Shell 2 screenshot showing the perfect path the player should take through the Ruins Of Nochte according to Rock Paper Shotgun's full walkthrough of the game.

Image credit: Rock Paper Shotgun/Playstack

Take the last right-hand turn into the village. On the right, you'll encounter a Neophyte Sester standing guard by a wooden section of wall to an otherwise stone building. Kill the Sester, loot the Coin Of Mammon on the statue beside the wood wall, and then destroy the wall to reveal a dungeon entrance within.

This is the Disciple's Stash - it's not really a true dungeon, more just a hidden loot area, as the name suggests. Kill the Sester at the bottom of the elevator, and loot the Bone Statue beside her for a Laterite. Then kill the next Sester and finally the Faceless Clerik at the end of the path.

A Mortal Shell 2 screenshot showing the perfect path the player should take through the Ruins Of Nochte according to Rock Paper Shotgun's full walkthrough of the game. A Mortal Shell 2 screenshot showing the perfect path the player should take through the Ruins Of Nochte according to Rock Paper Shotgun's full walkthrough of the game.

Image credit: Rock Paper Shotgun/Playstack

With the enemies slain, you can loot the various Coin Pouches in the last room (around 1350x Coin total), and loot the chest for a very handy 5x Ventrium.

Mark step as completed.

8. Obtain the Clerik's Stone.

Head back out of the Disciple's Stash, and unlock the main gate of the building with the stone button beside it. Ahead of you, in the centre of the village, is a medley of Cultist foes to slay, including another two Wortbinder Witches. Kill everything in sight, and loot the Ventrium up the small steps beside the house in the swamp.

A Mortal Shell 2 screenshot showing the perfect path the player should take through the Ruins Of Nochte according to Rock Paper Shotgun's full walkthrough of the game. A Mortal Shell 2 screenshot showing the perfect path the player should take through the Ruins Of Nochte according to Rock Paper Shotgun's full walkthrough of the game.

A Mortal Shell 2 screenshot showing the perfect path the player should take through the Ruins Of Nochte according to Rock Paper Shotgun's full walkthrough of the game. A Mortal Shell 2 screenshot showing the perfect path the player should take through the Ruins Of Nochte according to Rock Paper Shotgun's full walkthrough of the game.

Image credit: Rock Paper Shotgun/Playstack

Now, return to the wooden wall you broke through to reach the Disciple's Stash. Turn around and look opposite: you should see a wooden staircase leading up the side of a house. Head up those stairs to find another Ventrium.

A Mortal Shell 2 screenshot showing the perfect path the player should take through the Ruins Of Nochte according to Rock Paper Shotgun's full walkthrough of the game. A Mortal Shell 2 screenshot showing the perfect path the player should take through the Ruins Of Nochte according to Rock Paper Shotgun's full walkthrough of the game.

A Mortal Shell 2 screenshot showing the perfect path the player should take through the Ruins Of Nochte according to Rock Paper Shotgun's full walkthrough of the game. A Mortal Shell 2 screenshot showing the perfect path the player should take through the Ruins Of Nochte according to Rock Paper Shotgun's full walkthrough of the game.

Image credit: Rock Paper Shotgun/Playstack

Now head through the large wooden doorway in the fence beside that house. Follow the slope all the way up, carefully killing the trio of Foul Knights on the way.

A Mortal Shell 2 screenshot showing the perfect path the player should take through the Ruins Of Nochte according to Rock Paper Shotgun's full walkthrough of the game. A Mortal Shell 2 screenshot showing the perfect path the player should take through the Ruins Of Nochte according to Rock Paper Shotgun's full walkthrough of the game.

Image credit: Rock Paper Shotgun/Playstack

At the top is a small enclosed fort-like area. Another Foul Knight is just beyond the entrance, and two more can be found a few steps further in. The area is dominated by a large hole in the ground, which you'll need to skirt around. There's also another notice board here, like the one outside of Mushroom Village (ah, so long ago).

A Mortal Shell 2 screenshot showing the perfect path the player should take through the Ruins Of Nochte according to Rock Paper Shotgun's full walkthrough of the game. A Mortal Shell 2 screenshot showing the perfect path the player should take through the Ruins Of Nochte according to Rock Paper Shotgun's full walkthrough of the game.

Image credit: Rock Paper Shotgun/Playstack

Three collectibles to collect in quickfire fashion: past the notice board, there's a hole in the stone brick wall on the right, through which is a Devout's Chalice. On the other side of the hole from there, you can loot a Laterite from the stone slab there. And at the far end, through the archway, you'll find a Synaptic Vessel for improving your Mether's Pulse heal.

There's one other valuable here, and it's sneakily hidden. Facing that same archway where you found the Synaptic Vessel, look to the right of the archway and destroy first the crates against the wall, and then the wall itself.

A Mortal Shell 2 screenshot showing the perfect path the player should take through the Ruins Of Nochte according to Rock Paper Shotgun's full walkthrough of the game. A Mortal Shell 2 screenshot showing the perfect path the player should take through the Ruins Of Nochte according to Rock Paper Shotgun's full walkthrough of the game.

A Mortal Shell 2 screenshot showing the perfect path the player should take through the Ruins Of Nochte according to Rock Paper Shotgun's full walkthrough of the game. A Mortal Shell 2 screenshot showing the perfect path the player should take through the Ruins Of Nochte according to Rock Paper Shotgun's full walkthrough of the game.

Image credit: Rock Paper Shotgun/Playstack

A Mortal Shell 2 screenshot showing the perfect path the player should take through the Ruins Of Nochte according to Rock Paper Shotgun's full walkthrough of the game. A Mortal Shell 2 screenshot showing the perfect path the player should take through the Ruins Of Nochte according to Rock Paper Shotgun's full walkthrough of the game.

Image credit: Rock Paper Shotgun/Playstack

Behind the (illusory) wall is a cliff edge with a chest. Loot it for a new Tarstone - the Clerik's Stone. This one's nice if you're already in the habit of heavy attack combos. If you're finding it hard to commit to those long windup animations, Vatra's Seal (Harden) is the answer. You can block even while in the middle of a hefty animation, so it's perfect with the Clerik's Stone.

Mark step as completed.

9. Fast Travel to Widow's Overlook.

You might not expect this next step - it's time to go all the way back to Widow's Overlook! Why? Because we're now going to approach the Ruins Of Nochte from a different angle, and neatly meet up with your current position.

From the Clerik's Stone chest, drop off the edge of the cliff (you'll only take a small bit of damage). You can either run past or defeat the various enemies around you; either way, turn left and you'll see the Outskirts Of Nochte Beacon right next to you. Rest there and use Mether's Breath to fast travel to Widow's Overlook.

Mark step as completed.

10. Enter Nochte from the east side.

From Widow's Overlook, head down the slope and to the right, into the arena of the Great Arbiter Of Flesh boss (if you can remember that far back). At the far end of the arena, there's a bridge leading to a cliffside walkway.

A Mortal Shell 2 screenshot showing the perfect path the player should take through the Ruins Of Nochte according to Rock Paper Shotgun's full walkthrough of the game. A Mortal Shell 2 screenshot showing the perfect path the player should take through the Ruins Of Nochte according to Rock Paper Shotgun's full walkthrough of the game.

A Mortal Shell 2 screenshot showing the perfect path the player should take through the Ruins Of Nochte according to Rock Paper Shotgun's full walkthrough of the game. A Mortal Shell 2 screenshot showing the perfect path the player should take through the Ruins Of Nochte according to Rock Paper Shotgun's full walkthrough of the game.

Image credit: Rock Paper Shotgun/Playstack

Head down this walkway, killing the Shield Brigand and the four Lithopods on the way. There's a Bone Gate at the end, but before you use it, head around the left side and you'll find a well-hidden Ventrium. Then take the Bone Gate.

A Mortal Shell 2 screenshot showing the perfect path the player should take through the Ruins Of Nochte according to Rock Paper Shotgun's full walkthrough of the game. A Mortal Shell 2 screenshot showing the perfect path the player should take through the Ruins Of Nochte according to Rock Paper Shotgun's full walkthrough of the game.

Image credit: Rock Paper Shotgun/Playstack

At the other side, you'll find another Ventrium on the edge beside you. Collect it, then start to make your way across the large stone bridge and collect the 500x Coin Pouch on the left side. Now focus your attention on the foe ahead, because here you'll encounter a nasty new enemy type: a Gloom Seeker.

These dual-wielding foes are powerful - they're probably my least favourite regular enemy in the game. They have unusual timings on their attack patterns, and long combos of high-damage strikes. Their only drawback is that they don't have a very large health pool (though it isn't small either).

A Mortal Shell 2 screenshot showing the perfect path the player should take through the Ruins Of Nochte according to Rock Paper Shotgun's full walkthrough of the game. A Mortal Shell 2 screenshot showing the perfect path the player should take through the Ruins Of Nochte according to Rock Paper Shotgun's full walkthrough of the game.

A Mortal Shell 2 screenshot showing the perfect path the player should take through the Ruins Of Nochte according to Rock Paper Shotgun's full walkthrough of the game. A Mortal Shell 2 screenshot showing the perfect path the player should take through the Ruins Of Nochte according to Rock Paper Shotgun's full walkthrough of the game.

Image credit: Rock Paper Shotgun/Playstack

Try to bait it into a combo while staying out of reach, and punish it with Sidearm attacks to whittle it down before going in for the kill. Shell abilities like Tiel's Shadow Strike or Eredrim's Shoulder Bash will also make this fight safer.

Once the Gloom Seeker is dealt with, head to the far side of the bridge and use the next Bone Gate to enter the Ruins Of Nochte from the east side. Shoot the Netopyrs ahead of you before they can be a nuisance, then open all the nearby sarcophagi for a Laterite, a Ventrium, and a bunch of Gloom. There are also two Coins Of Mammon, one on either side of the tree in the centre; and there's a sitting spot by the Bone Gate if you want to use it.

A Mortal Shell 2 screenshot showing the perfect path the player should take through the Ruins Of Nochte according to Rock Paper Shotgun's full walkthrough of the game. A Mortal Shell 2 screenshot showing the perfect path the player should take through the Ruins Of Nochte according to Rock Paper Shotgun's full walkthrough of the game.

A Mortal Shell 2 screenshot showing the perfect path the player should take through the Ruins Of Nochte according to Rock Paper Shotgun's full walkthrough of the game. A Mortal Shell 2 screenshot showing the perfect path the player should take through the Ruins Of Nochte according to Rock Paper Shotgun's full walkthrough of the game.

Image credit: Rock Paper Shotgun/Playstack

Mark step as completed.

11. Clear out the Brigand Camp.

A Mortal Shell 2 screenshot showing the perfect path the player should take through the Ruins Of Nochte according to Rock Paper Shotgun's full walkthrough of the game. A Mortal Shell 2 screenshot showing the perfect path the player should take through the Ruins Of Nochte according to Rock Paper Shotgun's full walkthrough of the game.

Image credit: Rock Paper Shotgun/Playstack

Head down the slope to the left of the tree, and double back around the side of that slope to kill the three Wretches below you for a Tarspore.

Ahead, take the upper left-hand path across the bridge by the waterfall, rather than the lower path which leads down towards the stone structure ahead. Along this upper path, you'll find several more Wretches to kill. Ultimately, this path leads to a Brigand Camp, containing a Headsman, two Armed Knaves, and three regular Brigands.

A Mortal Shell 2 screenshot showing the perfect path the player should take through the Ruins Of Nochte according to Rock Paper Shotgun's full walkthrough of the game. A Mortal Shell 2 screenshot showing the perfect path the player should take through the Ruins Of Nochte according to Rock Paper Shotgun's full walkthrough of the game.

A Mortal Shell 2 screenshot showing the perfect path the player should take through the Ruins Of Nochte according to Rock Paper Shotgun's full walkthrough of the game. A Mortal Shell 2 screenshot showing the perfect path the player should take through the Ruins Of Nochte according to Rock Paper Shotgun's full walkthrough of the game.

Image credit: Rock Paper Shotgun/Playstack

Once all the Brigands are dead, various cages around the camp will automatically open, each one containing a Leechtongue. Deal with the one near the entrance first, and then explore the camp to find 2x Common Moonshine on the left and right sides, and a chest on the right containing 750x Coin.

A Mortal Shell 2 screenshot showing the perfect path the player should take through the Ruins Of Nochte according to Rock Paper Shotgun's full walkthrough of the game. A Mortal Shell 2 screenshot showing the perfect path the player should take through the Ruins Of Nochte according to Rock Paper Shotgun's full walkthrough of the game.

A Mortal Shell 2 screenshot showing the perfect path the player should take through the Ruins Of Nochte according to Rock Paper Shotgun's full walkthrough of the game. A Mortal Shell 2 screenshot showing the perfect path the player should take through the Ruins Of Nochte according to Rock Paper Shotgun's full walkthrough of the game.

Image credit: Rock Paper Shotgun/Playstack

Take the back-left path to another Leechtongue cage, kill it, and collect another Ventrium beside the cage. Then head to the right for another caged Leechtongue to slay. Beside this one is a Bone Gate. Use it to teleport down to the area below you.

A Mortal Shell 2 screenshot showing the perfect path the player should take through the Ruins Of Nochte according to Rock Paper Shotgun's full walkthrough of the game. A Mortal Shell 2 screenshot showing the perfect path the player should take through the Ruins Of Nochte according to Rock Paper Shotgun's full walkthrough of the game.

A Mortal Shell 2 screenshot showing the perfect path the player should take through the Ruins Of Nochte according to Rock Paper Shotgun's full walkthrough of the game. A Mortal Shell 2 screenshot showing the perfect path the player should take through the Ruins Of Nochte according to Rock Paper Shotgun's full walkthrough of the game.

Image credit: Rock Paper Shotgun/Playstack

Mark step as completed.

12. Clear out the Waterfall Camp.

After the teleport, a bunch of Infested Wretches will run from right to left, and explode themselves on some Brigands further around the corner. Let 'em. You, meanwhile, should turn around and head behind the Bone Gate, where you'll find a Tarred Vestige that needs killing.

A Mortal Shell 2 screenshot showing the perfect path the player should take through the Ruins Of Nochte according to Rock Paper Shotgun's full walkthrough of the game. A Mortal Shell 2 screenshot showing the perfect path the player should take through the Ruins Of Nochte according to Rock Paper Shotgun's full walkthrough of the game.

Image credit: Rock Paper Shotgun/Playstack

Follow the path beyond the Tarred Vestige and you'll arrive at the stone structure you bypassed on your way to the Brigand Camp. It's being patrolled by several of a new kind of enemy called a Hunched Collector, although really they should look very familiar: they're the non-boss versions of Vrannic, the Grand Illusionist, who you fought on the way to Magdalena.

Do a circuit around the stone structure, killing all the Hunched Collectors. They're really not that tough. Their ranged attacks are easily dodged, and their staff attacks easily parried.

A Mortal Shell 2 screenshot showing the perfect path the player should take through the Ruins Of Nochte according to Rock Paper Shotgun's full walkthrough of the game. A Mortal Shell 2 screenshot showing the perfect path the player should take through the Ruins Of Nochte according to Rock Paper Shotgun's full walkthrough of the game.

A Mortal Shell 2 screenshot showing the perfect path the player should take through the Ruins Of Nochte according to Rock Paper Shotgun's full walkthrough of the game. A Mortal Shell 2 screenshot showing the perfect path the player should take through the Ruins Of Nochte according to Rock Paper Shotgun's full walkthrough of the game.

Image credit: Rock Paper Shotgun/Playstack

A few steps north of the stone structure, there are three things to note. First: a sitting spot beside a waterfall. Second: the realisation that you're overlooking the area you reached at the end of the Hag's Path earlier, with the Clerik's Stone. You've now met up with your former self!

A Mortal Shell 2 screenshot showing the perfect path the player should take through the Ruins Of Nochte according to Rock Paper Shotgun's full walkthrough of the game. A Mortal Shell 2 screenshot showing the perfect path the player should take through the Ruins Of Nochte according to Rock Paper Shotgun's full walkthrough of the game.

Image credit: Rock Paper Shotgun/Playstack

Third: there's a pathway to your right, guarded by several Brigand Crossbowmen. Kill the Crossbowmen and open the chest at the base of the tree in their little hidey-hole for another 500x Coin.

A Mortal Shell 2 screenshot showing the perfect path the player should take through the Ruins Of Nochte according to Rock Paper Shotgun's full walkthrough of the game. A Mortal Shell 2 screenshot showing the perfect path the player should take through the Ruins Of Nochte according to Rock Paper Shotgun's full walkthrough of the game.

A Mortal Shell 2 screenshot showing the perfect path the player should take through the Ruins Of Nochte according to Rock Paper Shotgun's full walkthrough of the game. A Mortal Shell 2 screenshot showing the perfect path the player should take through the Ruins Of Nochte according to Rock Paper Shotgun's full walkthrough of the game.

Image credit: Rock Paper Shotgun/Playstack

Now head back to the nearest wall of the stone structure that was guarded by the Collectors. You'll notice a section in the centre of the wall that's partially inset against the rest. To the right of that section, there's a stone button. It's subtle, easily missed. Push it to open the way inside the structure.

A Mortal Shell 2 screenshot showing the perfect path the player should take through the Ruins Of Nochte according to Rock Paper Shotgun's full walkthrough of the game. A Mortal Shell 2 screenshot showing the perfect path the player should take through the Ruins Of Nochte according to Rock Paper Shotgun's full walkthrough of the game.

A Mortal Shell 2 screenshot showing the perfect path the player should take through the Ruins Of Nochte according to Rock Paper Shotgun's full walkthrough of the game. A Mortal Shell 2 screenshot showing the perfect path the player should take through the Ruins Of Nochte according to Rock Paper Shotgun's full walkthrough of the game.

Image credit: Rock Paper Shotgun/Playstack

Inside there is just a dungeon entrance, so head down it to enter the Waterfall Camp. It's another very short mini-dungeon; just head down the path, kill the three Brigands by the waterfall, and loot the Ventrium to your left.

A Mortal Shell 2 screenshot showing the perfect path the player should take through the Ruins Of Nochte according to Rock Paper Shotgun's full walkthrough of the game. A Mortal Shell 2 screenshot showing the perfect path the player should take through the Ruins Of Nochte according to Rock Paper Shotgun's full walkthrough of the game.

Image credit: Rock Paper Shotgun/Playstack

Finally, walk straight through the waterfall - but prepare yourself, because an Armed Knave is on the other side, already winding up a strike against you. Kill it, and loot the chest for a Coin Of Mammon. Then exit the dungeon and the stone structure.

A Mortal Shell 2 screenshot showing the perfect path the player should take through the Ruins Of Nochte according to Rock Paper Shotgun's full walkthrough of the game. A Mortal Shell 2 screenshot showing the perfect path the player should take through the Ruins Of Nochte according to Rock Paper Shotgun's full walkthrough of the game.

Image credit: Rock Paper Shotgun/Playstack

Mark step as completed.

13. Visit the Nightfish.

As you step out of the stone structure, turn left and you'll see a path leading to a raised drawbridge. Use the lever by the bridge to lower it. Cross the bridge and turn left immediately after the archway. You're now back at the last Bone Gate.

A Mortal Shell 2 screenshot showing the perfect path the player should take through the Ruins Of Nochte according to Rock Paper Shotgun's full walkthrough of the game. A Mortal Shell 2 screenshot showing the perfect path the player should take through the Ruins Of Nochte according to Rock Paper Shotgun's full walkthrough of the game.

A Mortal Shell 2 screenshot showing the perfect path the player should take through the Ruins Of Nochte according to Rock Paper Shotgun's full walkthrough of the game. A Mortal Shell 2 screenshot showing the perfect path the player should take through the Ruins Of Nochte according to Rock Paper Shotgun's full walkthrough of the game.

Image credit: Rock Paper Shotgun/Playstack

Head behind the Bone Gate again, to where you fought the Tarred Vestige. Where the bridge is, you can drop down below onto an air current. Directly ahead of you is the Outskirts Of Nochte Beacon once again, but only go there if you need to rest up.

Instead, after dropping down onto the air current, collect the Devout's Chalice at the bottom of the slope, and then immediately turn right. Kill the Skulks and Rootbound Lurks in your way, and enter the cave ahead of you.

A Mortal Shell 2 screenshot showing the perfect path the player should take through the Ruins Of Nochte according to Rock Paper Shotgun's full walkthrough of the game. A Mortal Shell 2 screenshot showing the perfect path the player should take through the Ruins Of Nochte according to Rock Paper Shotgun's full walkthrough of the game.

A Mortal Shell 2 screenshot showing the perfect path the player should take through the Ruins Of Nochte according to Rock Paper Shotgun's full walkthrough of the game. A Mortal Shell 2 screenshot showing the perfect path the player should take through the Ruins Of Nochte according to Rock Paper Shotgun's full walkthrough of the game.

Image credit: Rock Paper Shotgun/Playstack

This cave is home to an intriguing NPC known only as the Nightfish. You can go up to it and interact with it to enter a "shop" of sorts, where you simply convert your Coin into Gloom. Each 100x Coin you spend gives you 200x Gloom. Personally I don't think it's worth doing, because Coin is harder to come by than Gloom, and you'll need a huge amount of Coin to upgrade your weapons to the highest levels.

A Mortal Shell 2 screenshot showing the perfect path the player should take through the Ruins Of Nochte according to Rock Paper Shotgun's full walkthrough of the game. A Mortal Shell 2 screenshot showing the perfect path the player should take through the Ruins Of Nochte according to Rock Paper Shotgun's full walkthrough of the game.

Image credit: Rock Paper Shotgun/Playstack

However, it's worth looking around the cave for the various valuables stashed away: 2x Ventrium, 2x Devout's Chalices, and a Tooth Of Nochte.

Mark step as completed.

15. Conquer the Thieves Retreat.

Activate the Beacon, rest at it, and level up if you can - but don't cleanse the Beacon quite yet. Instead, exit the Beacon and head to the right (facing the Beacon).

A Mortal Shell 2 screenshot showing the perfect path the player should take through the Ruins Of Nochte according to Rock Paper Shotgun's full walkthrough of the game. A Mortal Shell 2 screenshot showing the perfect path the player should take through the Ruins Of Nochte according to Rock Paper Shotgun's full walkthrough of the game.

A Mortal Shell 2 screenshot showing the perfect path the player should take through the Ruins Of Nochte according to Rock Paper Shotgun's full walkthrough of the game. A Mortal Shell 2 screenshot showing the perfect path the player should take through the Ruins Of Nochte according to Rock Paper Shotgun's full walkthrough of the game.

Image credit: Rock Paper Shotgun/Playstack

Past the first archway, turn right and destroy the crates in your way. Ahead of you is a bridge guarded by two Crossbowmen. Loot the Common Moonshine, Laterite, and 1000x Coin Pouch on this bridge.

Then go back and head straight on through the second archway. Kill the next two Brigands, and drop down to the lower ledge. There's another 250x Coin Pouch here. Collect it, then go up the stairs and kill the Stoner up there.

A Mortal Shell 2 screenshot showing the perfect path the player should take through the Ruins Of Nochte according to Rock Paper Shotgun's full walkthrough of the game. A Mortal Shell 2 screenshot showing the perfect path the player should take through the Ruins Of Nochte according to Rock Paper Shotgun's full walkthrough of the game.

A Mortal Shell 2 screenshot showing the perfect path the player should take through the Ruins Of Nochte according to Rock Paper Shotgun's full walkthrough of the game. A Mortal Shell 2 screenshot showing the perfect path the player should take through the Ruins Of Nochte according to Rock Paper Shotgun's full walkthrough of the game.

Image credit: Rock Paper Shotgun/Playstack

Turn around after killing the Stoner, and you'll see a locked gate. Push the button beside the gate to open it up, allowing passage down into the Thieves Retreat.

This dungeon is actually a bit nasty and confusing. It's populated by a new kind of enemy - the spectral Necropede, which is capable of various different kinds of ranged Lightning attacks. Kill the first one you encounter in the corridor past the elevator, then step out into the main (very large) room of the dungeon.

A Mortal Shell 2 screenshot showing the perfect path the player should take through the Ruins Of Nochte according to Rock Paper Shotgun's full walkthrough of the game. A Mortal Shell 2 screenshot showing the perfect path the player should take through the Ruins Of Nochte according to Rock Paper Shotgun's full walkthrough of the game.

Image credit: Rock Paper Shotgun/Playstack

The gimmick of the Thieves Retreat is that it uses invisible floors. Walk straight across the gap in front of you and you'll see that you won't fall. Kill the two nearby Necropedes (they're also standing on an invisible floor so you can go right up to them), then turn back and look to the near wall, where another Necropede will attack you from an upper ledge.

This Necropede is also there to show you that there's also an invisible floor (a ramp this time) which leads up to that upper ledge. Kill the Necropede and head up the slope. Follow this path around the corner, killing more Necropedes and bypassing the tripwire traps as you go.

A Mortal Shell 2 screenshot showing the perfect path the player should take through the Ruins Of Nochte according to Rock Paper Shotgun's full walkthrough of the game. A Mortal Shell 2 screenshot showing the perfect path the player should take through the Ruins Of Nochte according to Rock Paper Shotgun's full walkthrough of the game.

A Mortal Shell 2 screenshot showing the perfect path the player should take through the Ruins Of Nochte according to Rock Paper Shotgun's full walkthrough of the game. A Mortal Shell 2 screenshot showing the perfect path the player should take through the Ruins Of Nochte according to Rock Paper Shotgun's full walkthrough of the game.

Image credit: Rock Paper Shotgun/Playstack

Towards the end of the path is a Roaming Head, and another Necropede around the corner to the left. Kill both, then go to the very end of the path where you're overlooking the main room again, and drop off the edge. There's another invisible floor to catch you just below.

A Mortal Shell 2 screenshot showing the perfect path the player should take through the Ruins Of Nochte according to Rock Paper Shotgun's full walkthrough of the game. A Mortal Shell 2 screenshot showing the perfect path the player should take through the Ruins Of Nochte according to Rock Paper Shotgun's full walkthrough of the game.

Image credit: Rock Paper Shotgun/Playstack

This path leads to the left where the end of the dungeon can be found, but before you do that, follow the path the opposite way (carefully), where it will turn a corner and lead back towards the centre of the room. Kill the remaining Necropedes in your way as you use the invisible floors (and stone floors) to cross to the opposite wall, where there's a Gloom Tentacle to destroy.

A Mortal Shell 2 screenshot showing the perfect path the player should take through the Ruins Of Nochte according to Rock Paper Shotgun's full walkthrough of the game. A Mortal Shell 2 screenshot showing the perfect path the player should take through the Ruins Of Nochte according to Rock Paper Shotgun's full walkthrough of the game.

Image credit: Rock Paper Shotgun/Playstack

Now drop down to the ground. The ground level is swarming with enemies (mostly Foul Knights), and you don't have to kill them if you don't want to. Just visit both ends of the ground floor. The side you entered the dungeon from has two stone slabs containing 2x Laterite, while the opposite side has a 500x Coin Pouch and a Gloom Tentacle containing 3500x Gloom.

A Mortal Shell 2 screenshot showing the perfect path the player should take through the Ruins Of Nochte according to Rock Paper Shotgun's full walkthrough of the game. A Mortal Shell 2 screenshot showing the perfect path the player should take through the Ruins Of Nochte according to Rock Paper Shotgun's full walkthrough of the game.

A Mortal Shell 2 screenshot showing the perfect path the player should take through the Ruins Of Nochte according to Rock Paper Shotgun's full walkthrough of the game. A Mortal Shell 2 screenshot showing the perfect path the player should take through the Ruins Of Nochte according to Rock Paper Shotgun's full walkthrough of the game.

Image credit: Rock Paper Shotgun/Playstack

Once you've collected them all, you can find an elevator near the centre of the room. Ride it back up to the top, and make your way to the end of the dungeon in the back-left corner, using that same path you dropped down onto earlier.

A Mortal Shell 2 screenshot showing the perfect path the player should take through the Ruins Of Nochte according to Rock Paper Shotgun's full walkthrough of the game. A Mortal Shell 2 screenshot showing the perfect path the player should take through the Ruins Of Nochte according to Rock Paper Shotgun's full walkthrough of the game.

Image credit: Rock Paper Shotgun/Playstack

Turn the corner and you'll find a Revered Gland at the end of the dungeon. You can then use the glowing light to teleport back out of the Thieves Retreat.

Mark step as completed.

16. Kill everything on ground level.

Exit the dungeon, head down the steps to your right, and drop down onto the ground level of the fort. Immediately to your left there will be a Crossbowman and a Headsman to kill. Just past them, you'll discover, is the bridge (guarded by a Stoner) which you saw at the very beginning of this part of the walkthrough. The one that leads back to the Desolate Peak Bone Gate.

A Mortal Shell 2 screenshot showing the perfect path the player should take through the Ruins Of Nochte according to Rock Paper Shotgun's full walkthrough of the game. A Mortal Shell 2 screenshot showing the perfect path the player should take through the Ruins Of Nochte according to Rock Paper Shotgun's full walkthrough of the game.

A Mortal Shell 2 screenshot showing the perfect path the player should take through the Ruins Of Nochte according to Rock Paper Shotgun's full walkthrough of the game. A Mortal Shell 2 screenshot showing the perfect path the player should take through the Ruins Of Nochte according to Rock Paper Shotgun's full walkthrough of the game.

Image credit: Rock Paper Shotgun/Playstack

You obviously don't need to go back there, though you can kill the enemies again if you wish (or just the nearby Stoner if it's noticed you). Instead, turn right before the bridge and go round the corner to find more Brigands, and a Ventrium on the back of a wooden cart.

Now head to the far side of the ground level. In your way there will be an Armed Knave, another Headsman, and another Crossbowman. Kill them all, and loot the Common Moonshine by the tents.

Mark step as completed.

17. Clear out the Ravaged Tomb.

A Mortal Shell 2 screenshot showing the perfect path the player should take through the Ruins Of Nochte according to Rock Paper Shotgun's full walkthrough of the game. A Mortal Shell 2 screenshot showing the perfect path the player should take through the Ruins Of Nochte according to Rock Paper Shotgun's full walkthrough of the game.

A Mortal Shell 2 screenshot showing the perfect path the player should take through the Ruins Of Nochte according to Rock Paper Shotgun's full walkthrough of the game. A Mortal Shell 2 screenshot showing the perfect path the player should take through the Ruins Of Nochte according to Rock Paper Shotgun's full walkthrough of the game.

Image credit: Rock Paper Shotgun/Playstack

Next, go to the locked gate beyond the bonfire, and use the lever on the wall to open it. To your right, there's another dungeon entrance. Descend it to enter the Ravaged Tomb.

Head down the corridor and kill the two Foul Knights at the end. Around the corner to the left, there's another locked gate that can be opened with the stone button beside it. Inside this tiny side-room is a Roaming Head, guarding a Ventrium.

A Mortal Shell 2 screenshot showing the perfect path the player should take through the Ruins Of Nochte according to Rock Paper Shotgun's full walkthrough of the game. A Mortal Shell 2 screenshot showing the perfect path the player should take through the Ruins Of Nochte according to Rock Paper Shotgun's full walkthrough of the game.

A Mortal Shell 2 screenshot showing the perfect path the player should take through the Ruins Of Nochte according to Rock Paper Shotgun's full walkthrough of the game. A Mortal Shell 2 screenshot showing the perfect path the player should take through the Ruins Of Nochte according to Rock Paper Shotgun's full walkthrough of the game.

Image credit: Rock Paper Shotgun/Playstack

Also inside this room is a stone block. Squeeze yourself between the block and the back wall, and strike the block to send it out of the side room and onto a pressure plate.

Activating the pressure plate opens up a new area beyond the far wall of the corridor. Head down the steps, and once you see the Bone Statue, prepare to dodge the Infested Wretch that attacks you from the right, just around the next corner.

A Mortal Shell 2 screenshot showing the perfect path the player should take through the Ruins Of Nochte according to Rock Paper Shotgun's full walkthrough of the game. A Mortal Shell 2 screenshot showing the perfect path the player should take through the Ruins Of Nochte according to Rock Paper Shotgun's full walkthrough of the game.

Image credit: Rock Paper Shotgun/Playstack

Loot that Bone Statue for a Laterite, then head up the next set of stairs and you'll find a chest containing the Duality Stone. Axe and Dagger users, this Tarstone is for you.

Turn around from the chest, and use the pressure plate to open the gate, leading back into the main corridor. But beware! There's now a rolling Knight Of Mammon in this corridor, and it can kill you easily if you're not prepared. Bait its roll, then get into the rhythm of single attacks and dodges to avoid its "pufferfish" spike attack.

A Mortal Shell 2 screenshot showing the perfect path the player should take through the Ruins Of Nochte according to Rock Paper Shotgun's full walkthrough of the game. A Mortal Shell 2 screenshot showing the perfect path the player should take through the Ruins Of Nochte according to Rock Paper Shotgun's full walkthrough of the game.

Image credit: Rock Paper Shotgun/Playstack

Once the Knight Of Mammon is dead, there's nothing else to do in the dungeon, so turn and leave the way you came.

Mark step as completed.

18. Cleanse the Abandoned Shrine.

Back out of the dungeon, head up the steps in front of you and take the elevator up. This leads right back to the Nochtean Gate Beacon. Rest there, and select "Cleanse Beacon" to enter the Abandoned Shrine inside.

A Mortal Shell 2 screenshot showing the perfect path the player should take through the Ruins Of Nochte according to Rock Paper Shotgun's full walkthrough of the game. A Mortal Shell 2 screenshot showing the perfect path the player should take through the Ruins Of Nochte according to Rock Paper Shotgun's full walkthrough of the game.

A Mortal Shell 2 screenshot showing the perfect path the player should take through the Ruins Of Nochte according to Rock Paper Shotgun's full walkthrough of the game. A Mortal Shell 2 screenshot showing the perfect path the player should take through the Ruins Of Nochte according to Rock Paper Shotgun's full walkthrough of the game.

Image credit: Rock Paper Shotgun/Playstack

Head down the corridor and kill the Foul Knight in your way. Try to do it carefully, avoiding damage, because you're about to face a boss and want to retain your health.

At the end of the path is a drop down to a lower platform, where two more Foul Knights can be found. Again, deal with them carefully, with minimal health loss if possible. Then loot the Bone Statue for a Laterite and open the chest for 1500x Coin.

Mark step as completed.

19. Defeat Vrago, Solikar Champion.

Now turn around, and check the left-hand corner. You'll find a group of crates to smash through, and just beyond that, another drop down to a lower platform. Prepare yourself: the moment you drop, you'll be forced to contend with Vrago, Solikar Champion.

A Mortal Shell 2 screenshot showing the perfect path the player should take through the Ruins Of Nochte according to Rock Paper Shotgun's full walkthrough of the game. A Mortal Shell 2 screenshot showing the perfect path the player should take through the Ruins Of Nochte according to Rock Paper Shotgun's full walkthrough of the game.

Image credit: Rock Paper Shotgun/Playstack

The bad news is you have to be pretty much perfect in this fight, because Vrago deals so much damage with each attack, and he chains them together so mercilessly, that one wrong move is likely to mean death (or at least, Shell-death). The good news is that it's really not as hard as it sounds to be pretty much perfect in this fight!

You'll need to quickly get used to the extreme speed of Vrago's unblockable jump-attack combo; each attack comes very quickly after the last, so you need to chain-dodge your way out of them. All his blockable attacks, meanwhile, are well-telegraphed and very easy to parry.

A Mortal Shell 2 screenshot showing the perfect path the player should take through the Ruins Of Nochte according to Rock Paper Shotgun's full walkthrough of the game. A Mortal Shell 2 screenshot showing the perfect path the player should take through the Ruins Of Nochte according to Rock Paper Shotgun's full walkthrough of the game.

A Mortal Shell 2 screenshot showing the perfect path the player should take through the Ruins Of Nochte according to Rock Paper Shotgun's full walkthrough of the game. A Mortal Shell 2 screenshot showing the perfect path the player should take through the Ruins Of Nochte according to Rock Paper Shotgun's full walkthrough of the game.

Image credit: Rock Paper Shotgun/Playstack

Once you manage a Riposte, punish him as much as possible as he's getting back up. You'll find that Vrago doesn't actually have a huge amount of health; I used a +9 Iconoclast, which whittled down his health bar pretty quickly.

Once Vrago is defeated, you'll earn a Glimpse for your trouble, as well as a tonne of Gloom (about 8000) and a new Tarstone: the Voltaic Crown. After that, you can cleanse the corruption to the side of the arena and retrieve the 3x Ova there as you make your way back out into the overworld (earning another Glimpse).

A Mortal Shell 2 screenshot showing the perfect path the player should take through the Ruins Of Nochte according to Rock Paper Shotgun's full walkthrough of the game. A Mortal Shell 2 screenshot showing the perfect path the player should take through the Ruins Of Nochte according to Rock Paper Shotgun's full walkthrough of the game.

Image credit: Rock Paper Shotgun/Playstack

You'll also find, as you exit the Beacon, that the gateway behind the Beacon has now been cleared of corruption, allowing you at last to enter your second legacy dungeon in Mortal Shell 2.

A Mortal Shell 2 screenshot showing the perfect path the player should take through the Ruins Of Nochte according to Rock Paper Shotgun's full walkthrough of the game. A Mortal Shell 2 screenshot showing the perfect path the player should take through the Ruins Of Nochte according to Rock Paper Shotgun's full walkthrough of the game.

Image credit: Rock Paper Shotgun/Playstack

Mark step as completed.

Next up in our expansive walkthrough of Mortal Shell 2, we'll be passing through that gateway and entering the Prisoners' Domain, where the second major story boss can be found. Join us in Part 12 and our Prisoner's Way walkthrough to continue playing along with us!

Share:

More in PlayStation, Xbox, PC

GTA 6 Skipping PC At Launch And Having No Online Right Away Is Good, Helldivers Boss Says🖥 PlayStation, Xbox, PC, Multi-platform

GTA 6 Skipping PC At Launch And Having No Online Right Away Is Good, Helldivers Boss Says

The CEO of Helldivers studio Arrowhead Game Studios has commented on the upcoming launch of GTA 6(https://www.gamespot.com/articles/gta-6-leaks-a-timeline-of-the-events-so-far/), saying he's happy there will be no PC version or online mode at launch, because that will help Helldivers 2 "keep crushing it." In a statement to press, Sham Jorjani said Rockstar makes "ridiculous, high-effort stuff, and it's awesome that games like this get made." He said he's selfishly happy that the game won't be on PC at launch, nor will there be an online mode right away. "It means Helldivers 2 gets to keep crushing it in our own space, and is also why it won’t be the all consuming behemoth everyone’s worried about," he said. Rockstar has confirmed GTA 6 will launch on PS5 and Xbox Series X|S, but the developer has not said a word about a possible PC edition. Additionally, Rockstar has said GTA 6 is a "single-player experience," but the company has not confirmed outright that there won't be an online mode at launch. It's expected Rockstar will evolve GTA Online in some form for GTA 6(https://www.gamespot.com/articles/with-gta-6-online-rockstar-is-deciding-who-to-make-mad/), but we don't know anything about that yet. With GTA 5, the game launched first on console before later coming to PC. For GTA 6, it's expected the game will also eventually come to PC. Additionally, it won't be unprecedented if GTA 6 launches with no online mode, as GTA 5 also launched without one. Jorjani went on to say Rockstar has "the brand power to confidently take their time and run their classic play," as opposed to chasing trends and pivoting like some other developers do. "They have the confidence and freedom to spend a decade doing things the old-school way because they know the core game will deliver. It’s going to raise the bar for sure," he said. The "Extended Look" for GTA 6(https://www.gamespot.com/articles/gta-6-netflix-trailers-beefy-runtime-revealed-footage-captured-on-ps5/) aired today, August 27, on Netflix. For more, be sure to read GameSpot’s breakdown ofhow to watch and what to expect from the GTA 6 Extended Look event(https://www.gamespot.com/articles/gta-6-extended-look-how-to-watch-what-to-expect-and-more/). The Netflix event comes after GTA 6 has suffered numerous, significant gameplay leaks. Rockstar reacted to the scandal, saying the leaks are “heartbreaking” for the developers(https://www.gamespot.com/articles/rockstar-finally-comments-on-all-those-gta-6-leaks-heartbreaking-for-our-team/). GTA 6 launches on November 19 for PS5 and Xbox Series X|S. It’s coming to market with an incredible amount of hype behind it, in part because fans have been waiting 13 years for the sequel to GTA 5(https://www.gamespot.com/articles/the-biggest-gaming-stories-that-happened-since-gta-5-came-out-13-years-ago/).

🎮 GTA🎮 Helldivers
GameSpotNews1 day ago
Mortal Shell 2: What to do in the Forgotten Tower🖥 PlayStation, Xbox, PC

Mortal Shell 2: What to do in the Forgotten Tower

!(https://assetsio.gnwcdn.com/proxima-standing-in-front-of-old-prisoner.jpg?width=690&quality=85&format=jpg&auto=webp) The Forgotten Tower is a location in Mortal Shell 2(https://www.rockpapershotgun.com/games/mortal-shell-2) that's a little off the beacon path, and home to a mysterious bird giant who appears deceased. There, you'll find many cryptic messages, a map highlighting three different spots, and a suggestion to activate Night Mode and revisit. Upon doing so, you'll find that you can make offerings to the dead bird creature, but obtaining the three special Glands that you need isn't very straightforward - and it's not exactly clear what you get for your effort. In this guide, we'll outline what to do in the Forgotten Tower in Mortal Shell 2 and how to find the Thawed Gland, Depleted Gland, and Faded Gland, which are the three items that you can give to the bird giant to get the Seedbearer's Scripture, a very important item. Read more(https://www.rockpapershotgun.com/mortal-shell-2-forgotten-tower)

RockGuides / Walkthroughs3 days ago
The Blood Of Dawnwalker Devs Heard Your 60fps Requests And Have Good News For Console Players🖥 PlayStation, Xbox, PC, Multi-platform

The Blood Of Dawnwalker Devs Heard Your 60fps Requests And Have Good News For Console Players

If you wanted to play The Blood of Dawnwalker(https://www.gamespot.com/games/the-blood-of-dawnwalker/) at 60fps, you'd originally need to get the PC version and hope your rig was up to scratch(https://www.gamespot.com/articles/the-biggest-surprise-about-the-blood-of-dawnwalker-is-how-little-ram-it-needs/). Developer Rebel Wolves didn't initially list a 60fps mode for Xbox Series X, PS5, and PS5 Pro when it recently released a quick look at the graphical modes for those consoles, but the developer says it will now be added via a day-one patch when the game launches in September. "Performance mode was already in the works, but it was still being tested. We simply weren’t ready to promise it yet," Rebel Wolves wrote(https://x.com/DawnwalkerGame/status/2091812822082580778) on its The Blood of Dawnwalker X account. "We heard your feedback. It was clear how much this mattered to many of you, so we focused on finishing the next round of tests. Those results gave us the confidence we needed to confirm Performance Mode for Day one." https://www.youtube.com/watch?v=yLMUp83HZKE The Blood of Dawnwalker will have three modes to choose from on Xbox Series X, PS5, and PS5 Pro: Performance targets 60fps, Balanced targets 40fps, and Quality targets 30fps. Xbox Series S owners are only getting one mode, which targets 30fps on the lower-spec hardware. Rebel Wolves hasn't detailed the major differences between the modes either, but typically, Performance mode prioritizes a higher, smoother frame rate while cutting back on fancier lighting effects, simpler particle effects, and less detail compared to Quality mode. Balanced mode attempts to have the best of both worlds while targeting 40fps, while the PS5 Pro has proven to be a 4K 60fps powerhouse(https://www.gamespot.com/articles/ps5-pros-upgraded-pssr-is-rolling-out-today-here-are-the-first-games-getting-it/1100-6538811/) after the rollout of an upgraded PlayStation Spectral Super Resolution(https://www.gamespot.com/articles/ps5-pro-visual-upgrade-incoming-with-new-pssr-update/1100-6538470/) earlier this year. Out on September 3, The Blood of Dawnwalker is the debut game from Rebel Wolves, a studio that features several former Witcher and Cyberpunk 2077 developers(https://www.gamespot.com/articles/witcher-3-director-says-his-vampire-game-couldnt-be-made-at-cd-projekt-red-or-another-established-studio/1100-6539674/) in its roster, including The Witcher 3 game director Konrad Tomaszkiewicz. Set in a dark medieval world full of vampires and grim fantasy, players will have to grapple with the consequences of their actions as they build up power for a final showdown against the vampire lord Brencis. "Whether you're talking to your best friend, working to bandage an injured comrade, or battling opponents to save your father's life, when the hunger takes hold, your actions may suddenly be out of your control. Dawnwalker is a game all about making you live with the consequences," Phil Hornshaw wrote in GameSpot's The Blood of Dawnwalker preview(https://www.gamespot.com/articles/in-the-blood-of-dawnwalkers-vampire-story-death-is-not-always-the-end/).

GameSpotNews5 days ago