Mortal Shell 2: What to do in the Forgotten Tower
Overview & Key Takeaways
The Forgotten Tower is a location in Mortal Shell 2 that's a little off the beacon path, and home to a mysterious bird giant who appears deceased. There, you'll find many cryptic messages, a map highlighting three different spots, and a suggestion to activate Night Mode and revisit.
Upon doing so, you'll find that you can make offerings to the dead bird creature, but obtaining the three special Glands that you need isn't very straightforward - and it's not exactly clear what you get for your effort.
In this guide, we'll outline what to do in the Forgotten Tower in Mortal Shell 2 and how to find the Thawed Gland, Depleted Gland, and Faded Gland, which are the three items that you can give to the bird giant to get the Seedbearer's Scripture, a very important item.
The Forgotten Tower is a location in Mortal Shell 2 that's a little off the beacon path, and home to a mysterious bird giant who appears deceased. There, you'll find many cryptic messages, a map highlighting three different spots, and a suggestion to activate Night Mode and revisit.
Upon doing so, you'll find that you can make offerings to the dead bird creature, but obtaining the three special Glands that you need isn't very straightforward - and it's not exactly clear what you get for your effort.
In this guide, we'll outline what to do in the Forgotten Tower in Mortal Shell 2 and how to find the Thawed Gland, Depleted Gland, and Faded Gland, which are the three items that you can give to the bird giant to get the Seedbearer's Scripture, a very important item.
To see this content please enable targeting cookies.
Manage cookie settings
On this page:
What to do in the Forgotten Tower
- Find the Forgotten Tower.
- Get the Thawed Gland.
- Get the Depleted Gland.
- Get the Faded Gland.
- Activate Night Mode and return to the Forgotten Tower.
- Give the Glands as Offerings and get the Seedbearer's Scripture.
1. Find the Forgotten Tower.
The Forgotten Tower is located in south-eastern Mammon and is isolated from the other landmasses on the map. It can be reached via Bone Gate teleporters located within the Sester's Retreat and The Silent Steps. The Sester's Refuge is the easier area to teleport from, and the closest Beacon is the Sester's Gate Beacon, which is just outside the Corrupted Gate that leads to the Valley of the Revered dungeon.

From the Sester's Gate Beacon, navigate to the refuge's courtyard, drop down to the rocky ledges beneath you (or take the lift) and use the Bone Gate teleporter to reach the Forgotten Tower. | Image credit: Rock Paper Shotgun/Playstack
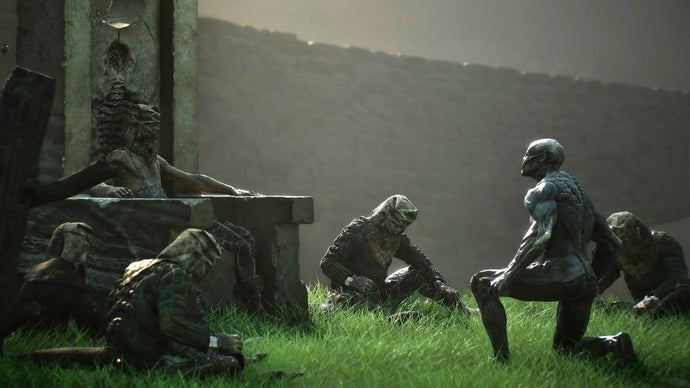
The Forgotten Tower consists of one central structure with the bird-faced giant's corpse, as well as a bridge that extends to another smaller building and landmass. Several messages are strewn about that hint at the bird's importance as well as coming back during Night Mode, and if you climb the stairs next to the bird, you can find a parchment highlighting three areas - the locations of special Glands that you need to collect and return as offerings.

What a behemoth. Wondering if he was important in Mortal Shell lore? Read the additional author's note below! | Image credit: Rock Paper Shotgun/Playstack
There are no enemies in the Forgotten Tower except for one Gloom Seeker, who guards the Axatana in the small building that extends from the bridge connected to the tower. If you don't have the Axatana - the best weapon in the game, in our eyes - it's definitely worth picking it up.
Mark step as finished.
2. Get the Thawed Gland.
The first special Gland is the Thawed Gland, and you'll find it in the Conquered Temple, the snowy dungeon that ends with the fight against Droeg, the Conquerer. From the start of this dungeon, move forwards until you reach the entrance to an indoor area atop a ledge that borders a snowy bridge.

There's a wandering skeleton enemy and a crossbow-headed foe to contend with by the entrance. | Image credit: Rock Paper Shotgun/Playstack
Enter and you'll find a room full of large stone hands and a head which somewhat resembles Sester Genessa. There's a Wraith in here, along with a candle-lit altar. Pick up the Thawed Gland from the altar.

One Thawed Gland down, two more to go. | Image credit: Rock Paper Shotgun/Playstack
Mark step as finished.
3. Get the Depleted Gland.
The next Gland is the Depleted Gland, and it can be found in the Withered Shoals dungeon right before the boss battle against the Hexapod. Progress to where Ruk sits, on the giant ledge overlooking the fall into the boss arena, and then drop down one level.

The Depleted Gland's hidden in a pretty obvious place, which means you may find it before the other two. | Image credit: Rock Paper Shotgun/Playstack
Instead of moving forward into the Hexapod's arena, turn around and walk towards the cave to find the Depleted Gland sitting in plain sight.

The second Gland has been acquired. | Image credit: Rock Paper Shotgun/Playstack
Mark step as finished.
4. Get the Faded Gland.
The last Gland is the Faded Gland, and it can be found near the Citadel Annex Beacon, which is part of the final dungeon of the game, shortly before the battle with Solnir, the Gloom Seeker.

This one's in the final dungeon, and you may miss the fact that you can actually jump off of this ledge here. | Image credit: Rock Paper Shotgun/Playstack
Leap off of the ledge bordering the Beacon and onto the ground below. (Harden in mid-air to avoid fall damage, and be sure to look before you leap to make sure you aren't plummeting to your death.) Several Gloom Seekers abound; dispatch them and then examine the small altar in the centre of the area; the Faded Gland lies there.

All Glands acquired! Nice. | Image credit: Rock Paper Shotgun/Playstack
Mark step as finished.
5. Activate Night Mode and return to the Forgotten Tower.
Now that you've gotten all three Glands, you need to activate Night Mode. If for whatever reason you don't have the Gloombound Flame (which is found in the gravestones near the Great Arbiter of Flesh), go grab it.
Then, return to the Marrow Keep and head to the top of the tower. Use the Gloombound Flame to light the brazier and you'll meet Thestus, a creepy NPC from Mortal Shell 1 with a raspy voice.

If you're not a fan of harder difficulties, don't worry - you really only need to do Night Mode for this very brief part of the game if you want to complete this side quest. | Image credit: Rock Paper Shotgun/Playstack
Thestus lets you switch from day to night, which is basically Mortal Shell 2's harder difficulty. You only need to stay in Night Mode to turn in these three glands, so teleport back to the Sester's Gate Beacon (or whichever Beacon you prefer) and then return to the Forgotten Tower.
Mark step as finished.
6. Give the Glands as Offerings and get the Seedbearer's Scripture.
Go up the staircase towards the old bird giant. Since it's now Night Mode, you'll be able to offer all three Glands. Doing this gives you an interesting reward - the Seedbearer's Scripture.

An intriguing item - what is this Cosmic Disease it speaks of, anyway?! | Image credit: Rock Paper Shotgun/Playstack
After you get the scripture, the old bird prisoner will disappear, marking the end of this questline. Curious!
Mark step as finished.

What's up with the Forgotten Tower and that bird thing? A fun fact from Jeremy
You may be wondering what this tower is and why it's got a bird trapped in it. It's actually the main hub location from Mortal Shell 1, Fallgrim Tower. In that game, you'd return to this place repeatedly to switch Shells, save and level up your character with Sester Genessa, and return Glands that were acquired from bosses to the Old Prisoner - the oversized bird guy trapped in the tower.
At the end of the game, the Old Prisoner broke free and tried to use the Glands to achieve godhood. He served as the final boss, and upon defeating him, your character - known as the Foundling - ascended to the heavens as a god in his stead. These events are summed up very quickly at the start of Mortal Shell 2's opening, and if you never played the first game, they likely meant nothing to you.
Fallgrim Tower's existence in the new world of Mortal Shell 2 is unusual, and there are hints that its either moved from its old location - which was in the middle of a swamp - or that enough time has passed for the world to change around it. Messages scattered around the tower also mention the actions of Solomon, a scholar Shell from the first game who is unusually absent in this sequel. I suspect he'll play a role in the DLC, if Mortal Shell 2 gets any!
What is the Seedbearer's Scripture?
The Seedbearer's Scripture is an equippable item that heals Cosmic Disease, which is a status effect you probably haven't heard of yet, unless you've already advanced to the final boss - Zmey, the Unbidden.
Zmey is the only enemy in the game that deals Cosmic Disease, and is a huge pain in the butt to fight (check our strategy on how to defeat Zmey for more info). Nevertheless, the Seedbearer's Scripture makes things easier.

Zmey's a cheap boss with supremely annoying moves. The Seedbearer's Scripture won't make the fight a walk in the park, but it does reduce some of the trouble you'll inevitably have. | Image credit: Rock Paper Shotgun/Playstack
When Zmey breathes fire, he'll inflict Cosmic Disease on your Harbinger, which will eventually make you unable to inhabit your Shell or use skills and Tarstones. Use Seedbearer's Scripture when this occurs to give yourself immunity and also send a wave of yellow energy out towards him that will temporarily put Zmey down for the count.
As of this moment, there is only one Seedbearer's Scripture in Mortal Shell 2, despite the fact that the menu screen seems to let on that you can equip multiples.
That finishes our guide to how to finish the Forgotten Tower questline, and what to do with the Depleted Gland, Thawed Gland, and Faded Gland. For additional help on navigating the world of this grim Soulslike, check out our guide on all Shell locations. If you're in need of weapons, we've got guides on how to get the Axe and Dagger and how to get the Troubadour's Lute, and if you're more interested in quests, take a peek at our guides on Gorf's questline and Hilga's questline. Last but not least, be sure to bookmark our comprehensive walkthrough!