Mortal Shell 2: Sunken Village walkthrough (Part 4)
Overview & Key Takeaways
Where we last left off in our Mortal Shell 2 walkthrough, you'd just reached the end of Mushroom Village and cleansed the final Beacon there, ready to enter the shining gateway into the Glutted Mire and the Sunken Village. This is the game's first "legacy dungeon", and there's a lot to discover and conquer within - including your first major boss, Magdalena.
If you want a dependable 100% guide to the area, you've come to the right place. Below I'll walk you through every step of the journey through the Sunken Village, and how to handily defeat Magdalena in her glade at the end of the region.
Where we last left off in our Mortal Shell 2 walkthrough, you'd just reached the end of Mushroom Village and cleansed the final Beacon there, ready to enter the shining gateway into the Glutted Mire and the Sunken Village. This is the game's first "legacy dungeon", and there's a lot to discover and conquer within - including your first major boss, Magdalena.
If you want a dependable 100% guide to the area, you've come to the right place. Below I'll walk you through every step of the journey through the Sunken Village, and how to handily defeat Magdalena in her glade at the end of the region.
Want the walkthrough for a different area of the game? You'll find the full list of all our guides on our Mortal Shell 2 walkthrough hub page!
Sunken Village walkthrough steps:
- Give Tiel Poison Immunity.
- Enter the Sunken Village.
- Open the Offerings Chest.
- Reach the Seeping Mire Beacon.
- Defeat the Circle Of The Grasping Root.
- Obtain the Shrike Stone.
- Reach the Sunken Village Beacon.
- Cleanse the Wortbriar Encampment.
- Obtain the Revered Gland.
- Defeat the Wandering Shepherd.
- Defeat Magdalena.
- Cleanse Magdalena's Glade.
- Use the Gloom Siphon.
- Give Franz the Etching Needles.
- Visit Merrick's Shop.
- Visit Sester Genessa (as Tiel).
To see this content please enable targeting cookies.
Manage cookie settings
1. Give Tiel Poison Immunity.
If you're not already there, go back to Marrow Keep via the nearest Beacon, and visit Zhirelle, the Shellkeeper.
Select Shell Bonding, and use 1 Glimpse to deepen your bond with Tiel. This will unlock a new tier of passive abilities for Tiel, which is going to help quite a bit in the coming area. You can also view the new Shell Memory you've just unlocked for Tiel if you like.


Image credit: Rock Paper Shotgun/Playstack
Back out of Shell Bonding, and now select Shell Abilities. The top row of abilities is now available for you to spend any Shell Points you've earned so far. You should have enough to unlock the third node, Plague Bearer, up to level 2 - which grants Tiel total immunity from Poison.
You'll encounter a decent bit of Poison in the Sunken Village, so this is a great advantage to give yourself before we set off.
Mark step as completed.
2. Enter the Sunken Village.

Image credit: Rock Paper Shotgun/Playstack
Fast travel back to the Mushroom Village Gate Beacon, and then enter the glowing gateway to begin your journey through the Glutted Mire. This is a legacy dungeon - an extended area comprising three Beacons.
Immediately on the other side of the gateway, be on guard - there are tripmines connected to arrow-firing turrets on the walls, and also an Infested Wretch who runs towards you and explodes. Bypass these obstacles carefully, and follow the path down (beware of more tripmines) until you find a large Wortbinder Witch in your way.

Image credit: Rock Paper Shotgun/Playstack
Her attacks deal Poison in an area, but you're now completely immune as Tiel (not if you're kicked out of your Shell though - worth remembering!). Still, the attacks deal high damage, and she has an unblockable overhand swing, so it's best to dodge and play it patient against this new enemy.
Head up the slope and you'll enter the Sunken Village. Immediately in front of you are two Shield Brigands. You can Heavy Attack your way through them as normal, or shoot the beehive in the tree above them, sit back, and watch the chaos unfold.


Image credit: Rock Paper Shotgun/Playstack
Loot the Ventrium on the rock below the tree, and then turn the corner and kill the Batushka guarding the Village entrance. Then head on in.
Mark step as completed.
3. Open the Offerings Chest.
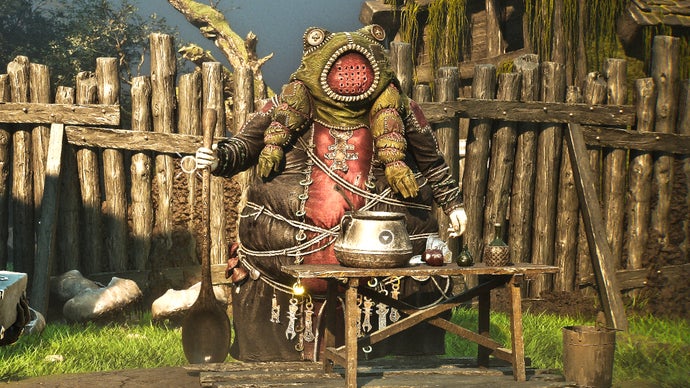
Inside, you'll see that Sunken Village is very aptly named. In front of you is a welcome party consisting of a Wortbinder Witch, two Frog Cultists, and a Batushka.
As always, deal with the Frog Cultists first, so they don't heal the others. The Witch can heal too, even more strongly - but the Frog Cultists are easier to get out of the way quickly. There's also another beehive you can shoot to make the job easier.


Image credit: Rock Paper Shotgun/Playstack
Collect the 150x Coin Pouch on your left, and also your first Tarspore consumable below the beehive. Tarspore is ubiquitous here, so I won't point out each location from now on. Search around and you'll find tonnes of them.
On the left side is a chest. Like the one in Mushroom Village, it's locked until you make "3 Offerings" by lighting three candles in the area. Before you go looking, follow the left-hand side past the chest to the Gloom tentacle to see a new enemy: the rather horrible Rootbound Lurk. These things burst out of the ground looking all terrifying, but they're fairly easy to stunlock and kill.

Image credit: Rock Paper Shotgun/Playstack
Head across to the other side of the swamp and you'll find another small group of Cultists guarding a stone platform. Kill them and loot the statue on the platform for a Ventrium. One of the four stone slabs in the corner of the platform also holds the first Offering candle, so light it before moving on.


Image credit: Rock Paper Shotgun/Playstack
Next to the stone platform there's a Skulk locked inside a cage. Swing to break the lock and kill the Skulk. The second Offering candle is on the floor of the cage (for some reason).

Image credit: Rock Paper Shotgun/Playstack
Finally, turn around and head back towards the entrance. On your left are some stairs leading up to a hut - the third Offering candle is here on the wooden beam at the top of the stairs.

Image credit: Rock Paper Shotgun/Playstack
With all Offerings made, return to the chest and open it for the Siegebreaker's Stone. This Tarstone improves the heft of your ranged attacks, allowing them to stagger enemies more effectively. Pretty useful!
Mark step as completed.
5. Defeat the Circle Of The Grasping Root.
Enter the Beacon and head through into Rootwater Hollow. This isn't much of a dungeon, per se - it's more just a miniboss arena. Drop down into the swamp below and you'll begin a fight against the Circle Of The Grasping Root.


Image credit: Rock Paper Shotgun/Playstack
This "boss" is actually just a selection of regular Cultist enemies. The boss health bar is made up of a Witch and three Torch Cultists; although they're all also supported by two Neophyte Sesters, who I actually find deadlier than the rest.
The Torch Cultists tend to charge you, so let them isolate themselves from the pack and pick them off. After that, use your Naylshotte to quickly burst down the Witch so it can't heal anyone else.

Image credit: Rock Paper Shotgun/Playstack
Once that's done, deal with the Sesters one at a time, and then cleanse the corruption at the far side of the arena. Collect the Ovum inside and return to the overworld for an extra Glimpse.
Mark step as completed.
7. Reach the Sunken Village Beacon.
Head back the way you came, and this time take the left-hand route out of the swamp. On your right, take note of the three Frog Cultists praying around some corruption. Kill them if you like, but you can't clear the corruption until you get to the next Beacon.


Image credit: Rock Paper Shotgun/Playstack
Fortunately, it's right behind you. Revitalise the Sunken Village Beacon, and then enter it to reach the Wortbriar Encampment.
Mark step as completed.
9. Obtain the Revered Gland.
With the Beacon cleansed, that corruption around which the three Frog Cultists were praying has now cleared. Go back over there and kill the three of them.

Image credit: Rock Paper Shotgun/Playstack
Now you can safely loot what was inside the corruption: your second Revered Gland. As a reminder, this powerful item allows you to upgrade your total number of Mether's Pulse (healing) charges. If you haven't already done so, go back to the Beacon and rest, then select "Mether's Pulse" to upgrade your healing capacity.
Mark step as completed.
10. Defeat the Wandering Shepherd.
The next two steps are boss fights. If you have any trouble with either of them, perhaps consider returning to the Marrow Keep and upgrading your weapon of choice, if you're able!
When you're ready, cross the bridge in front of the Beacon, and you'll immediately enter the arena of the Wandering Shepherd.

Image credit: Rock Paper Shotgun/Playstack
This unusual and irritating boss likes to teleport away from you and possess the sheep in its flock to distract you. I've found it's best to completely ignore the sheep. Just keep dodging away from them, single-mindedly hunting down the Shepherd and dealing as much damage to it as possible before it teleports away again.
At half-health, the Wandering Shepherd will subtly transform into the Tarblighted Shepherd. Its sheep will start glowing red and becoming more aggressive, while the Shepherd itself will start telekinetically using its sword to stab and swing at you if you get close.


Image credit: Rock Paper Shotgun/Playstack
It's not the easiest to read these sword attacks, so I tend to just dodge them instead of trying to block them. Your plan doesn't change - just concentrate on hunting down the Shepherd wherever it goes and dealing as much damage as possible. If it's successfully zoning you out, then use your Naylshotte to inflict damage, or Shadow Strike to get close while invisible.
Once the Shepherd is defeated, all its sheep will disappear instantly, and you'll receive another Sheephead Totem as a reward (as well as 2000-odd Gloom).

Image credit: Rock Paper Shotgun/Playstack
Mark step as completed.
11. Defeat Magdalena.
Destroy the crates at the far end of the Shepherd's arena, and squeeze through the gap beyond. Cross the bridge and you'll find Ruk, again here to warn you that he senses you're about to face the big boss of the region.


Image credit: Rock Paper Shotgun/Playstack
Open the chest just past Ruk to obtain the Etching Needles. This is another Tarforge part you can give to Franz later.
You should also take this moment to open your inventory and equip the Burnt Effigy in your passive item slot. The Burn resistance it provides will be useful very shortly!
Then continue along the path (stopping to pick up the Tarspores to your right as you like), before heading through the short tunnel and out into Magdalena's Glade.
At this point you'll see a glowing blue spirit standing on your left. His name is Smert. If you want some help with the next boss, you can spend a Glimpse to permanently unlock this spirit as a helper against this boss. If you die, you can summon him again at no cost.

Image credit: Rock Paper Shotgun/Playstack

Who is Smert? An extra tip from Ollie
Smert is actually another Shell who you'll encounter later on in Mortal Shell 2. Just like Tiel, he comes with his own backstory and unique abilities. Going forward, you'll find that you can summon a certain Shell as a helper for each of the major bosses in the game.
To clarify: unlocking the Summon Smert is different from unlocking the Shell Smert. Spending this Glimpse to unlock the Summon won't allow you to properly unlock the Shell so you can play as Smert. That comes later in the story.
Whether you decide to spend the Glimpse to get Smert's help or not, drop down into the swamp below to trigger a cutscene, where you're at last introduced to Magdalena, The Lady Of The Woods.

Image credit: Rock Paper Shotgun/Playstack
Magdalena rides atop a flame-spouting motorised chair, and she loves nothing more than to charge at you. The charge is unblockable, but it's fairly easy to dodge as long as you see it coming. So never let her out of your sight.
Another dangerous attack of hers is an unblockable spin, during which her chair shoots flames in a circle out of its back. Just back off when she does this attack, and let the fire clear.
You'll quickly discover that this boss fight is a test of patience. Magdalena's erratic moves and fiery area-of-effect attacks give you only very short space of time where you can land an attack or two before you have to back away again. The moment you get impatient and start to overcommit, she'll punish you for it. Patience makes this fight easy.

Image credit: Rock Paper Shotgun/Playstack
Because so many of her attacks are unblockable, she'll instead get her poise broken simply by dealing enough damage to her. A single riposte should be enough to bring her to around half-health.
At this point, Magdalena will summon small Child Of Gloom minions to attack you. Unlike the sheep in the previous fight, it's best in this case to kill the minions as quickly as they arrive. They're too much of a nuisance to ignore, and they'll die in one hit anyway.


Image credit: Rock Paper Shotgun/Playstack
Magdalena will also get a couple of new moves, including a slower multi-stage trundling charge; and an attack where she summons some flying minions who then home in on you and explode. Both attacks are quite slow and easy to dodge.
Just keep whaling away at her during the short windows she gives you, and use your Naylshotte when you can't get close due to the fire. Eventually you'll deliver the killing blow, receiving Magdalena's Memento for the effort (not to mention a huge amount of Gloom).

Image credit: Rock Paper Shotgun/Playstack
Mark step as completed.
12. Cleanse Magdalena's Glade.
As Magdalena dies, a Beacon will rise from the ground in the centre of the arena. This is Magdalena's Glade Beacon. If you like, you can check the very back of the arena first for 5x Tarspore, but when you're ready, rest at the Beacon and enter it.

Image credit: Rock Paper Shotgun/Playstack
Inside, there's no dungeon - just a room with a whopping 26x Ova inside. Interact with the corruption to cleanse it and collect the Ova. Doing so will immediately return you to Marrow Keep - which is good, because we have a few things to do there.

Image credit: Rock Paper Shotgun/Playstack
Mark step as completed.
13. Use the Gloom Siphon.

Image credit: Rock Paper Shotgun/Playstack
First thing you should do on returning to Marrow Keep: use the Gloom Siphon. You just got a lot of new Ova, and siphoning them will get you around 2500x Gloom.
But it won't just get you that. Because you just defeated an Ovum Thief (one of the big bosses of the game) and returned its stash of Ova, you'll also be rewarded with 15x Ventrium. Very handy indeed!
Mark step as completed.
14. Give Franz the Etching Needles.

Image credit: Rock Paper Shotgun/Playstack
Head up to Franz and give him the Etching Needles. Doing this will allow you to upgrade your Tarstones at the Tarforge.
Fighting with a Tarstone equipped will increase its XP, and once it meets its XP threshold, you can level it up at the Tarforge. One important point: every time you level up a Tarstone from Level 1 to Level 2, you can collect a Tarcore from the output port of the Tarforge. This is a special resource used to upgrade Tarstones from Level 2 to Level 3.
To put it simply: you'll need to use a lot of different Tarstones and level them all up in order to get enough Tarcores to level up your favourite Tarstone to max level. It's a mechanic that encourages you to swap out Tarstones regularly.
Mark step as completed.
15. Visit Merrick's Shop.

Image credit: Rock Paper Shotgun/Playstack
Now is also a great moment to visit Merrick's Shop. He has plenty of maps for sale, but I personally wouldn't recommend purchasing any of them, because this walkthrough will guide you to all of them anyway.
Instead, open up the Rare Findings section and purchase his Revered Gland, Synaptic Vessel, and Glimpse. You already know what the first and third ones do; Synaptic Vessels are the other resource you need to upgrade Mether's Pulse (your healing). While Revered Glands increase the number of heals, Synaptic Vessels increase the amount healed each time.
Now go back to the Marrow Keep Beacon and upgrade Mether's Pulse before you forget!
Mark step as completed.
16. Visit Sester Genessa (as Tiel).

Image credit: Rock Paper Shotgun/Playstack
Finally, if you haven't already done so since unlocking Tiel, go and visit Sester Genessa while wearing Tiel's Shell. You'll get some unique dialogue, at the end of which Genessa asks if she can hold him. There's no reason not to, so just enjoy the hug. Fia flashbacks, anyone?
As you might imagine, this hints at a historical relationship between Tiel and Genessa, which we'll explore more later in the story and in Tiel's memories. For now, do anything else you might wish at Marrow Keep, and then prepare for the next stage of your journey.
Mark step as completed.
Congratulations are in order for beating the Sunken Village and Magdalena! You've earned a good rest. But once you're ready, look no further than Part 5 of our Mortal Shell 2 walkthrough, in which we detour to the hidden Flooded Village north of Widow's Overlook, for a powerful new sidearm.