Ancient Sanctuary walkthrough - Clair Obscur: Expedition 33
Summary
Welcome to our 100% walkthrough for Ancient Sanctuary, a stopover before you get to the Gestral Village in Clair Obscur: Expedition 33. While not as large as Flying Waters, this maze-like forest realm is packed with twisting corridors and some very annoying enemies, as these sly Gestrals just won't stop attacking you in their ramshackle wooden mechs!
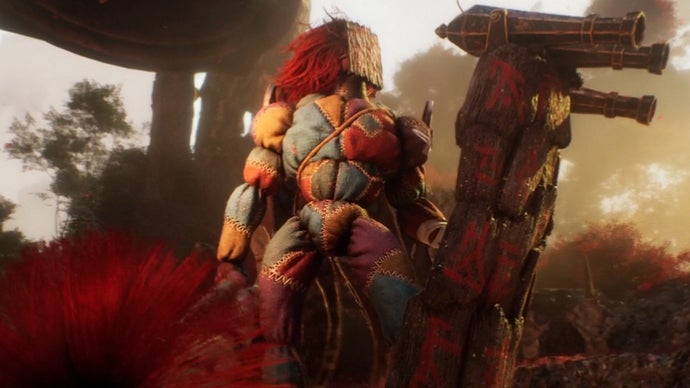
Those wooden mechs - or Sakapatate, as they're called in-game - come in all shapes and sizes, with big shields, mounted guns that unleash waves of buckshot, and mannequin clubs. It's almost like these little guys don't want us to show up in their village and buy all of the goodies they have for sale.
In this guide, we'll offer a 100% walkthrough of Ancient Sanctuary in Clair Obscur: Expedition 33, telling you everything you need to know to survive the Sakapatate onslaught and find all of the area's secrets in the Sanctuary Maze.
Welcome to our 100% walkthrough for Ancient Sanctuary, a stopover before you get to the Gestral Village in Clair Obscur: Expedition 33. While not as large as Flying Waters, this maze-like forest realm is packed with twisting corridors and some very annoying enemies, as these sly Gestrals just won't stop attacking you in their ramshackle wooden mechs!
Those wooden mechs - or Sakapatate, as they're called in-game - come in all shapes and sizes, with big shields, mounted guns that unleash waves of buckshot, and mannequin clubs. It's almost like these little guys don't want us to show up in their village and buy all of the goodies they have for sale.
In this guide, we'll offer a 100% walkthrough of Ancient Sanctuary in Clair Obscur: Expedition 33, telling you everything you need to know to survive the Sakapatate onslaught and find all of the area's secrets in the Sanctuary Maze.
In this guide:
To see this content please enable targeting cookies.
Manage cookie settings
Ancient Sanctuary Entrance
Getting to Ancient Sanctuary is easy - just go north after leaving Flying Waters until you reach red and white trees. (By this point, you also have some freedom to step off the beaten path and start exploring the world map. We're going to stick to the main story for now, but stay tuned, as we'll soon add a Side Quest section to this walkthrough to help you find everything there is to discover!)
After entering Ancient Sanctuary, activate the Expedition Flag - Entrance. Looks like Expedition 63 were the ones who left this one behind. Just beyond the flag is a round Nevron, a Pétank, that will roll away when you approach it. Chase it to the blue pattern on the ground and initiate combat.
Beating the Pétank takes strategy, as it starts the fight with 6 Shields. Breaking them will send it into a tizzy, and on its subsequent turns it'll summon 3 Shields, 6 Shields, and finally 9 Shields. It will also flee after three of its turns are up, meaning you're on a timer to deal as much damage as possible and shatter those Shields quickly.

Pétanks are the treasure goblins of Expedition 33. They're tricky to beat, but offer tonnes of rewards to those who can bust up their many Shields. | Image credit: Rock Paper Shotgun/Sandfall Interactive
To defeat the Pétank fast, inflict Burn for damage over time, then use high damage skills like Maelle's Percée or Gustave's Overcharge. Using any skill that causes it to Break will give you an extra turn, and if you're able to parry the Pétank's only attack (it jumps forward and shoots a flow of rocks at you) then you can also sneak in counterattack damage.
Beating the Pétank gets you 5 Polished Chroma Catalyst, a Recoat, and 5 Colour of Lumina. If it successfully flees, then just rest at the nearby flag and it'll respawn.
Explore the surrounding area after the fight to find the Energising Jump Pictos across a wooden bridge. Then take the lower path by the brook to end up on a cliff with a nice view of waterfalls; along the wall to the right are handholds that lead down to the Burning Mark Pictos, which lets you apply Burn after hitting a Marked enemy. (The Gestral foes in this region are weak to fire, so this is highly useful.)

Don't miss the Burning Mark Pictos like I did the first time I was in this area; it's on the path below where the Young Boy is located. | Image credit: Rock Paper Shotgun/Sandfall Interactive
Now head up to the higher path, where you'll meet a creepy Young Boy NPC who delivers spooky exposition. Exhaust his dialogue and go down the path until you run into a bunch of dead Nevrons and Robust Sakapatate, a big ol' Gestral controlled-contraption who hits hard like a boss, but is actually just a normal enemy.
Robust Sakapatate starts the fight with 3 Shields, and is a pain to defeat, since so many of its attacks target all expeditioners. Its Weakness is fire, so inflict Burn ASAP, and its Resistance is to lightning. If you can, use Free Aim to shoot its slightly glowing arm joint, which is a weak point. It takes three hits to destroy the arm joint.

Notice the glow on the Sakapatate's arm? Deactivate this nasty strike that will smack all members of your crew by hitting that glow with Free Aim. | Image credit: Rock Paper Shotgun/Sandfall Interactive
As you fight this behemoth, you'll have to contend with a 'clunky combo' (two club strikes on a single party member, followed by a prompt to jump, and then one more club strike), a single attack from Robust Sakapatate's 'dead partner' (that's the mannequin it carries; you can disable this attack by destroying its arm joint with Free Aim), and a nasty counterattack that hits all expeditioners and only happens if you attack the Sakapatate when its shield is raised. If that weren't enough, the Robust Sakapatate crashes into your party when its HP is gone. This crash is difficult to parry; I have better luck dodging it, myself.
The Sakaram weapon for Gustave is your reward, along with a cutscene with a cute new Gestral friend. Then you'll reach the Expedition Flag - Santuary Maze.
Sanctuary Maze

When in doubt, go right An extra tip from Jeremy
The Sanctuary Maze is a confusing, loopy area with a lot of pathways that lead into each other and many small treasures to pick up. Our guide has done most of the hard work in helping you 100% this region, so pay attention to the annotated screenshots below showing where branching paths lead. As a rule of thumb, when there's a fork in the road, it's usually easiest to take the right path, as the left often loops back around.
Get ready for one of the most infuriating areas in the game thus far, where everything looks the same! They don't call this a maze for nothing, but let's start by keeping to the right when you come to the first fork in the road. You'll see a rocky wall with a small crawl space that your characters can enter.

Time to squat down and crawl through this little shortcut. | Image credit: Rock Paper Shotgun/Sandfall Interactive
Upon leaving the crawl space, the path splits again - left (marked by a torch) and right. As we previously said, we're going to go right first. This leads to a clearing with a patrolling Sakapatate. Get the Chroma x965 hidden in the alcove on the right before challenging this foe.
When the fight begins, you'll be facing a Ranger Sakapatate alongside a Catapult Sakapatate. These two have a fire Weakness, like all Sakapatate, and some obvious glowing weakpoints that your Free Aim can blast to bits. I recommend taking out the Ranger Sakapatate first, since it has a cannon that targets all expeditioners and inflicts Burn.
The Catapult Sakapatate, meanwhile, fires off 'thunder thingies' four times in a row at random party members. These can be parried, but deal considerable lightning damage and inflict the Stun status. If you shoot its two weak points, you can damage and break the catapult, forcing it to rely on a hidden blade attack that will Exhaust a party member on a hit. Personally, I find the thunder thingies slightly easier to parry as opposed to the hidden blade, but your mileage may vary.

Free Aim at the Catapult Sakapatate's wheels to break its catapult and prevent it from using its so-called thunder thingies. | Image credit: Rock Paper Shotgun/Sandfall Interactive
When the Sakapatate scoundrels have no more HP, they'll try to crash into the party. Survive this, and you'll acquire the Trebuchim weapon, which is a good choice for Lune after you leave this area. (Its Element is lightning, which all of the Sakapatate are resistant to.)
Now move a little further into the clearing and you should see climbing handholds on your left. Climb them upwards and follow the path to uncover the Energising Start II Pictos near some crates.
Then, retrace your steps to the clearing and enter the dark cave. There's a lone Catapult Sakapatate wandering in here along with the Attack Lifesteal Pictos, which sits in a corner on the left after entering the cave.
In the opposite direction of the Pictos is a Rope that leads to a Colour of Lumina and a ledge that overlooks the beginning of the Ancient Santuary. (You can jump down here if you want to retrace your steps or missed a certain item.)

So many branching paths in this place... Don't let the Catapult Sakapatate in the dark here get the drop on you. | Image credit: Rock Paper Shotgun/Sandfall Interactive
When you've collected everything, leave the cave, return to the outside clearing where you first faced the Ranger and Catapult Sakapatate, and then follow the exit path that leads towards the crawl space. This time, we're going to explore the route marked by the torch that we didn't investigate a short while ago.
You'll emerge into a new clearing decoated with blue glowing flowers. There's a Colour of Lumina on a ledge to your left, a Revive Tint Shard under the tent in the clearing's centre, and the Ancient Sanctuary Mime lies in wait on the right.

Grab the Colour of Lumina and Revive Tint Shard before showing the Ancient Sanctuary Mime that you mean business. | Image credit: Rock Paper Shotgun/Sandfall Interactive
How to beat the Ancient Sanctuary Mime
This Mime might sport a cute beret and bob cut, but it hits just as hard as all of its brethren. As usual, use Lune and Maelle's skills to inflict Burn to slowly deal damage to the Mime's Shields and bring its Break bar up. Gustave's Overcharge and any of Maelle's Virtuose Stance skills will also help cut the Mime down to size.

The Ancient Sanctuary Mime's a funky take on Lune, if you hadn't guessed. | Image credit: Rock Paper Shotgun/Sandfall Interactive
Your reward for defeating the latest wordless automaton is the Baguette outfit and hairstyle for Lune. They look better on her than they did on the Mime, that's for sure!
Sanctuary Maze 2
We're almost done with the Sanctuary Maze, but there are a few additional items to grab (and a Paint Cage to break) if we want to 100% the area.
From the ledge where you found the Colour of Lumina, drop down and then take an immediate turn left. There's some Chroma x483 hidden amongst crates here. Then take note of the surrounding area, which is littered with big wooden Gestral statues.
There's another fork in the road here; the left path technically leads all the way back to the left route from the first branching path at the Sanctuary Maze entrance (remember, we told you to go right, towards the crawl space opening). If you want to kill all Nevrons in the area, you can explore that route to fight another Ranger Sakapatate; just take note of the landmarks and try not to get lost.

Go left if you want to backtrack or missed items; you'll eventually do a loop to the Sanctuary Maze entrance. Go right if you wish to forge ahead. | Image credit: Rock Paper Shotgun/Sandfall Interactive
The right path, meanwhile, leads to a patrolling Catapult Sakapatate and several towering blue Gestral statues, along with the occasional lamppost. Follow the lefthand route past the torch and around a cliff. There will be a brief party conversation about how this maze is confusing. (No kidding!) Keep going forward and veer left when the path splits; you'll find a Healing Tint Shard under a statue.
In the opposite direction of this Healing Tint Shard are more Gestral statues, a domed structure stuck in the ground, and a Robust and a Catapult Sakapatate. After demolishing both of them, look left and take a sec to examine yet another fork in the road. There are technically three pathways here - one that slopes down a hill and leads to an Expedition Journal, a narrow one that goes into trees and leads to a Paint Cage, and one that leads towards lampposts and the Ancient Sanctuary boss.

I got supremely lost here. To help you where I faltered, I've labeled all three directions the hill path, the tree path, and the lamppost path. | Image credit: Rock Paper Shotgun/Sandfall Interactive
It's all very confusing, but technically, the hill and tree paths lead to the same place, so let's take the hill path first. There, we'll find Journal - Expedition 63. After reading the journal, if you want to blast apart all of the boxes in the clearing, you can smash one of the upcoming Paint Cage locks open for free! But don't worry if you'd rather not, because we can get all three locks from a different vantage point.
To access to Paint Cage and the locks, return to the three-pronged fork in the road and then take the tree path. This leads you to a Rope. Shimmy down and use the platforms to reach higher ground, which leads you to the Paint Cage. From this high ground, which overlooks the area where you picked up the Journal entry, you can find the locks as follows:
The third lock of this Paint Cage is the most elusive, as it's hidden behind some crates. But if you wrecked all of the crates when picking up the Journal of Expedition 63, chances are you may have broken the lock without even knowing it!
- To the far west of the giant heap of Gestral parts in the clearing beneath you, twinkling on a faraway ledge and framed by some white birch-looking trees.
- To the north of the Gestral heap, hidden in a rock crevice.
- To the far east of the Gestral heap, hidden behind some crates. This is the one lock that you can inadvertently destroy if you end up blasting apart the crates after getting the Journal entry.
For your efforts, the cage will break apart and give you a Chroma Elixir Shard. With this in tow, we've grabbed all the items we can here, so retrace your steps back to the three-pronged fork in the road and take the lamppost path to a new fast travel point, Expedition Flag - Great Bell Alley.
The path to the right of the flag has a golden swirl by it, if you interact with it, you'll unlock a new Rope that you can use as a shortcut to get back to the Sanctuary Maze. But you've probably had enough of this place by now, eh? Walk towards the big bell to face the final Gestral-controlled mech.
How to beat Ultimate Sakapatate

These Gestrals seriously need to find a better way to test our their mechanical creations. | Image credit: Rock Paper Shotgun/Sandfall Interactive
Ultimate Sakapatate Weakness: Fire damage
Ultimate Sakapatate Resistance: Lightning damage
Dammit, won't these Gestrals ever give up? Ultimate Sakapatate is similar to the other Sakapatate enemies that you've fought so far, but with greatly improved firepower. Its similarities mean you'll already be familiar with the wording of many of its attack patterns, but the Ultimate Sakapatate puts its own spin on things. Beware the following:
- 'Ultimate Sakapatate attacks with its dead partner' - Two swings of Ultimate Sakapatate's mannequin on a single party member, followed by a prompt to jump. Get that jump counterattack!
- 'Ultimate Sakapatate slams the ground' - A single big ground pound that targets all party members, with a pretty lengthy windup animation.
- 'Ultimate Sakapatate takes the fight seriously and raises its shield' - This occurs when a fourth of the boss' health bar has been depleted, and is a sign that Ultimate Sakapatate will start slamming its shield and using its cannons.
- 'Ultimate Sakapatate slams its shield' - Performed as a counterattack when the shield is raised. Ultimate Sakapatate spins around and then bashes its shield into one expeditioner.
- 'Ultimate Sakapatate fires its cannon' - Performed when the shield is raised. Three shots from the cannon that target everyone. They can be parried or dodged, but the shots hit faster than you might expect, so correct timing takes practise.
- 'Ultimate Sakapatate launches some weird electric things' - Three lightning projectiles, with each flung at either one expeditioner or random expeditioners. This attack is basically the same as the projectiles that Catapult Sakapatate shot.
- 'Ultimate Sakapatate unleashes its full power' - Activated halfway through the fight. This is an attack buff that will increase the number of times that Ultimate Sakapatate uses its cannon. To avoid the extra cannon fire, your best bet is to break Ultimate Sakapatate's weak point, described below.
- 'Ultimate Sakapatate's shoulder weakspot is exposed' - Unlike other Sakapatate, Ultimate Sakapatate almost always conceals its shoulder weak point behind its shield. But if you manage to fill up its Break bar, you'll get this message as Ultimate Sakapatate staggers.
- 'Ultimate Sakapatate's shoulder weakens' - Free Aim at Ultimate Sakapatate's exposed weak point to see this.
- 'Ultimate Sakapatate's arm is broken' - Three Free Aim shots at the weak point will shatter the arm, dealing big damage and preventing future cannon use.

Maelle delivers swift justice, keeping this big fella from using that peashooter on its back. | Image credit: Rock Paper Shotgun/Sandfall Interactive
The strategies that you've developed for the other Sakapatate still work here. Set this bastard on fire, weave in Maelle's Virtuose Stance attacks or Gustave's Overcharge for building up the Break bar, and watch out for those shield counterattacks and cannon blasts. Definitely break this guy's shoulder if you can to avoid all that cannon fire!
After the boss fight finishes, don't be too quick to head to the exit. On the lefthand side of the arena is a Colour of Lumina, and to the right you can find an Energy Tiny Shard on a ledge near several Gestral statues. There's another crawl space lit by a lantern near the shard - this leads to a hidden area with the Stun Boost Pictos.
With all of these goodies in tow, we can finally get the heck out of this maze. Exit and return to the overworld map. Now's a good time to visit Camp and maybe improve your weapons and characters via the Curator. When you're ready to proceed, go north and you'll be at the Gestral Village.
Whew, that wraps up our 100% walkthrough, showcasing all of the confusing twists and turns of Ancient Sanctuary. I won't miss the place, to be honest, and I definitely won't miss all those Gestrals in their dang constructs flinging all manner of explosive gimmickery at me! Thankfully, they're our buddies now, and next time we'll delve into all that awaits our heroes in the Gestral Village. In the meantime, refer to our Expedition 33 boss list for more on all the bosses in this excellent RPG, as well as our guide to all relationships and romance in Expedition 33 if you've got a particular party member you're fancying. For those who come after!