007 First Light: The Past Never Dies walkthrough
Overview & Key Takeaways
Left reeling by the catastrophic events of 007 First Light's previous chapter, The Past Never Dies sees Bond and Greenway regroup and make tracks to Mauritania in search of 009's trail. The following chapter is arguably the most freeform in the entire game, as Bond drums up leads in the pirate city of Aleph.
Our walkthrough will guide you on finding all of the various paths through Aleph, including listing every single Opportunity in the Black Market and how to find all the collectibles along the way.
Left reeling by the catastrophic events of 007 First Light's previous chapter, The Past Never Dies sees Bond and Greenway regroup and make tracks to Mauritania in search of 009's trail. The following chapter is arguably the most freeform in the entire game, as Bond drums up leads in the pirate city of Aleph.
Our walkthrough will guide you on finding all of the various paths through Aleph, including listing every single Opportunity in the Black Market and how to find all the collectibles along the way.
In this guide:
NOTE: This walkthrough is built around a loadout containing the Laser Strap and the Phone Dart. Make sure you have both equipped in Out Of The Ashes if you don't want to miss out on any of the opportunities detailed below.
To see this content please enable targeting cookies.
Manage cookie settings
Out Of The Ashes
You'll begin this chapter with a briefing from M, who will tell Bond and Greenway they're popping off to Mauritania to continue tracking 009. After the briefing, follow the quest marker down to Q-Lab, speak to Q, get your new watch and ear piece, and then he'll teach you to use the Laser Strap and Flash Mine gadgets.

Image credit: Rock Paper Shotgun / IO Interactive
It's worth noting now that the Laser Strap is, in my humble opinion, the best gadget in the game, owing to the fact that it blasts off padlocks which lead to secret routes. From this point on, the rest of the walkthrough will revolve around a build including both the Laser Strap and Phone Dart, so if you want to be able to follow along to the letter, I'd highly recommend adding both gadgets to your loadout.
With both in your arsenal, pick up your service pistol, testing it on the range if you feel inclined, then head up the elevator to Operations.
Collectible: Niko And Tero Murto Intel

Image credit: Rock Paper Shotgun / IO Interactive
After reaching Operations, head around the right-hand side of the elevator and look for a row of drawers in the back left-hand corner of the room. On top of them, you'll find a composite sketch of the twins we fought in the previous chapter, netting the Niko and Tero Murto Intel.
Make your way to Moneypenny's pod and get your briefing. Ask any questions you like, then choose "exit to mission" when you're ready to get going.
Drive To Aleph and Arriving At Aleph
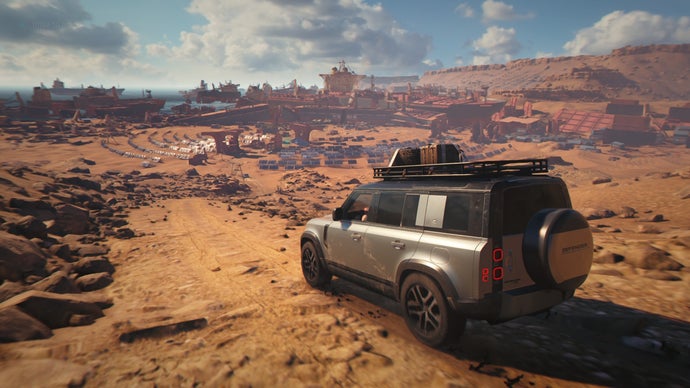
You'll regain control as Bond navigates a Land Rover through the desert, so drive it down the winding paths until you reach the gates of Aleph. Bond and Greenway will hop out and proceed through the entrance of a rusty ship, revealing a giant Black Market full of illicit goods.

Image credit: Rock Paper Shotgun / IO Interactive
During your arrival, Bond will bump into a passing local and lose Greenway in the crowd, so our first objective is to catch up with him.
Collectible: 6 Of Bells Card

Image credit: Rock Paper Shotgun / IO Interactive
Directly after bumping into the local, proceed forward towards the stall ahead, then take a left and follow the path around to a dilapidated bathroom. On the side of the bathtub in here, you'll find the 6 Of Bells Card.

Image credit: Rock Paper Shotgun / IO Interactive
Follow the path through the market until you reach a group of pirates watching some staticky fighting pit footage on a horrendously positioned TV. Walk past them, and they'll kick up a mighty fuss at you interrupting their watch party, beginning a brawl. Crack one of them into the TV to electrocute him, then beat the snot out of his pals and proceed through the door ahead.
You'll find Greenway, who will chastise you for throwing hands. Take the lecture as you follow him upstairs and over to a pair of guards. If you chat to the guards, they'll tell you that the only way to meet Bawma is by raising $100,000 to enter a private auction, and despite asking very nicely, Moneypenny refuses to spot us. Well, looks like we've gotta do a spot of fundraising.
Black Market - All Opportunities
When we regain control, venture down the steps into the heart of Aleph's Black Market. From here, our goal is to raise $100,000, but there are a good handful of ways to do it. We're going to run through each of these different methods below, so feel free to skip ahead to whichever ones interest you using our index:
When you've got your cash and are ready to move on, skip over to our entering the auction section.
The Jewel of Jahari
Requires $3,500 to complete.

Image credit: Rock Paper Shotgun / IO Interactive
Upon entering the Black Market, you'll find a stall directly on your left, where a cendor named Nemala will offer Bond a hefty sum if he can recover her lost ruby. To find the ruby, you'll need to find Jahar and win his cup game. From Nemala's stall, head down the alleyway opposite where she's set up, and Jahar will call you over to play. Give him $3,500, and he’ll let you take a crack at his infamous cup game.

Image credit: Rock Paper Shotgun / IO Interactive
To win the cup game, wait for Jahar to start moving the ruby underneath three cups. If you activate the Q Lens, you can watch the ruby move, allowing you to know exactly where it's located. Pick the correct cup (the middle one) when he asks where the ruby is, then grab it and bring it back to Nemala for $30,000.
Shooting Range
Requires $3,000 to complete.

Image credit: Rock Paper Shotgun / IO Interactive
Around the Black Market, you'll find posters for "Basim's Bullseye Bonanza," a shooting range with a whopping $30,000 prize pool. To find Basim, head over to the west side of the Black Market and look for a training dummy with the Basim's Bonanza poster attached to it. A little further down the path, you'll find Basim.
Collectible: Bawma Intel

Image credit: Rock Paper Shotgun / IO Interactive
While at Basim's shooting range, head up the path towards the umbrellas, left of Basim's stall. On a table near the turn into the alley where you find Basim, you'll find a box with a golden finger inside. Examining this gives you the Bawma Intel.

Image credit: Rock Paper Shotgun / IO Interactive
Speak to Basim and he'll let you take a crack at his shooting range for $3,000. Shoot all the targets, and you'll win your $30,000, despite how much Basim protests that you've cheated.
The Crypto Wallet
Found on the west side of the Black Market. In an alleyway, near the stand with headphones you can examine, you'll find a man on a phone chatting about a crypto wallet. Eavesdrop on him, then perform a proximity hack, following him into the east portion of the Black Market. He'll eventually enter a guarded stall and continue chatting.


When you reach the guarded stall, distract the guard with the fan in the image on the right to slip past and complete the hack. | Image credit: Rock Paper Shotgun / IO Interactive
Use the fan in the back left-hand corner of the vendor area to distract the guard at the entrance to the stall, then take cover behind the counter inside to complete the hack.
When the hack is complete, Moneypenny will send you a waypoint to the caller on the other side of the phone. Follow it to find a woman in a white suit. Distract her using a Phone Dart or by hacking a nearby charging station, then pickpocket the wallet.
Annoyingly, Moneypenny can't hack into the wallet without a little help, so we'll need to boost her signal using an antenna. Follow the waypoint that appears through to a laundromat, out the back and up into an enemy compound.


Head up this ladder, then follow the path, drop the bundle of junk on your foes, then air takedown the final straggler. | Image credit: Rock Paper Shotgun / IO Interactive
Inside, scale the ladder to your left, then follow the path to a balcony and take out the enemy stationed up here. Continue on the route until you're looking over a group of enemies watching TV. There's a bundle of junk hanging above them, so hit it with a phone dart to crush them, then use a leaping takedown to finish off the third guard.
Quickly pass up the stairs ahead before anyone comes to investigate, and bluff the three men standing up here playing snooker. Use the window of time they're not suspicious to pass up the stairs to the floor above.


Bluff these guards, sneak up this balcony and then hack the laptop while slipping out the exit. | Image credit: Rock Paper Shotgun / IO Interactive
At the top of the stairs, cross the ledge to the balcony directly ahead, taking cover behind some boxes to your right. Around the corner, you'll spot four guards and an exit door behind them. If you can muster a second bluff, use it now to bypass them easily. Otherwise, create a distraction using the laptop on the crate opposite the door, and use the time they're facing away to sneak through the exit by hugging the wall to your right.
When you're through, climb towards the antenna and kick through the wooden wall you come across. Inside is your first "Brute" enemy. Brutes are durable opponents that love spamming grab attacks. Dodge out of the way while laying in shots and throwing our new friend through wooden walls until he's out for the count, then continue through to the construction site ahead.

Image credit: Rock Paper Shotgun / IO Interactive
You'll have to descend through this construction site, using the various ledges and railings leading around the perimeter to cross to the beam in the centre.
Collectible: ATAC Legacy collectible

Image credit: Rock Paper Shotgun / IO Interactive
While climbing through this parkour segment, make sure to stop on the middle beam to find a collectible. When you reach it, look for a small walkway on the opposite end of the beam. At the end of this walkway, you'll find the ATAC Computer. Examine it for a Legacy collectible.
Once you're on the beam in the middle, climb up to the antenna and interact with its power box to hack the wallet and receive the funds. Just like that, you've got 50k stashed away in your pocket. Follow the path down, slipping through a wall and meeting some lovely locals, before ziplining back down to the Black Market.
Fight Pit
Found in the east section of the Black Market, close to where you play Jahari's cup game. Look for a hanging jawbone underneath some screens showing pit fighters. As you approach these screens, a man will gesture for you to come chat with him, telling you that the fight pit up ahead is a great way to make money.


Image credit: Rock Paper Shotgun / IO Interactive
Continue past the man, up the path and into a bar, where you'll find two of the organisers talking just in front of the fight pit. Eavesdrop to learn they're after a new fighter, then talk to the one who remains after the conversation to put yourself forward for it.
Next, head past the bar and out into the rooftop gym down the path. Talk to Yasin, who's coaching a fighter out here, and you'll be asked to beat Yasin's trainee to prove your worth. To scratch off another challenge, grab this guy and yeet him over the railing to end the fight quickly, then you'll be accepted as an entrant into the fight pit.
Collectible: Ace Of Roses Card

Image credit: Rock Paper Shotgun / IO Interactive
While in this rooftop gym, look for an archway to the left of the entrance. On top of a box inside, you'll find the Ace Of Roses Card.
Follow Yasin and drop into the pit. From here, it's time to throw some hands. You'll go through a gauntlet of opponents, with the full lineup being as follows:
- One Specialist.
- Two Specialists.
- One Brute (The Hammer).

Image credit: Rock Paper Shotgun / IO Interactive
Beat all four opponents and you'll complete the Opportunity. When you climb out of the pit, speak to Yasin to bag $60,000 in winnings.
Scorpius
This Opportunity will begin if you eavesdrop on any of the soldiers you'll find dotted around the Black Market. You'll learn that Scorpius are a shady militia conducting some sort of operation in Aleph, and you'll need to infiltrate their bases to discover what they're up to.
Follow the first waypoint to their base near the entrance to the Black Market to get started. There's a guard here watching over the entrance, but you'll find a generator behind some barrels nearby. Turn it off to lure him away, then pass into the base.
Collectible: 9 Of Acorns Card

Image credit: Rock Paper Shotgun / IO Interactive
While entering the first Scorpius base, you'll spot some fish tanks to the left of the entrance. Break open the middle one using the Laser Strap to find the 9 Of Acorns Card.


Climb on top of this box, then spin around and hop across to the ship window. | Image credit: Rock Paper Shotgun / IO Interactive
You can sneak through this base in a few different ways, but the quickest is to push towards the blue crate ahead, hop on top, and then climb up to the ship on your left.
Once you're up, immediately spin around and jump across to a ledge below the second ship's adjacent window. A guard is patrolling the room above, so wait for him to look away, before climbing through the window and passing to the crates on your right.


Hack this projector to distract the guards, then sneak in and yoink the phone. | Image credit: Rock Paper Shotgun / IO Interactive
Use the projector on a desk behind the two guards chatting in the centre of the room to distract them, then scoot over to the whiteboard behind them and grab the phone on the desk across from the whiteboard.
Now, drop back down to the base's entrance using the hole in the wall to your right and leave the compound.

You'll find the secret entrance right here. | Image credit: Rock Paper Shotgun / IO Interactive
Bond's next objective is to find Container 76. Follow the waypoint until you arrive at the entrance to the docks. There are a few ways in here, but we're gonna take the easiest one. On the right-hand side of the massive anchor in front of the dock's entrance, you'll see a gate locked with a padlock. Blast the padlock off using the Laser Strap to open a new path.
Collectible: Ober Of Acorns Card

Image credit: Rock Paper Shotgun / IO Interactive
While facing the padlocked door, look into the alley to your right, and you'll see a truck. Behind the truck is a locked hatch. Laser Strap the hatch to open it up, and inside you'll find the Ober Of Acorns Card.
Collectible: Mauritania Postcard

Image credit: Rock Paper Shotgun / IO Interactive
As soon as you head into the passage beyond the locked gate, look on the table to your left to find the Mauritania Postcard.

Image credit: Rock Paper Shotgun / IO Interactive
Pass through the secret tunnel you unlock, and you'll drop down into the shipping yard, where Bond will quickly clock Container 76. Open it up, and he’ll call the client Scorpious were in talks with; however, the militia will attempt to thwart our deal. Take cover behind the nearby crates as they storm the area, then finish them all off with your pistol before talking to the client when he appears to earn $52,000
Pickpocketing Soldiers
Less a full-scale Opportunity and more of a way to make a quick buck, you can pickpocket any soldier that, by using the Q Lens, you spot has a bundle of cash in their pocket. There are a good few of them around, so make sure to use the Phone Dart to distract them before yoinking your cash.

If your Q Lens reveals a pouch like this, you've found a soldier to pickpocket. | Image credit: Rock Paper Shotgun / IO Interactive
This can be a good way to make the buy-in fees for both the Shooting Range and the Jewel of Jahari Opportunities if you want to knock both out early.
How to complete the Show Me The Money challenge
One final thing. If you head into the challenges menu, you'll see a challenge called "Show Me The Money," which tasks you with making 140K in the market. The issue is, you'll be railroaded into leaving the area after earning 100K, barring you from completing any further Opportunities. To get around this, you'll want to get as close to 100K as possible without surpassing it, then do a big Opportunity with a large payout to hit the 140K goal.

Image credit: Rock Paper Shotgun / IO Interactive
There are several ways to accomplish just that, but the one I wound up going with on my run was:
The combination above brought my total to exactly $140,000.
Entering the auction
When you're ready to continue, return to the Black Market entrance.
Collectible: Pirate Grillz Memento

Image credit: Rock Paper Shotgun / IO Interactive
Before leaving, look for a stall directly opposite Nemala's pawn shop. A man there will be selling a set of Pirate Grillz. Speak to him, Bond will haggle, and you'll get another Memento. This can only be done after reaching the 100k fee, so you’ll have to do it right before setting off to the auction.
Make your way up to the men who asked us if we wanted to join the auction before, hand over the cash and follow them upstairs.
Infiltration
As you reach the upper floor with the guards, you'll spot a DJ in a spot of trouble. There's a challenge to complete here if you help him out, or you can just ignore him and continue along the route.
Speak to the DJ, turn on the generator, and then grab a fuse from the green box and shove it into the speaker to tick off a challenge.
Let's quickly knock the challenge off the list by speaking to the DJ. He'll need you to check the generator and the nearby speaker. Turn on the generator next to the bar, then grab a fuse from the green box to the left of the speaker and insert it to fix the setup. If you're struggling to find either component, follow the yellow wires leading from the DJ booth.
When the beats are pumping again, return to Greenway and let the soldiers take you through the compound and to the auction, then take a seat.

Image credit: Rock Paper Shotgun / IO Interactive
The following section is largely just a story beat with little wiggle room. Pick whatever you want until you reach the third bid in the round. Here, Greenway will tell you to sabotage the bidder, so use the Q Lens to hack his polygraph test.
Continue picking whatever appeals until Bond gets the option to improvise. Click it to cue a cutscene and end the segment.
Aleph's Port
When you regain control, you'll need to sneak through Aleph's Port to reach the boat 009 is hiding on. Zipline from the platform you're on into the large freighter, then slip through a crack in the wall and follow the path through to the ship on your left.
When you reach the top deck, you'll enter into a combat encounter. This one's lengthy and, as usual for 007: First Light, full of opportunities to tackle it your way. Feel free to improvise, but here's our stealth-focused route.

Image credit: Rock Paper Shotgun / IO Interactive
Descend the ladder ahead down to the floor below, then hop across to the platform in front of you. While keeping an eye on the Watcher talking to a fellow pirate near where you entered, slip around to a small passage in the back right-hand corner of the ship, following it until you reach some crates beneath a window.
Ahead, you'll spot two men talking near a PC. Wait for their conversation to end, then tamper with the fuse box to your right to bring one of them close enough for a takedown.

Hit the fusebox to distract one of these guys, then take him out, finish off his buddy and climb this ladder to the next area. | Image credit: Rock Paper Shotgun / IO Interactive
When he’s down and out, finish off the other one, then climb the ladder against the wall next to them and sneak through the door marked by the waypoint.
In the next area, take a right and head across the walkway to the ship opposite you. You'll arrive at a vantage point, spotting a guard below. Use an air takedown to finish him off.

Image credit: Rock Paper Shotgun / IO Interactive
Head down the steps from where you land, dropping to the floor through the gap in the railing ahead when you reach the bottom and pushing towards the ladder opposite you. If the nearby guards are facing your way, feel free to make a pit stop at the large box between the rail and the ladder.
Climb the ladder, then follow the path around until you reach a gap you can jump across to reach a platform where a man is sorting through boxes. Wait for the man to face away from where you'll land, then hop across, take cover behind the boxes, and execute a cover takedown.


Past this bloke sorting boxes, through a door down the path, and then laser off the padlock shown on the right to enter the back of the boat. | Image credit: Rock Paper Shotgun / IO Interactive
Now, look for a metal door on the right-hand side of the boat, and follow the platforms around to it, pushing through to another walkway. There’s another door directly ahead here that’s locked with a padlock, so laser it off then continue through to the back of the boat.
You'll step out onto a pathway with three men performing maintenance ahead. To the left of them, you'll see a route around the main path, across a gap to their left. Hop over to it and follow it around, dropping down to an area with a suspended crate above a railing and three soldiers watching over it.


Pass by the maintenance crew, then drop down and take out two birds with one stone using this massive fan. | Image credit: Rock Paper Shotgun / IO Interactive
If you take a look around the area, you'll see a large fan that can be activated by hacking. Wait for two of the three men to be standing in front of this fan, then activate it to knock them over the railing to the floor below. Take out the third soldier, then follow the route in the back right-hand corner of their patrol area.
You'll arrive at a walkway with two exits. Approach the exit on the right and turn on your Q Lens. You'll see a security camera watching the walkway ahead. Triggering this camera will blow our cover, so hack it to temporarily turn it off and pass through, then head up the stairs.


Avoid the security camera, head up the stairs, bluff the guard and escape. | Image credit: Rock Paper Shotgun / IO Interactive
Bluff the guard stationed by the exit door, then proceed through it to bring the encounter to a close.
Find 009
When you've escaped the port, continue along the route until you reach 009's boat. When you vault onto it, Greenway will inform you that it's rigged with all manner of booby traps. When you regain control, aim at the grenade at the end of the tripwire in front of you, then click the prompt to disarm it.

Interact with the grenade to disarm the tripwires. | Image credit: Rock Paper Shotgun / IO Interactive
Proceed past where the tripwire was, then squeeze through the crack between the crates on your right and disarm a second tripwire by interacting with the grenade attached to a pole on your left, then return through the crack and proceed past the now-disarmed tripwire and towards the stairs beyond it. Don't climb them! They have a tripwire blocking them that can’t be disarmed.
Instead, disarm the trap to your right, then disarm the crossed trip wires to your right again. When you're past them, vault the crate on your left and pass up the stairs ahead.

Image credit: Rock Paper Shotgun / IO Interactive
At the top, Bond will realise that 009 stepped up his game while trapping the top deck, adding laser trip wires. We can only see these trip wires by using nearby items to illuminate the sensors. You'll see one method of highlighting these invisible threats when you reach the deck, as a falling plant pot breaks and the rising dust illuminates the lasers.
Collectible: Banner Of Shields Card

Image credit: Rock Paper Shotgun / IO Interactive
When you regain control at the top of the stairs, spin around, and you'll notice a tripwire in front of a seating area. Disarm the tripwire and look next to the chess table beyond it to find the Banner Of Shields card.

Image credit: Rock Paper Shotgun / IO Interactive
The easiest way to keep track of the laser wires is to use the sprinklers dotted around this second deck. When you regain control, circle around the plant pot ahead, and you'll find a tap to turn on the first set of sprinklers, illuminating a trip wire on your left. Crouch under it to reach the other side.

Image credit: Rock Paper Shotgun / IO Interactive
Once you're under the wire, you'll see another tap in front of a planter. Turn it on to reveal two tripwires on either side of the planter. Vault the planter, then bank right. Another tripwire has been exposed up ahead, so vault over the blue tarp covering the railing beside you and use the ledges on the side of the boat to reach a second blue tarp. Vault back over to cross by safely.
Activate the tap to your left when you land, revealing a moving tripwire blocking the path forward. Wait for the laser to angle up, then crouch-walk under it and cross into the section on your right. You'll run into another moving tripwire, this time swinging back and forth above a planter.


Image credit: Rock Paper Shotgun / IO Interactive
Wait for it to be as far right or left as possible, then vault over the centre of the planter. Activate one final tap to your left, where you'll see a tripwire in the shape of an X blocking the path over to Greenway. Wait for it to reach the very top of its trajectory, then crouch-walk through the bottom of the X. Now you’re done evading lasers, follow Greenway into the cabin.
Examine The Crime Scene
After a brief cutscene, we'll have to examine a grisly crime scene. Investigate any items you can find in the general area before following Greenway into the very back room, where you'll spot a giant conspiracy board.
Collectible: John Greenway Intel

Image credit: Rock Paper Shotgun / IO Interactive
When entering the room with the conspiracy board, look for a display case on your immediate left. Beside it, you'll be able to examine a picture of Greenway, adding the John Greenway Intel to your dossier.

Zoom in on this logo when Bond uses the telescope to progress the scene. | Image credit: Rock Paper Shotgun / IO Interactive
Examine the conspiracy board, then check out the photo on the floor when Greenway prompts you. Flip it to find a shipping logo. Bond will remark that 009’s trying to tell us something, so head to the telescope, look for a ship with the same logo and zoom in on it to cue another cutscene.
Leaving Aleph
The following cinematic has a few interactive elements, but it's largely just a case of hitting some button prompts and making some dialogue decisions. Opt for what appeals to you, and the story will eventually return the reins as you're walked to your Land Rover.
Collectible: Crocodile Tooth

Image credit: Rock Paper Shotgun / IO Interactive
When you reach your Land Rover, look on top of the crates to the right of the car to find the Crocodile Tooth Memento.
Hop in and follow the waypoint, driving through the desert. The only thing to really note here is that you can unlock the Wheels Up challenge by picking up some speed when driving through the freighter along the route. As you're leaving the freighter, make sure to floor it and get a little bit of air time to complete the challenge.
.jpg?width=2048&height=2048&fit=bounds&quality=85&format=jpg&auto=webp)
Image credit: Rock Paper Shotgun / IO Interactive
Eventually, Bond and Greenway will encounter a bridge they need to lower. Climb the pipes on the right and left-hand sides of the bridge, activating the two mechanisms you find on the walkways above. When they’re both activated, the bridge will lower, so return to the car to cue a cutscene.
Find A Way Inside The Shipwreck
When you regain control, you'll be outside the shipwreck. Approach the front of it with Greenway, and he'll comment on some nearby symbols only viewable through the Q Lens that seem to be plotting a path to something important.

Image credit: Rock Paper Shotgun / IO Interactive
Remove the wooden sheet in front of the entrance, enter the boat, then approach the raised bridge at the end of the walkway beyond.
Bond needs to lower this for Greenway, so take a left and hop across to a sealed door, opening it and heading inside. Disarm the trap to your right on the other side, then kick open a hole in the freighter wall and follow the path of ledges until you can slip through a crack in the wall.

Image credit: Rock Paper Shotgun / IO Interactive
When you emerge, bank left, and Bond will break the walkway he steps on, creating a jumpable gap. Hop down to a chain lift and use it to ascend to a zipline, then cross over to the other side of the boat. Head through the door on your right when you land, and you'll spot the raised bridge ahead. A tripwire is blocking your path to it, so use the ledge on your right to circle around the tripwire and back to the path.
Collectible: 6 Of Shields Card

Image credit: Rock Paper Shotgun / IO Interactive
When approaching the raised bridge, look on top of the oil canisters to your right. You'll spot the 6 Of Shields Card. Grab it to find the final collectible in this chapter.
Climb the pipe to the left of the raised bridge and use the release on the platform it leads to, dropping the bridge. With Greenway now across, you can backtrack to a locked door further up the path and, with Greenway's help, force it open, accessing 009's secret stash.

Image credit: Rock Paper Shotgun / IO Interactive
Take a peek around until you come across a briefcase, cueing a cutscene that ends with armed soldiers raiding the boat.
Escape The Wreck
When you regain control, it's time to click some heads. You'll want to click them quickly too, as you'll immediately regain control amidst heavy gunfire. The cover in the section of the ship you start in is relatively flimsy, so keep moving, grabbing ammo and blowing up explosives while eviscerating any angry gunmen in the room, then push through into the area beyond.


Image credit: Rock Paper Shotgun / IO Interactive
The next room can be a little bit tricky, considering you can easily get flanked and the room’s setup has plenty of blind spots. Position yourself so you can see into the room in the centre of the area and around the corner pathway circling around it, then pick off any enemies that approach through either.
Once they're clear, continue along the path, taking out the group of enemies blocking the stairs and proceeding up to a sniper perch.

Image credit: Rock Paper Shotgun / IO Interactive
Stealth takedown the Sniper you’ll spot as you enter the perch, then grab his rifle and look down to the outpost below. You'll have the element of surprise here (and a very powerful rifle to boot). You'll also be introduced to enemy snipers for the first time, who can do huge damage even if they are slow to fire.
Use the rifle's power to quickly take out some helmeted foes, considering it can one-shot them, then, once you're out of sniper ammo, drop down and use your pistol to clear out the rest of the squad.
Push up and through to another combat area, where you'll face off against more goons at the back of the ship, then proceed through to a passage with a wall you can kick down, leading to a narrow channel that acts as the final stretch of the fight.

Image credit: Rock Paper Shotgun / IO Interactive
This section can be a little bit dicey to have a shootout in, considering a lot of the immediate cover in the centre of each passage is flimsy and will quickly be eviscerated by enemy fire. Make sure to use the girders and supports of the boat itself to avoid taking damage, all the while advancing, finding more ammo, and using explosives to your advantage.
You'll eventually reach a clearing where Greenway will make the save, picking you up and driving you right into a cutscene.
Survive The Ambush

Image credit: Rock Paper Shotgun / IO Interactive
When we regain control, you’ll have to fight back an ambush, as an endless swarm of soldiers advance on your position. As you might've guessed, this is a scripted setpiece, so just shoot as many soldiers as you can, grabbing Greenway's gun when you're out of ammo, and you'll eventually cue a cutscene that brings the mission to a close.
With that, our time in Mauritania has come to a close. Bond and Greenway have stumbled upon a real corker of a conspiracy, and as we'll soon find out in our next chapter, Uninvited, one that a bunch of shady folks aren't all too happy about them dredging up. Be sure to continue following our walkthrough for help uncovering more, but in the meantime, if you need to catch up on collectibles, be sure to check out our guides on finding all Intel, all Cards, all Postcards, all Mementos and all Legacy items. If that's not really your jam though, you can find our full list of 007 First Light guides here.