007 First Light: A New Home walkthrough
Overview & Key Takeaways
With Bond passing his fundamentals in the Needle's Eye chapter of 007 First Light, our next mission will have us moving into a swanky new apartment with our spy buddies. However, nothing in this life comes for free, and Bond's price is having to do the mother of all obstacle courses while evading and punching very angry S.A.S soldiers. He really should've read the tenancy agreement.
With Bond passing his fundamentals in the Needle's Eye chapter of 007 First Light, our next mission will have us moving into a swanky new apartment with our spy buddies. However, nothing in this life comes for free, and Bond's price is having to do the mother of all obstacle courses while evading and punching very angry S.A.S soldiers. He really should've read the tenancy agreement.
Our walkthrough will guide you through this capture-the-flag mission, as well as the midnight excursion we'll have to tackle directly after it.
In this guide:
To see this content please enable targeting cookies.
Manage cookie settings
The Heart Of The Matter
Following his scrap with Monroe at the tail-end of the previous chapter, Bond has officially passed basic training and now must return to HQ to discuss his performance. After a talk with M, she'll take us down to the basement. Play along with the segment, and it'll eventually conclude in us paying a visit to Q's Lab.

Image credit: Rock Paper Shotgun / IO Interactive
When you arrive, you'll be given two tasks: Speak to Q and speak to Selina Tan. However, definitely don't beeline to both tasks. There's a bunch of cool little doo-dads around the area that are worth looking at, the flame-shooting motorbike being a highlight.
Collectible: Selina Tan Intel

Image credit: Rock Paper Shotgun / IO Interactive
After first entering Q's Lab, head to the back right-hand corner of the central area. Near a glass room containing a blue Range Rover, you'll spot two scientists chatting by a photocopier. Behind the photocopier, you'll find a chest of drawers with a flier on top of it. View the flier to get the intel.
When you're ready, go and find Q in the centre of the lab. He's marked on your map. He'll let you pick a Q Watch and then teach you how to use it. You should definitely get to grips with it too, as it gives you the Q Lens, which allows you to use your gadgets, highlight nearby enemies and a bunch of other useful abilities. You can open the Q Lens by hitting LB / L1 / ALT.
Collectible: 00 Recruits Intel

Image credit: Rock Paper Shotgun / IO Interactive
After you've finished the Q Lens tutorial, return to where you first found Q. On a monitor on the desk just behind where he was originally standing, you'll find the 00 Recruits Intel collectible.
When you've finished chatting with Q, you can find Selina Tan down some steps to your left. Speak to her, then return to Moneypenny to begin A New Home.
Home
The mission will begin with a trip to Bond's fancy new apartment. All we really have to do here is chat with Cressida and pick up some keys. But, much like in Q’s Lab, feel free to explore.
Collectible: Lennox Monroe Intel

Image credit: Rock Paper Shotgun / IO Interactive
If you head to the sitting room at the back of the flat where you find Monroe, you’ll be able to spot a family photo on a chest of drawers on the right-hand side of the room. Examine it to get the Lennox Monroe Intel.

Image credit: Rock Paper Shotgun / IO Interactive
When you’re ready, head to Cressida's bedroom at the very end of the hallway. Speak to her and then pick up the bedroom key from her desk.
Collectible: Cressida Bright Intel

Image credit: Rock Paper Shotgun / IO Interactive
When inside Cressida's bedroom, you can find a box for a dress on the bed. Examine the box to add the Cressida Bright Intel to your collectibles.
When you have the bedroom key, head to the door across the hallway, unlock it, and then put your bags down on the bed. Go chat with Cressida to pick some artwork before speaking with her again to segue back to Malta.
Advanced Training
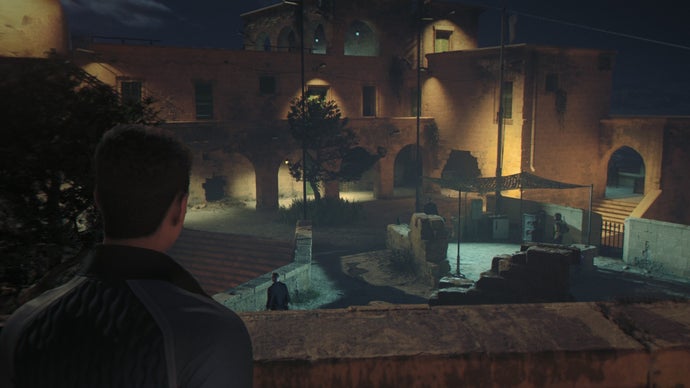
When we arrive in Malta, we'll be tasked with our toughest training exercise yet: liberating a flag located deep within a staged enemy compound. Truthfully, there's a tonne of ways you can approach this task, and if you want some help exploring all of the alternate paths, you should definitely check out our New Home challenges guide. For now, we're going to give you our preferred route.
Collectible: Under Of Acorns Card

Image credit: Rock Paper Shotgun / IO Interactive
As soon as you spawn, head towards the archway leading down to the training grounds, but instead of heading through, take a right up the stairs next to it. Push ahead to the wall at the end of the path, and you’ll find the Under Of Acorns Card resting on top of it. Grab it, then return to the archway.
When you're ready to start, head through the arch in front of you and follow the path down until you reach a shut gate. Open the Q Lens and hack the gate open, then head through it to begin the challenge. After a short animation showing you the compound, you'll regain control.
In At The Deep End
When you’re ready, take a right and duck into the tall grass nearby. Directly next to the stairs along the path here, you'll see an open doorway with a soldier smoking a cigarette. Aim the Q Lens at the target above him and hack it to make it spring down, knocking him out, then vault through the window next to him and hide behind the pile of wooden sheets ahead.


You can hack these targets to take both of the first two guards out quietly. | Image credit: Rock Paper Shotgun / IO Interactive
You'll spot a second soldier guarding the exit on the opposite side of the room. Wait for him to turn and spot the first guard you took down, then activate your Q Lens and look for another target you can hack along his path.
Aim at it and wait. He'll slowly cross the room towards the body, so when he lines up with the target, hack it to knock him down as well. Make sure to grab any batteries you can find close by, then cross to the ladder on the other side of the room and climb to the second floor.
When you reach the top of the ladder, you'll see a vaultable wall and a soldier leaning against it. Execute a cover takedown on the soldier, then vault the wall and go right, leaping across the gap ahead to reach the firing range.


Back-to-back cover takedowns will get you out of the firing range and closer to your goal. | Image credit: Rock Paper Shotgun / IO Interactive
Pass through the firing range and you'll enter a room with two guards: one leaning against the boxes directly in front of you, and another leaning against some boxes on the right-hand side of the room. This can be a little bit fiddly, but you'll want to hack the raised target in the doorway ahead to lure in the guard on the right. When he's in the doorway, staring at the target, execute a cover takedown on the guard in front of you, then hop over and bring the second down along with him.
When both are out for the count, leave the firing range, and you'll arrive on a rampart. Take cover behind the set of wooden sheets opposite the firing range doorway. On top of them, you'll see an SAS radio. Turn it on to lure the guard watching over the path ahead, then cover-takedown him to clear the route.
Slowly push into the patch of tall grass lining the stone wall on the left-hand side of the path, and you'll spot a guard keeping his eyes on the path before us. We'll need to remove him, so hack the speaker on the wall to his right to force him to stand underneath a precarious bundle of hanging ammo crates.

Activate this crank to drop the ammo crates on top of the distracted guard. | Image credit: Rock Paper Shotgun / IO Interactive
On the wall to your left, you'll see a crank. When the soldier is directly beneath the ammo crates, use the crank to drop it on his head. Don't move immediately, though. The nearby soldiers will come to investigate. Wait for them to conclude that it must have been the wind, that heathenous villain, and then return to their posts.
Make sure the patrolling guard in the building to your right isn't looking out the window, then proceed up the path and climb up the stairs to the left of where the soldier once stood. You'll see another guard up ahead, roaming around the small area near the flag.

Hack this speaker to distract him, then sneak past for the victory. | Image credit: Rock Paper Shotgun / IO Interactive
Hack the speaker on the stone wall behind him to lure him away, then round the corner, climb the ladder and approach the flag to end the trial.
Polygraph Lesson & False Positive
We're back to the montages now, as we cut between Bond's various training endeavours. Included is a polygraph test, where you can opt to be truthful or lie in response to Greenway's questions.

Image credit: Rock Paper Shotgun / IO Interactive
You can pick either, but it's worth noting that the Spinning A Yarn challenge can be completed if you opt to lie every time. Might as well knock that out while you're here.
A few scenes later, you'll do a similar task, this time asking Cressida questions. Pick whichever ones you like, then we'll montage through to the next segment.
Q Phone
We'll pick up in Q's lab, where we'll learn about our latest gadget, the Q Phone. Pick up the phone and the chemicals from the workbench next to Q, then stand in the blue circle at the back of the room.

Image credit: Rock Paper Shotgun / IO Interactive
When your opponent stands in the red square, hit LB + B / L1 + CIRCLE / ALT + 4 to pull up your Q Lens and then fire a dart from the Q Phone. These darts will make your foe queasy, forcing enemies to evacuate an area to throw up, as you can see from our fellow trainee, who flees to the nearest bin. It also counts as a distraction, allowing you to pickpocket your target.
Instinct

Image credit: Rock Paper Shotgun / IO Interactive
Another cut, and now we're in the shooting range. After a quick cutscene, Bond will pick up a gun and be asked to shoot a rotating target spinning at breakneck speed. Aim, then hit RB / E to activate focus (way lamer name than bullet time), then shoot the target. Do it one more time and we're outta here.
Do The Unexpected
With that, the montage will end, as Bond, Cressida and Monroe decide to "do the unexpected" and loot tomorrow's flag early. Let's get these lazy sods a day off. When you regain control, Cressida will distract the guards, so follow Monroe through the archway behind where they're standing.
Going In
You'll arrive at a door, but Monroe will point out two guards inside. Head around the right-hand side of the building to find a hole in the wall.

Image credit: Rock Paper Shotgun / IO Interactive
Here, the game will teach you the Lure ability. When Bond has 3 focus points, you can hit V / Up on the D-PAD to bait a nearby guard towards you, letting you set up easy takedowns from behind cover.
Wait for the guard to approach, then perform a takedown. At the same time, Monroe will knock out the other guard. Follow him out of the room, then take a right and continue down the route. Bond will eventually run into a guard, cueing another tutorial: Bluffing.

Image credit: Rock Paper Shotgun / IO Interactive
By hitting B / CIRCLE / Q while having 3 focus, Bond can bluff guards, sweet-talking his way into creating a brief window where the bluffed target (and any guards in the immediate vicinity) will turn a blind eye to you. Honestly, this is probably the most useful ability in the game, so make sure to keep an eye on your focus meter going forward.
Bluff and bypass the guard, then continue to the centre of the compound. It's time to begin your search for the flag.
Search The Compound
Our general goal for this section is to cross to the building on the opposite side of the compound, get inside, and then climb to the very top to find the flag. However, there are a lot of patrolling SAS officers in our path.
Much like getting the flag in the official training assignment, you can really go hog wild with this one and try a range of unique routes. Feel free to hop over to our A New Home challenges guide for advice on exploring as many as possible. For now, here's our recommended path.
When you're ready, turn to your right and look off the edge of the rampart you're standing on. You'll spot a soldier below you that you can eliminate using a leaping takedown.


Takedown the guard below you, then bluff your way through the centre of the compound. | Image credit: Rock Paper Shotgun / IO Interactive
Take him down, head through the door to his left and cross through the centre of the compound. When you reach the soldiers watching the football in the centre of the compound, bluff them, then use the time they’re unaware to walk past them towards the front of the compound's central building.
Collectible: 7 Of Roses Card

Image credit: Rock Paper Shotgun / IO Interactive
Before you leave the area, we can find a Card nearby. Head back towards the soldiers watching TV and grab the Compound Basement Key from the wall behind the yellow generator. Now, return to the central building and look for an open doorway on your right, near the stairs leading to the first floor.

Image credit: Rock Paper Shotgun / IO Interactive
Head through this door, down the stairs to your left, and look for a green side door. You can open this with the Compound Basement Key. Continue down the stairs and through the first door on your left. There's a group of soldiers in here, so take them out or bluff them. Either way, you'll find the Card on the wooden pallets in the back right-hand corner. Once you have it, return to the front of the central building.
Look for the stairs on the lower floor of the compound. There's a window to the right of them, just further down the path. Hop through this window, then climb up the pipe to the right of the platform you land on, scaling it to a ledge running beneath a second-floor window.


Out the lower-floor window, up the pipe, through the second-floor window, then directly ahead to zap this poor bastard. | Image credit: Rock Paper Shotgun / IO Interactive
Wait for the soldier on the second floor to look out the window, then leap through to perform an instant takedown. Push through this room and stop at the arch leading to the next one. There's a man on a phone ahead, standing in a puddle. If you hit the fusebox to the left of the archway, you can electrocute him, knocking him out.
When he's been zapped, enter and look for a door to your left. It'll take you out onto a balcony. Proceed up the balcony towards the flight of stairs ahead, then climb them to reach the compound's rooftop.

Image credit: Rock Paper Shotgun / IO Interactive
There are three soldiers up here, chatting amongst themselves. If you're quick enough, you can cross the rooftop before they spot you, heading for the blue door on the other side, where we'll find our objective. Otherwise, bluff your way through before entering the door and grabbing the flag inside.
Get Out
With the flag claimed, it's time to make our grand escape. When you regain control, the guards will be on us. Quickly hop down through the gap in the wall on your right to reach a path below, then cross over the ledge running around the second floor of the building until you reach the opposite side.

Image credit: Rock Paper Shotgun / IO Interactive
Drop down from the ledge onto the raised stone walkway at the back of the central building, then, after making sure no guards are watching, drop down to the path skirting around the side of the building. Head towards the docks at the bottom of the stairs at the back of the Compound, using the tall grass to sneak down undetected.
A guard will be waiting at the bottom of the stairs, so give him a second to walk away, then head around to the dock. Two guards are waiting here. One will mostly look out towards the ocean, while the other will roam the central path back and forth. Walk towards the guard roaming the central path and, as he gets within range to spot you, hit him with Phone Dart. While the effects of the dart are active, he’ll ignore you.

Image credit: Rock Paper Shotgun / IO Interactive
Slip past and sneak towards Cressida's boat, which is docked on the left-hand side of the pier. When you arrive, James will hop on board, ending the segment.
A Narrow Escape

Image credit: Rock Paper Shotgun / IO Interactive
A brief transition later and we'll be piloting a boat to Monroe's rescue. Simply drive towards the mission indicator, swerving around to a beach and cueing a cutscene that will bring the mission to a close.
With that, you've completed another step in Bond's training. We'll finish the lot in his next adventure, which sees Bond completing a mission in a London nightclub filled with opportunities to exploit. Before getting stuck into this next mission, why not catch up on missing collectibles using our Postcard, Memento and Legacy guides? Maybe you're more leaning towards dusting off every challenge, in which case we have guides for completing all Against The Odds challenges and All The Time In The World challenges. If none of those appeal though, you can always find a full list of our 007: First Light guides here.