Pragmata Walkthrough: Sectors 5 and 6 (Central Port)
Overview & Key Takeaways
Looking for a guide to Pragmata's Sectors 5 and 6? The final hours of Pragmata see Hugh on a mission to save Diana from the infectious goo that's slowly destroying her robot body. This will lead our spacefaring duo into Experimental Pragmatics, a brief stopover where revelations about Diana's origins are revealed. Then, we'll head to the Central Port to put a stop to IDUS once and for all.
Looking for a guide to Pragmata's Sectors 5 and 6? The final hours of Pragmata see Hugh on a mission to save Diana from the infectious goo that's slowly destroying her robot body. This will lead our spacefaring duo into Experimental Pragmatics, a brief stopover where revelations about Diana's origins are revealed. Then, we'll head to the Central Port to put a stop to IDUS once and for all.
Hugh and Diana might be near the end of their story, but new abilities are still going to come your way in the eleventh hour in the form of Diana's super powerful Deletion Protocol. Plus, there are some wicked boss battles awaiting you as the Lunafilament truly hits the fan in the Cradle. This guide offers up a full walkthrough for Sectors 5 and 6 of Pragmata, covering the entirety of Experimental Pragmatics and the Central Port.
Keep in mind that major spoilers follow!
In this guide:
Experimental Pragmatics
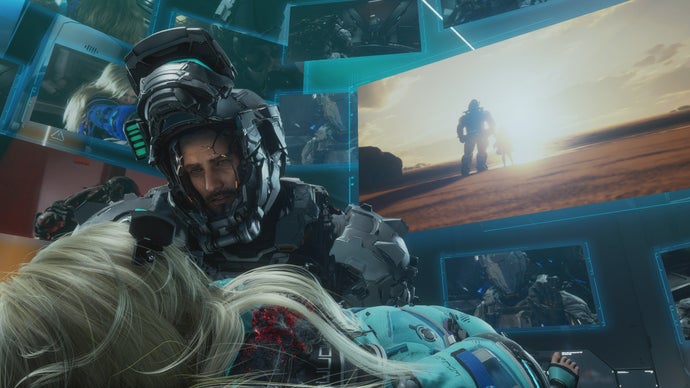
This section begins with Hugh carrying an injured Diana back to the Shelter. Cabin guides them to Experimental Pragmatics, part of the Cradle designed for healing Pragmata. This might be Sector 5, but it's a linear affair where your main focus is repairing Diana and learning more about why she was created. Consider it a much-needed break in the game's action.

Poor girl...we'll get ya patched up quick. | Image credit: Rock Paper Shotgun/Capcom
First things first - Hugh takes Diana to a repair table but needs more juice to bring her back to full potential. Pick up the weapons and Data Shard in the area, then enter the door and keep moving up the stairs. More weapons and Data Shards await you, along with Walkers who have purple corrupted nodes, making Diana's hacking work harder.
After a while, you'll encounter the goop on the ground that you saw in the Lunum Mines. These dead filaments will mess up Diana's hacking further, so run through them or jump over them as best you can.
Along the way, you'll notice several holographic conversations and files related to Dr. Higgins, the scientist who made Diana and Eight. Watch and read all of these carefully to learn the truths behind your robot daughter's existence, as well as the human child who was the reason for her birth.

Some tearjerker stuff, this is. | Image credit: Rock Paper Shotgun/Capcom
Your brief excursion will take you on two lifts and there will be a bunch of enemies to contend with, but nothing too difficult. Eventually you'll enter a hangar-style room full of some heavy duty bots that look far too deadly for a lunar printing facility. You'll face these Sentinels pretty soon - keep moving to unlock more conversations about Diana's genesis. She doesn't take this news all too well, and keeps talking about how she's "useless," but we know better, don't we.
Finally you'll grab the Reactor you need and Diana will undergo her fixup process, but then one of those heavy duty bots you saw previously will come at you, all wreathed in sparkly evil space gunk.

The Sentinel is a viciously neat design. Would be darn cool to build as gunpla. | Image credit: Rock Paper Shotgun/Capcom
Hugh will need to fight this hunk of bolts on his own, but really all you need to do is survive until Diana wakes up. She'll activate her Deletion Protocol, an upgraded version of the Overdrive Protocol that cleanses dead filaments and shrinks the hacking matrix to its smallest size.
With this, you can now Cleanse those red Lunafilament blockages that your Lim Eraser wasn't able to handle. It's a little more complicated than simply using your Lim Eraser, though - you'll need to hold LB (on a gamepad) or E (on a keyboard) to charge up Cleanse, and then release it to target the blockage in front of you. The meter will take some time to reset when you're done.
You'll be prompted to test your Cleanse ability a few times on the way back to the Shelter, after which it's time to suit up and get ready to tackle the Central Port.
Port Entrance
Your objective is to reach Eight, who's somewhere in the core of the Central Port. From the entrance, enter the door on your left, Cleanse the dead filament blockages in front of you, and keep moving until you receive a tooltip on how to Cleanse enemies. This is going to become a very handy element of your toolkit moving forward in this final stretch of Pragmata, so pay attention and try it out on the group of bots that come your way.
When the bots are gone, head to the nearest control panel, which activates a moving rig that will take you towards the Central Port. As Diana wonders why Eight is being such a meanie, more bots spawn. You know what to do!
When you're off the rig, a screen nearby reveals that cargo heading to Earth is packed up and sent off at the Central Port. The Cargo Terminal Station Escape Hatch is here, so unlock it. You'll also notice an REM taunting you from a window by the Escape Hatch; to reach it, do a floaty jump from the stack of boxes by the Escape Hatch and land into the higher room that's otherwise inaccessible. Inside is the Parasol. A Crusher MK-II will ambush you as you try to leave with it, so beware.

From the Escape Hatch, do a jump and veer left to make it to the Parasol room. | Image credit: Rock Paper Shotgun/Capcom
After getting the REM, walk down the stairs and immediately angle yourself right by the railing to spot a hard-to-sight Mini Cabin Figure, the first of this level, perched on a ledge. You can also jump to the platform beneath it to get a better angle on your shot.

All of the Mini Cabin Figures in this Sector are very easy to miss. Jump off the railing and look upwards to find this one. | Image credit: Rock Paper Shotgun/Capcom
After you've picked that fella up, walk down to those pools of brackish dead filament. Several foes drenched in the stuff whill come at you, prompting a message about using Cleanse on corrupted bots. Doing this will remove the troublesome purple nodes on their hacking matrices.
When they're dead, use your Scan to get a grip on the area. There's an invisible wall just to the left of the stairs; an invisible Creeper is waiting here to snatch you when you enter, so beware. Inside is a blue chest with the Untapped Potential Mod, which makes Hacking Nodes increase attack power by 10% and reduce damage taken by 10% (but only for 15 seconds).
There are some Upgrade Components nearby; be sure to get them before using the Unit Printer and entering the yellow security zone. Multiple corrupted bots will charge at you, and the worst one is an amalgamated version of an Executor who will lunge at you with its head. Cleanse it to showcase its weak spot - a huge yellow-orange filament growth that results in major damage if you successfully shoot it.

Never before have I seen such an obvious weak point! Show this Executor that it'll do no good to mutate in all that filament. | Image credit: Rock Paper Shotgun/Capcom
When the fight's done, enter the next room to unlock a hologram of Eight taking about a giant chain reaction. It appears as if she's gone full-on mustache-twirling baddie and intends to dump tonnes of dead Lunafilements on Earth, presumably terraforming it in a way that will cause everyone to die. And this robot kid's only like eight years old, jeez.
Progress onwards through the next rooms until you come to a platform overlooking a giant mass of dead Lunafilament circling a central tower. Interact with the computer to make the platform go down, which will give you a killer view of the mess that Eight has created.

Spooky. We'd better stop Eight before she makes the Earth look like this. | Image credit: Rock Paper Shotgun/Capcom
Getting to the Orbital Elevator
You must now reach the Orbital Elevator, but it's not an easy path. Go down, grab the Upgrade Component on the way, and enter the door to pick up a Red Gate key, some Training Data, and unlock the Research Sector Gate Station Escape Hatch.
Through the next door, a wave of dead filaments will shoot up and block your path. Jump over the platforms to circle around, dodging laser targeting from the flying bots along the way. There's one chest with a Cabin Coin here and an Upgrade Component to pick up before you hop onto the ground and need to face a new wave of bots, including another one of those lumbering corrupted Executors.
When you've killed the Executor, a fresh enemy emerges - the Anomaly. These are the most monsterous of all of Pragmata's foes, and they boast a hacking matrix full of corrupted nodes. Regularly use Diana's Cleanse to clear the matrix and target the canisters on its back, which will expand into the yellow-orange crystal weak spots that you're quickly becoming familiar with.

Meet the Anomaly, definitely the most "Resident Evil" robot in this game. | Image credit: Rock Paper Shotgun/Capcom
In the next room, you'll see dead filaments everywhere you look, along with the Research Sector Lobby Station Escape Hatch. Climb up the left set of stairs to read a report on the Cradle logistics network and open the door marked "Sec .06". Within this room is a Mini Cabin Figure perched near the ceiling atop an orange pipe.

Another very elusive Mini Cabin Figure! I missed this guy the first time around and had to double back for him later. | Image credit: Rock Paper Shotgun/Capcom
If you head outside of the room with the Mini Cabin Figure and loop around, you'll come across two sets of lasers blocking your path. There are corrupted bots to annoy you here; take them out and search for the control panels to hack the lasers. One of them is obviously located behind the lasers themselves, which the other is on the ceiling. For your effort, you'll get a Data Shard, a Cabin Coin, and the Heat Transfer mod, which makes enemy heat gauges fill 10% faster.
Return to the Escape Hatch room and take the right set of stairs. Another Data Shard and an Upgrade Component await you on this route, along with a hallway filled with rows of lasers that will move towards you, requiring some well-timed jumps. A Red Zone awaits in the next hallway - if you decide to tackle it, you'll need to survive against several flying enemies on a small, crowded platform. The biggest pain in the butt here is a very hardy Air Raider who took absolutely forever for me to kill.
Following the Red Zone, the next room is filled with filament wrapped around some of those NYC taxicabs from Sector 2, along with a few more robots to kill. On ground level, turn your Scan on and note how there's an REM very close - it's hidden behind one of those fake hologram doors, and you'll get the Water Gun if you look carefully.

Go through this fake door to get the Water Gun. Aww yeah, finally Diana can start packing some heat back at the Shelter. | Image credit: Rock Paper Shotgun/Capcom
You can also Cleanse two paths on the ground level. One leads into a dark bunker where spider bots, Crushers, and a corrupted Executor will try to kill you. A blue chest is here with a Mod that is literally named Cursed. (It increases weapon and hacking damage by 20%, but reduces HP by 50% - good if you like a challenge, I suppose.
The other path you can Cleanse takes you to a hackable door that turns off lasers leading to the upper level. Go up there and enter the door to find a chest with two Upgrade Components and another holographic conversation with Eight giving IDUS orders to kill everyone.
A yellow security zone is beyond the hologram. Lasers block off all exits, and you'll face Lancers, Walkers, a Creeper, and several corrupted bots before you can leave. Through the next door, you'll find a pathway leading down to a chest with Pure Lunum and a large blockage that you can Cleanse. Doing so will get rid of all of the filament outside that was blocking your route to the Orbital Elevator.

Farewell, all that gunk that was previously in my way. | Image credit: Rock Paper Shotgun/Capcom
Follow your Scan objective and retrace your steps back outside to reach a hallway that leads down into a room with two terminals that need to be unlocked and the Connect Center Station Escape Hatch. There's also a door here that leads to a Red Zone.
It's up to you which terminal you want to unlock first, but I started with the left door, which takes us into a room with lots and lots of yellow signs on the floor. Remember the Lim Recycler from Sector 2? Yeah, time to use that ol' chestnut again. A bevy of bots will appear, and if you use your old tactics of setting up a decoy or kiting them around the arena, you can zap them all into oblivion at once.
After killing the mobs and watching the hologram in the next room showing Cradle workers getting attacked by dead filament gunk, go up the stairs, get the Upgrade Component, and Cleanse the next layer of dead filaments. There's a room here with 700 Lunafilaments and a Cabin Coin, and up the stairs lies a tablet where you can read some confidential intel hinting that Daisy (the daughter of Dr. Higgins who Diana's design was based off of, if you haven't been following along) died due to foul play. Spicy stuff.
The room opposite is full of lasers in all manner of zig-zag directions. Jumping over them isn't too hard, but then two corrupted Walkers and an Executor will come at you. Take 'em out and hack the control panel to turn off the lasers and unlock the first terminal.

What's up with all these lasers? What is this, the 1999 movie Entrapment, starring Sean Connery and Catherine Zeta-Jones?! | Image credit: Rock Paper Shotgun/Capcom
Head back to the Connect Center Station Escape Hatch room and go into the opposite door. You'll end up in a room split up into several platforms floating atop a pool of dead filament. A few enemies will rise from the gunk, and there's also another door that you need to open here - but it requires hacking five control panels. I know what you're thinking - "Oh god, not another one of these 'hack X number of things to open Y' puzzles" - but this one's not too bad, as the panels are hidden nearby.
Carefully sweep the room for these five panels, and refer to the descriptions below these screenshots for more on their locations.
- The first panel's right next to the locked door.
- The second's on the ceiling above one of the platforms overlooking the locked door.
- The third's behind a Lunafilament layer that you can use your Lim Eraser on.
- The fourth is within a large crack in the wall.
- The fifth is in a dark section of the room nestled away to the left of the entrance.
After hacking all of the panels, enter through the door to find the Sandcastle REM. Then go up the stairs, grab a new weapon at the Unit Printer, and enter the next security zone for a bot fight. This one sees you against a Defender, plus the usual array of corrupted bots. When they're dead, hack the wall controls to open the second terminal you needed. Grab the Pure Lunum and head back to the lobby - now that both terminals have been unlocked, you can finally progress through the middle door - but it's a good idea to rest up at the Shelter first, as a mini-boss is waiting for you.
Sentinel boss fight
The Sentinel who you briefly tangoed with back when Diana was still out for the count is back, and this time there's no holding back. This fella's a heckuva fighter with two swift blades that'll slice and dice you good if you don't get one of the way and dodge those charge attacks.

The Sentinel returns for round two. Watch out for those swords. | Image credit: Rock Paper Shotgun/Capcom
Use the same tactics that have worked well for other enemies in this Sector so far - stay close, Cleanse to clear up all of the corruption on that hacking matrix, and then blast away. I was able to do plenty of damage with a steady onslaught of Homing Missiles, and when those were depleted I switched to my Riot Blaster.
When the Sentinel's lost enough health, it'll gather all of the corrupted Lunafilament in the area, preparing for an outwards eruption. Diana will alert you when this happens, which is your notification to use Hugh's thrusters and dash as far away as you can. By the time the Sentinel did this to me, though, the fight was almost over.
After the Sentinel is history, pick up all of the powerups in the arena you may have missed, then exit through the next room to find some Pure Lunum in a chest and an Upgrade Component. You'll also witness a cutscene where Hugh and Diana admire the most advanced section of the Cradle.
Reaching Eight
There are two holographic conversations to watch in the next few rooms - one showing Dr. Higgins having a breakdown, and the other showing Eight with the good doctor in his final moments. Grim stuff. You can also find some Upgrade Components and a tablet with Dr. Higgins saying his goodbye to Daisy.
Once you've finished exploring, you'll finally be in a large chamber with the Orbital Elevator. Activate the Laboratory - Main Entrance Station Escape Hatch. Before dropping down into the pit, turn to the right and jump to reach a ledge that leads to a variety of pickups; go further down the stairs here and look at the wreckage to reveal the very last Mini Cabin Figure of this Sector, and of the game!

Congrats on finding the last Mini Cabin Figure. Gotta catch 'em all and all that. | Image credit: Rock Paper Shotgun/Capcom
When ready, drop into the pit, getting the Upgrade Component on the way down. You'll pass through a few rooms full of bots and corrupted Lunafilament, some of which you can Cleanse, some of which is just there for window dressing. Of special note is one side room here with a Creeper and two chests containing Upgrade Components and 800 Lunafilaments. There's also a tablet with the last message from Sharon, the Cradle employee who's left behind notes in several of the secret little rooms you've come across during your journey.
Other than that, what follows is a fairly straightforward series of battles as you progress through more yellow security zones. This section's hard, with an Anomaly and plenty of infected bots of all size and shape, so be sure to suit up with your best weapons and Hacking Nodes.
When the dust has settled, run through the next area, grab the Upgrade Components and Cabin Coin from the chests you see, and activate the very last portal back to the Shelter - the Orbital Elevator Access Station Escape Hatch. Yeah, you guessed it... Eight's just ahead.
Idea boss fight
After pontificating about how the Earth must share Dr. Higgins' suffering, Eight transforms into Vergil from Devil May Cry. Or at least a cool robot analogue! In all seriousness, Eight's form is dubbed Idea, and it's an impressive look to behold, with a glowing purple head, one black orb in lieu of a face, and plenty of tentacles to give Hugh and Diana a bad day.

I'm really lovin' the look of Eight's Devil Trigger. | Image credit: Rock Paper Shotgun/Capcom
Intimidating appearance aside, Idea isn't that awful of a boss. Cleanse it and hit that purple head, which will glow a telltale yellow-orange to indicate that it's a weakpoint. Unload your biggest and baddest weapons posthaste. Frankly, I was able to do a tonne of damage by having a complete Deletion Protocol gauge, maxed out Homing Missiles and a Riot Blaster, not to mention the Close Quarters Mod equipped. (My intrepid fellow guides writer Callum also employed a similar strategy to make this fight a swift one.)
As you whittle away Idea's health bar, it'll restrain Hugh with goop. Diana will activate a hacking matrix but Idea will start to hack back, which is one of the cooler ideas within the game (that has unfortunately been left until the last moment). This will basically make the hacking matrix even harder by having rows of nodes slowly turn red.

Idea makes these rows of red blink in and out of your hacking matrix. Nothing a little good timing can't circumvent, but it sure is annoying. | Image credit: Rock Paper Shotgun/Capcom
Idea's last trick is to summon a halo around itself and increase those red sections of the hacking matrix with greater speed and ferocity in the second half of the fight, typically making three rows of them appear at once. Idea will also rise up into the air and make dozens of red targeting circles erupt across the area. Corrupted Lunafilament mass will extend from them, so dodge, weave, and keep shooting. When Idea's on its last legs, follow the onscreen prompt to unleash Diana's final Deletion Protocol.
Abiosis boss fight

Betcha thought it was over, right? Hell nah. Time to bring out the raddest space guns of all. | Image credit: Rock Paper Shotgun/Capcom
As Hugh and Diana prepare to return home, a huge mass of dead filament gunk lunges towards them, destroying everything in its wake. This hideous thing is named Abiosis. Luckily, Hugh just happens to find a bigass gun that he can attach himself and Diana to, and then we're off on a rad arcade-style sequence. (Anyone here play the finale of the original Devil May Cry, which randomly has Dante and Trish piloting an aircraft to safety as the very last scene? I was definitely reminded of that here.)

Diana proceeds to do the most stellar hack in existence. I don't even know what's happening anymore. | Image credit: Rock Paper Shotgun/Capcom
Anyway, this is a fairly simple boss sequence - complete the hacks with Diana, wait for the big gun to charge, and then keep the targeting cursor on the section of Abiosis that you want to send packin'. It'll take two shots to put this thing down for the count, and you can really only take one hit from it, so don't screw up.
Halfway through, Diana will initiate a really cool hack, and the final shot that she and Hugh perform together is a sight to behold. Abiosis will be toast when it's done - enjoy the tearjerker of an ending...and get ready to backtrack and complete a few more objectives if you want to unlock the true and final ending.

We sure have been through a lot together, kid. | Image credit: Rock Paper Shotgun/Capcom
Congratulations! You've finished our walkthrough of Sectors 5 and 6 of Pragmata, detailing both Experimental Pragmatics and the Central Port. Head back to our Pragmata walkthrough hub to check to see if there's anything you missed in the previous Sectors, and stay tuned, as we'll drop info on how to unlock the game's final ending very shortly!