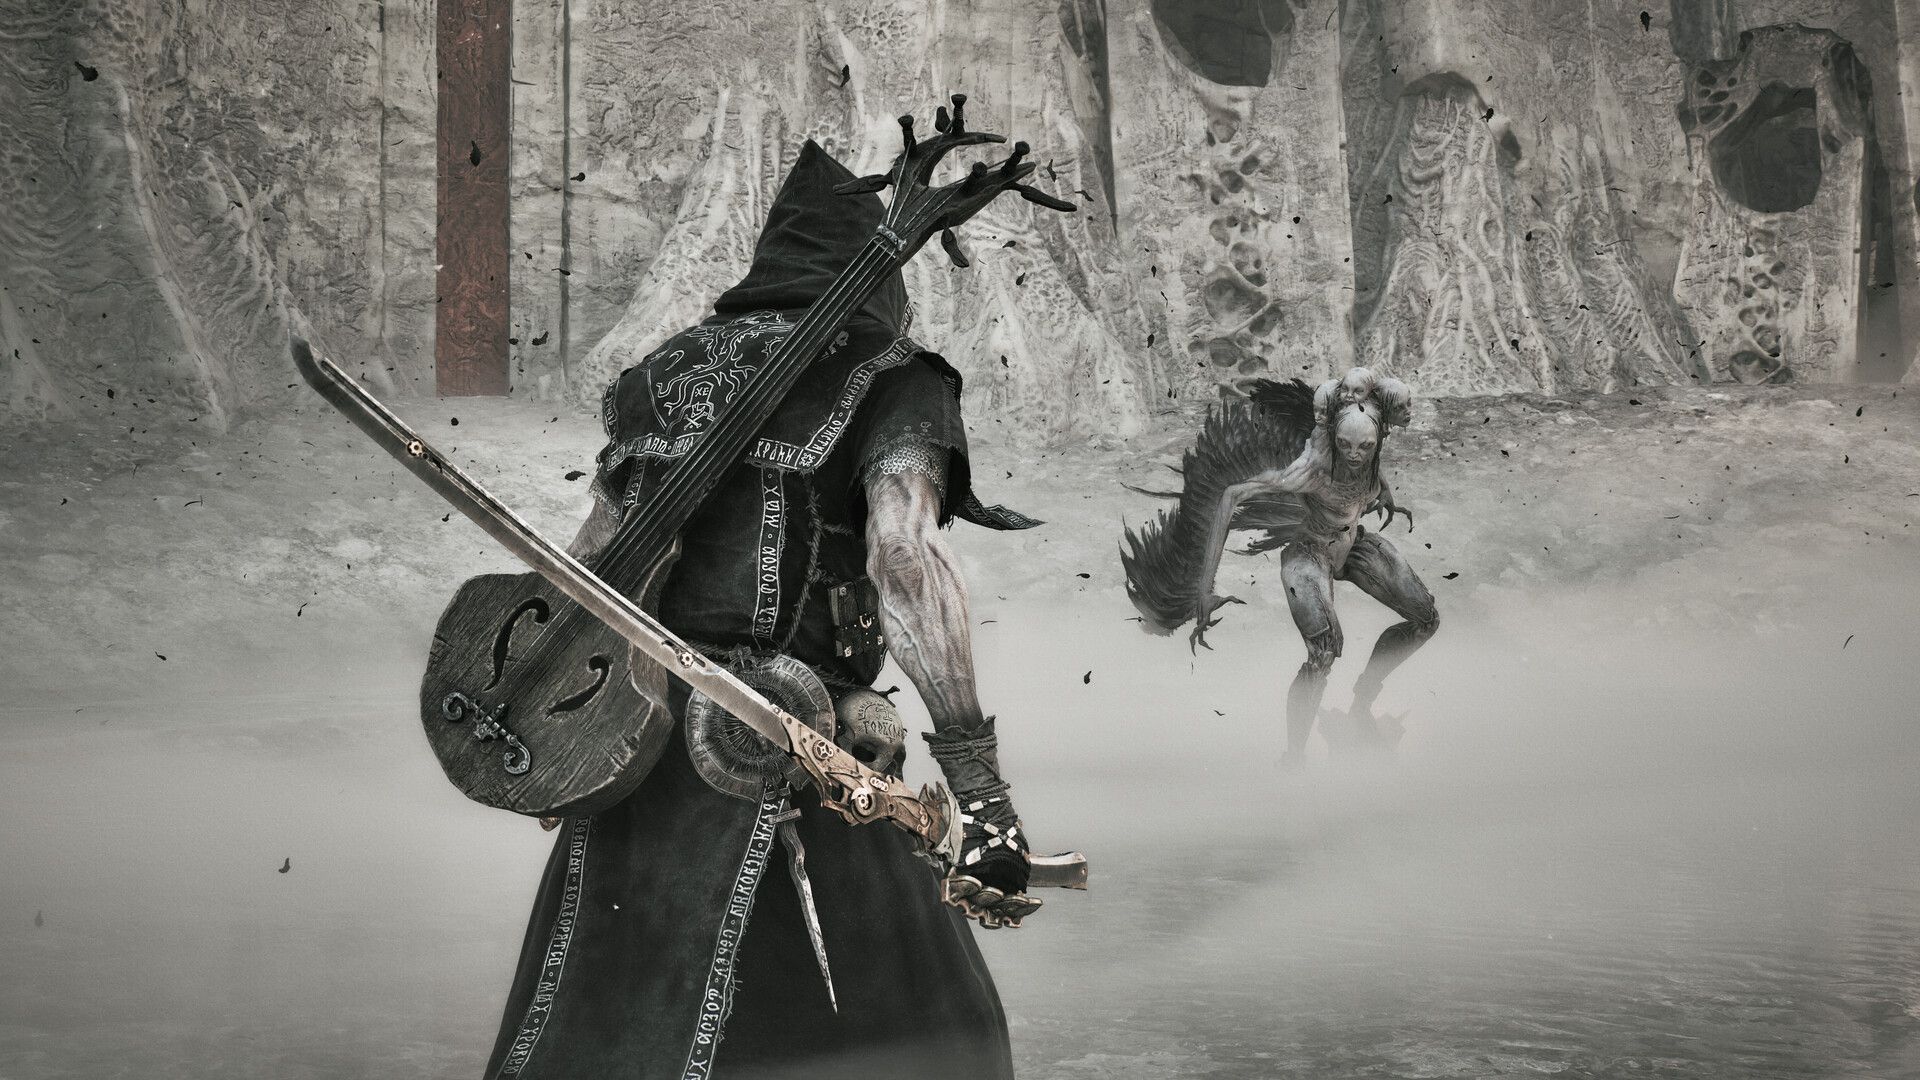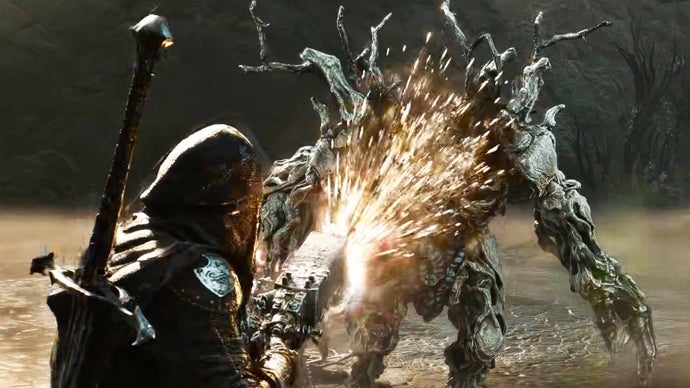
Mortal Shell 2: Blackridge Cliffs walkthrough (Part 6)
๐Ÿ–ฅ PlayStation, Xbox, PCGuides / Walkthroughs
#Single Player#Cold Symmetry#Action Adventure#Mortal Shell II#PC

Mortal Shell 2: Blackridge Cliffs walkthrough (Part 6)

Rock Paper Shotgun ยป Guidesโœ Ollie Tomsโฑ 29 min read(about 4 hours ago)

Overview & Key Takeaways

If you've been following along with our Mortal Shell 2 walkthrough up to this point, you'll already have dipped your toes into the area known as the Blackridge Cliffs. So far, all you've done here is cleanse the Blackridge Pass Beacon at the very start of the area, and then return to less challenging grounds. But now it's time to delve into this dark region and reap it for all its rewards.

And those rewards are plentiful. Inside Blackridge Cliffs, you'll find a brand new weapon, your next Shell (the lovely Proxima), and a host of useful materials. On the flipside, they're all guarded by some horrifying new enemies. So let's take it a step at a time with our full 100% Blackridge Cliffs walkthrough.

Read more

If you've been following along with our Mortal Shell 2 walkthrough up to this point, you'll already have dipped your toes into the area known as the Blackridge Cliffs. So far, all you've done here is cleanse the Blackridge Pass Beacon at the very start of the area, and then return to less challenging grounds. But now it's time to delve into this dark region and reap it for all its rewards.

And those rewards are plentiful. Inside Blackridge Cliffs, you'll find a brand new weapon, your next Shell (the lovely Proxima), and a host of useful materials. On the flipside, they're all guarded by some horrifying new enemies. So let's take it a step at a time with our full 100% Blackridge Cliffs walkthrough.

Want the walkthrough for a different area of the game? You'll find the full list of all our guides on our Mortal Shell 2 walkthrough hub page!

Blackridge Cliffs walkthrough steps:

  1. Explore Blackridge Hamlet.
  2. Conquer the Coward's Retreat.
  3. Defeat the Bell Snail.
  4. Make your way along the cliffside.
  5. Scout out the path to the Sanguine Caverns.
  6. Obtain the Veteran's Battle Axe.
  7. Unlock the Proxima Shell.
  8. Conquer the Crumbling Tunnel.
  9. Open the second path to the Stones Of Remembrance.

To see this content please enable targeting cookies.

Manage cookie settings

1. Explore Blackridge Hamlet.

Fast travel back to the Blackridge Pass Beacon, north of Widow's Overlook. Turn around from the Beacon, and take the left-hand route to enter Blackridge Cliffs themselves.

A note on Corruption before we begin... An extra tip from Ollie

The Blackridge Cliffs are quite a small region, but they act as a connector between several different important areas. This is why you'll see so many areas of corruption blocking off different routes.

Now that you have Mether's Breath, you can clear these areas of corruption. However, while I walk you through this region, I won't necessarily advise you to clear every bit of corruption you see. The criss-crossing routes in this area of the map can get pretty confusing, and it's actually useful to leave certain areas blocked off for now, to avoid being overwhelmed. If there's a section of corruption that needs removing, I'll let you know!

As you enter the region, you'll see a battle unfold in front of you, between a small group of Cultists and a Tarred Vestige. If you do nothing, then the Tarred Vestige will most likely win, but it'll get pretty injured in the process due to the flames of the Torch Cultists. Handle them all however you like.

A Mortal Shell 2 screenshot showing the perfect path the player should take through the Blackridge Cliffs according to Rock Paper Shotgun's full walkthrough of the game. A Mortal Shell 2 screenshot showing the perfect path the player should take through the Blackridge Cliffs according to Rock Paper Shotgun's full walkthrough of the game.

Image credit: Rock Paper Shotgun/Playstack

Once the enemies are slain, turn right and you'll see two points of interest: an area of corruption blocking off a path; and, further along, a fog wall (or floor) leading to a dungeon.

Go up to the corruption, and cleanse it using Mether's Breath. As you head up the slope, three Tarred Corpses will rise from the ground. They're easy foes, not much worse than Wretches to dispatch.

A Mortal Shell 2 screenshot showing the perfect path the player should take through the Blackridge Cliffs according to Rock Paper Shotgun's full walkthrough of the game. A Mortal Shell 2 screenshot showing the perfect path the player should take through the Blackridge Cliffs according to Rock Paper Shotgun's full walkthrough of the game.

A Mortal Shell 2 screenshot showing the perfect path the player should take through the Blackridge Cliffs according to Rock Paper Shotgun's full walkthrough of the game. A Mortal Shell 2 screenshot showing the perfect path the player should take through the Blackridge Cliffs according to Rock Paper Shotgun's full walkthrough of the game.

Image credit: Rock Paper Shotgun/Playstack

A Mortal Shell 2 screenshot showing the perfect path the player should take through the Blackridge Cliffs according to Rock Paper Shotgun's full walkthrough of the game. A Mortal Shell 2 screenshot showing the perfect path the player should take through the Blackridge Cliffs according to Rock Paper Shotgun's full walkthrough of the game.

Image credit: Rock Paper Shotgun/Playstack

Then head up into Blackridge Hamlet. It's only a small place with a few collectibles to find and routes to unblock. First, take the left-hand route all the way to another area of corruption, and unblock it.

Just beyond is a bridge guarded by two Batushkas. Kill them both, but don't progress across the bridge for now. It leads into a large area which we'll tackle later on in the walkthrough.

A Mortal Shell 2 screenshot showing the perfect path the player should take through the Blackridge Cliffs according to Rock Paper Shotgun's full walkthrough of the game. A Mortal Shell 2 screenshot showing the perfect path the player should take through the Blackridge Cliffs according to Rock Paper Shotgun's full walkthrough of the game.

A Mortal Shell 2 screenshot showing the perfect path the player should take through the Blackridge Cliffs according to Rock Paper Shotgun's full walkthrough of the game. A Mortal Shell 2 screenshot showing the perfect path the player should take through the Blackridge Cliffs according to Rock Paper Shotgun's full walkthrough of the game.

Image credit: Rock Paper Shotgun/Playstack

Instead, once you've killed the Batushkas, turn around and check the other side of the tree at the edge of the bridge. Tucked away in the corner you'll find 2x Ventrium.

A Mortal Shell 2 screenshot showing the perfect path the player should take through the Blackridge Cliffs according to Rock Paper Shotgun's full walkthrough of the game. A Mortal Shell 2 screenshot showing the perfect path the player should take through the Blackridge Cliffs according to Rock Paper Shotgun's full walkthrough of the game.

Image credit: Rock Paper Shotgun/Playstack

Now head back into the Hamlet and take the first left. Ahead you'll find three more Tarred Corpses. Note the well in the centre of this area, surrounded by explosive barrels. Shoot one barrel for a large explosion that should kill off the Tarred Corpses, as long as they're near enough.

To the left, you can pick up a Devout's Chalice from the mouth of a statue, and there's a spot next to the statues where you can sit and overlook the cliffs if you like.

A Mortal Shell 2 screenshot showing the perfect path the player should take through the Blackridge Cliffs according to Rock Paper Shotgun's full walkthrough of the game. A Mortal Shell 2 screenshot showing the perfect path the player should take through the Blackridge Cliffs according to Rock Paper Shotgun's full walkthrough of the game.

A Mortal Shell 2 screenshot showing the perfect path the player should take through the Blackridge Cliffs according to Rock Paper Shotgun's full walkthrough of the game. A Mortal Shell 2 screenshot showing the perfect path the player should take through the Blackridge Cliffs according to Rock Paper Shotgun's full walkthrough of the game.

Image credit: Rock Paper Shotgun/Playstack

Continue down the path at the far end and take a left turn. Drop down into the air current below, and keep going until you find a broken bridge. To your left, there's a Coin Of Mammon to collect.

A Mortal Shell 2 screenshot showing the perfect path the player should take through the Blackridge Cliffs according to Rock Paper Shotgun's full walkthrough of the game. A Mortal Shell 2 screenshot showing the perfect path the player should take through the Blackridge Cliffs according to Rock Paper Shotgun's full walkthrough of the game.

A Mortal Shell 2 screenshot showing the perfect path the player should take through the Blackridge Cliffs according to Rock Paper Shotgun's full walkthrough of the game. A Mortal Shell 2 screenshot showing the perfect path the player should take through the Blackridge Cliffs according to Rock Paper Shotgun's full walkthrough of the game.

Image credit: Rock Paper Shotgun/Playstack

Now ride the air current back up and take the left path. On your left you'll see a downward slope which leads into some explosive barrels. Shoot the barrels to clear them, and collect 3x Laterite. Also, if you look carefully off the edge of the cliff, you'll see that you're directly above Gorf!

A Mortal Shell 2 screenshot showing the perfect path the player should take through the Blackridge Cliffs according to Rock Paper Shotgun's full walkthrough of the game. A Mortal Shell 2 screenshot showing the perfect path the player should take through the Blackridge Cliffs according to Rock Paper Shotgun's full walkthrough of the game.

A Mortal Shell 2 screenshot showing the perfect path the player should take through the Blackridge Cliffs according to Rock Paper Shotgun's full walkthrough of the game. A Mortal Shell 2 screenshot showing the perfect path the player should take through the Blackridge Cliffs according to Rock Paper Shotgun's full walkthrough of the game.

Image credit: Rock Paper Shotgun/Playstack

Now head back up the slope and head directly opposite. Loot the Ventrium on the table next to the Wretch on your right.

The last thing to do here is keep going straight on, back to that second corruption you cleared with the bridge behind it. To your right, just before the bridge, there's a lower ledge. Drop down it, and then carefully drop down to the ground below, which you'll discover to be the Grisha Hunter Camp back in the Mushroom Village.

A Mortal Shell 2 screenshot showing the perfect path the player should take through the Blackridge Cliffs according to Rock Paper Shotgun's full walkthrough of the game. A Mortal Shell 2 screenshot showing the perfect path the player should take through the Blackridge Cliffs according to Rock Paper Shotgun's full walkthrough of the game.

A Mortal Shell 2 screenshot showing the perfect path the player should take through the Blackridge Cliffs according to Rock Paper Shotgun's full walkthrough of the game. A Mortal Shell 2 screenshot showing the perfect path the player should take through the Blackridge Cliffs according to Rock Paper Shotgun's full walkthrough of the game.

Image credit: Rock Paper Shotgun/Playstack

A Mortal Shell 2 screenshot showing the perfect path the player should take through the Blackridge Cliffs according to Rock Paper Shotgun's full walkthrough of the game. A Mortal Shell 2 screenshot showing the perfect path the player should take through the Blackridge Cliffs according to Rock Paper Shotgun's full walkthrough of the game.

Image credit: Rock Paper Shotgun/Playstack

At the bottom you'll see another area of corruption nestled up against the cliffside. Cleanse the corruption, and it'll reveal an air current shortcut from Mushroom Village straight into the Blackridge Hamlet.

Ride it back up to the sitting spot you found earlier. Then return the way you came, back out of Blackridge Hamlet and into Blackridge Cliffs again.

Mark step as completed.

2. Conquer the Coward's Retreat.

A Mortal Shell 2 screenshot showing the perfect path the player should take through the Blackridge Cliffs according to Rock Paper Shotgun's full walkthrough of the game. A Mortal Shell 2 screenshot showing the perfect path the player should take through the Blackridge Cliffs according to Rock Paper Shotgun's full walkthrough of the game.

Image credit: Rock Paper Shotgun/Playstack

You should now be standing at the entrance to Blackridge Cliffs, where the Cultists fought the Tarred Vestige. This time, head through the fog on the right-hand side, and descend the elevator into the Coward's Retreat dungeon.

Be warned: there's a collapsing floor very close to the entrance of this dungeon. As you head down the cave path, you'll see a Bone Statue ahead of you. The trick floor is directly in front of the statue. This is the whole gimmick of the dungeon: fall down there, and you'll immediately land at the end of the dungeon, surrounded by enemies, and have to fight your way back up here.

A Mortal Shell 2 screenshot showing the perfect path the player should take through the Blackridge Cliffs according to Rock Paper Shotgun's full walkthrough of the game. A Mortal Shell 2 screenshot showing the perfect path the player should take through the Blackridge Cliffs according to Rock Paper Shotgun's full walkthrough of the game.

Careful - trick floor ahead! | Image credit: Rock Paper Shotgun/Playstack

Instead, carefully sidestep the trick floor, and destroy the Bone Statue for a Laterite. Just past the next doorway you'll be attacked by a trio of Brigands and a Sturdyman - an aggressive enemy wielding a large scythe, but with not much health.

A Mortal Shell 2 screenshot showing the perfect path the player should take through the Blackridge Cliffs according to Rock Paper Shotgun's full walkthrough of the game. A Mortal Shell 2 screenshot showing the perfect path the player should take through the Blackridge Cliffs according to Rock Paper Shotgun's full walkthrough of the game.

A Mortal Shell 2 screenshot showing the perfect path the player should take through the Blackridge Cliffs according to Rock Paper Shotgun's full walkthrough of the game. A Mortal Shell 2 screenshot showing the perfect path the player should take through the Blackridge Cliffs according to Rock Paper Shotgun's full walkthrough of the game.

Image credit: Rock Paper Shotgun/Playstack

Loot the chest in the corner of their camp for another Laterite, then follow the main path to the end, where you'll find a piece of wood sticking up into the air. Attack it to make it collapse, forming a bridge to the other side.

A Mortal Shell 2 screenshot showing the perfect path the player should take through the Blackridge Cliffs according to Rock Paper Shotgun's full walkthrough of the game. A Mortal Shell 2 screenshot showing the perfect path the player should take through the Blackridge Cliffs according to Rock Paper Shotgun's full walkthrough of the game.

Image credit: Rock Paper Shotgun/Playstack

Kill the two Brigands around the corner, and loot the cell to your left for a Ventrium. Further along the path there's a 300x Coin Pouch on the right side, and then a corpse pile marking the end of the dungeon - and the exact spot you would have fallen into if you hadn't avoided the trick floor at the start.

A Mortal Shell 2 screenshot showing the perfect path the player should take through the Blackridge Cliffs according to Rock Paper Shotgun's full walkthrough of the game. A Mortal Shell 2 screenshot showing the perfect path the player should take through the Blackridge Cliffs according to Rock Paper Shotgun's full walkthrough of the game.

Image credit: Rock Paper Shotgun/Playstack

That's everything, so head back the way you came and exit the Coward's Retreat dungeon.

Mark step as completed.

3. Defeat the Bell Snail.

Outside the dungeon, head counter-clockwise around the central corrupted growth that dominates this starting area of the Blackridge Cliffs. You'll come to a path along the cliffside; as you approach, more Tarred Corpses will burst up from the ground. Kill them using the explosive barrels (or via any other method).

A Mortal Shell 2 screenshot showing the perfect path the player should take through the Blackridge Cliffs according to Rock Paper Shotgun's full walkthrough of the game. A Mortal Shell 2 screenshot showing the perfect path the player should take through the Blackridge Cliffs according to Rock Paper Shotgun's full walkthrough of the game.

A Mortal Shell 2 screenshot showing the perfect path the player should take through the Blackridge Cliffs according to Rock Paper Shotgun's full walkthrough of the game. A Mortal Shell 2 screenshot showing the perfect path the player should take through the Blackridge Cliffs according to Rock Paper Shotgun's full walkthrough of the game.

Image credit: Rock Paper Shotgun/Playstack

Then cross the bridge beyond. At the other side you'll see a frightful-looking new enemy: a Bell Snail. Two things - learn them now, because Bell Snails will be a common enemy later on:

  • The Snail's attack comes out very quickly after its "tell". That tell? Below its "face", you'll see its ribcage-like maw flex open momentarily. If you see this, quickly block or dodge.
  • When attacked, the Snail will retreat into its bell, rendering it immune to damage. But it only stays there for a couple of seconds, and when it comes back, there's a good 3-4 seconds of exit animation where you are free to attack it.

A Mortal Shell 2 screenshot showing the perfect path the player should take through the Blackridge Cliffs according to Rock Paper Shotgun's full walkthrough of the game. A Mortal Shell 2 screenshot showing the perfect path the player should take through the Blackridge Cliffs according to Rock Paper Shotgun's full walkthrough of the game.

Image credit: Rock Paper Shotgun/Playstack

Kill the Bell Snail, and then search to the left for 4x Weltcap and another statue containing a Devout's Chalice.

There's also a Gloom Tentacle on your right, but the path beyond is blocked by bells, so turn around and cross the bridge back the way you came.

A Mortal Shell 2 screenshot showing the perfect path the player should take through the Blackridge Cliffs according to Rock Paper Shotgun's full walkthrough of the game. A Mortal Shell 2 screenshot showing the perfect path the player should take through the Blackridge Cliffs according to Rock Paper Shotgun's full walkthrough of the game.

Image credit: Rock Paper Shotgun/Playstack

Mark step as completed.

4. Make your way along the cliffside.

Head straight across the way from the bridge, and you'll find three paths: the first is a slope to the right; the second is a path along the cliffside; and the third takes you back the way you came, to Blackridge Pass Beacon. Take the middle of the three routes.

A Mortal Shell 2 screenshot showing the perfect path the player should take through the Blackridge Cliffs according to Rock Paper Shotgun's full walkthrough of the game. A Mortal Shell 2 screenshot showing the perfect path the player should take through the Blackridge Cliffs according to Rock Paper Shotgun's full walkthrough of the game.

A Mortal Shell 2 screenshot showing the perfect path the player should take through the Blackridge Cliffs according to Rock Paper Shotgun's full walkthrough of the game. A Mortal Shell 2 screenshot showing the perfect path the player should take through the Blackridge Cliffs according to Rock Paper Shotgun's full walkthrough of the game.

Image credit: Rock Paper Shotgun/Playstack

Along the way you'll be accosted by more Tarred Corpses rising from the ground. Kill them all, and keep heading across the cliffside until, just down a slope at the end, you come to a small bridge guarded by Brigands and an Armed Knave.

Kill the Brigands carefully (take out the Crossbowmen first), and then turn the corner beyond.

Mark step as completed.

5. Scout out the path to the Sanguine Caverns.

The path diverges ahead of you once again. There's a right-hand turn into a clearing with a Tarred Archer and more Tarred Corpses, but leave them for now. Instead, head straight on.

You'll quickly come to a Bone Gate. Interact with it to be sent hurtling over to the other side.

A Mortal Shell 2 screenshot showing the perfect path the player should take through the Blackridge Cliffs according to Rock Paper Shotgun's full walkthrough of the game. A Mortal Shell 2 screenshot showing the perfect path the player should take through the Blackridge Cliffs according to Rock Paper Shotgun's full walkthrough of the game.

A Mortal Shell 2 screenshot showing the perfect path the player should take through the Blackridge Cliffs according to Rock Paper Shotgun's full walkthrough of the game. A Mortal Shell 2 screenshot showing the perfect path the player should take through the Blackridge Cliffs according to Rock Paper Shotgun's full walkthrough of the game.

Image credit: Rock Paper Shotgun/Playstack

Check behind you for 3x Weltcap and a sitting spot. Then head onward to find a pair of (hostile) Grisha Hunters. Try to handle them one at a time - they go down pretty easily to a riposte.

A Mortal Shell 2 screenshot showing the perfect path the player should take through the Blackridge Cliffs according to Rock Paper Shotgun's full walkthrough of the game. A Mortal Shell 2 screenshot showing the perfect path the player should take through the Blackridge Cliffs according to Rock Paper Shotgun's full walkthrough of the game.

Image credit: Rock Paper Shotgun/Playstack

This point is one to remember, because it allows you access to two new areas (neither of which we'll go to quite yet). To your north, across the cliff, there's a bridge which leads to the pale Sanguine Caverns on the very north edge of the map.

A Mortal Shell 2 screenshot showing the perfect path the player should take through the Blackridge Cliffs according to Rock Paper Shotgun's full walkthrough of the game. A Mortal Shell 2 screenshot showing the perfect path the player should take through the Blackridge Cliffs according to Rock Paper Shotgun's full walkthrough of the game.

Image credit: Rock Paper Shotgun/Playstack

Opposite that, there's a corruption area. Behind this corruption is another new area of Fainweald called the Stones Of Remembrance, but leave the corruption there for now to make things simpler. Instead, just take the Laterite from the stone coffin on the cliff edge, and return to the Bone Gate once more.

Mark step as completed.

6. Obtain the Veteran's Battle Axe.

Cross the Bone Gate back to the side you came from, and this time take the side route down the slope. Kill all the Tarred Corpses (start with the Archer).

A Mortal Shell 2 screenshot showing the perfect path the player should take through the Blackridge Cliffs according to Rock Paper Shotgun's full walkthrough of the game. A Mortal Shell 2 screenshot showing the perfect path the player should take through the Blackridge Cliffs according to Rock Paper Shotgun's full walkthrough of the game.

Image credit: Rock Paper Shotgun/Playstack

At the far right-hand side there's a short path which ends with a statue containing another Devout's Chalice.

Then head back and enter the dungeon through the fog wall near where the Tarred Corpses were hiding. Descend the elevator into the King's Crypt.

A Mortal Shell 2 screenshot showing the perfect path the player should take through the Blackridge Cliffs according to Rock Paper Shotgun's full walkthrough of the game. A Mortal Shell 2 screenshot showing the perfect path the player should take through the Blackridge Cliffs according to Rock Paper Shotgun's full walkthrough of the game.

A Mortal Shell 2 screenshot showing the perfect path the player should take through the Blackridge Cliffs according to Rock Paper Shotgun's full walkthrough of the game. A Mortal Shell 2 screenshot showing the perfect path the player should take through the Blackridge Cliffs according to Rock Paper Shotgun's full walkthrough of the game.

Image credit: Rock Paper Shotgun/Playstack

Kill the lone enemy in the corridor in front of you, but mind the pressure plate traps on the ground, and also the exploding barrel to the side.

Kill the Tarred Corpses in the room beyond (again, mind the pressure plates), and destroy the crates in the far right corner. Dodge the Infested Wretch that tries to explode on you behind the crates, then proceed along this path and drop down the hole at the end.

Break the wooden wall at the bottom of the hole, and kill the next Infested Wretch that comes charging at you. It'll die to one swing, but back off after you hit it or it'll deal serious damage with its death explosion.

A Mortal Shell 2 screenshot showing the perfect path the player should take through the Blackridge Cliffs according to Rock Paper Shotgun's full walkthrough of the game. A Mortal Shell 2 screenshot showing the perfect path the player should take through the Blackridge Cliffs according to Rock Paper Shotgun's full walkthrough of the game.

Image credit: Rock Paper Shotgun/Playstack

Further along you'll find an Armed Knave. Kill it, and then carefully cut the tripwire up the stairs before continuing on. Destroy the Bone Statue at the top for some extra Gloom.

Two things about the next doorway. First: it has a bear trap on the floor inside it. Second: as you move up to the doorway, a group of Infested Wretches will jump at you. Try to attack the first one and then dodge well back, because its explosion will (hopefully) take out all the others with it.

A Mortal Shell 2 screenshot showing the perfect path the player should take through the Blackridge Cliffs according to Rock Paper Shotgun's full walkthrough of the game. A Mortal Shell 2 screenshot showing the perfect path the player should take through the Blackridge Cliffs according to Rock Paper Shotgun's full walkthrough of the game.

Image credit: Rock Paper Shotgun/Playstack

Drop down the hole beyond, into the final room of the dungeon. Inside there's a lone Armed Knave. Kill it, and then loot the corpse by the large stone coffin to obtain the Veteran's Battle Axe.

A Mortal Shell 2 screenshot showing the perfect path the player should take through the Blackridge Cliffs according to Rock Paper Shotgun's full walkthrough of the game. A Mortal Shell 2 screenshot showing the perfect path the player should take through the Blackridge Cliffs according to Rock Paper Shotgun's full walkthrough of the game.

A Mortal Shell 2 screenshot showing the perfect path the player should take through the Blackridge Cliffs according to Rock Paper Shotgun's full walkthrough of the game. A Mortal Shell 2 screenshot showing the perfect path the player should take through the Blackridge Cliffs according to Rock Paper Shotgun's full walkthrough of the game.

Image credit: Rock Paper Shotgun/Playstack

A Mortal Shell 2 screenshot showing the perfect path the player should take through the Blackridge Cliffs according to Rock Paper Shotgun's full walkthrough of the game. A Mortal Shell 2 screenshot showing the perfect path the player should take through the Blackridge Cliffs according to Rock Paper Shotgun's full walkthrough of the game.

Image credit: Rock Paper Shotgun/Playstack

Congratulations on finding your third main weapon! The Veteran's Battle Axe has an unusual cadence to its regular Light Attack combos, which is quite good at interrupting the attack patterns of enemies. Try it out for yourself to see how you like it!

When you're ready, exit the dungeon using the teleport that appears in this final room after you pick up the Axe.

Mark step as completed.

7. Unlock the Proxima Shell.

Outside the King's Crypt dungeon, there's an air current directly opposite you. Ride it up to the top, and prepare to be alarmed by the horrifying Infested Stalker that clatters towards you on its spider-like legs.

A Mortal Shell 2 screenshot showing the perfect path the player should take through the Blackridge Cliffs according to Rock Paper Shotgun's full walkthrough of the game. A Mortal Shell 2 screenshot showing the perfect path the player should take through the Blackridge Cliffs according to Rock Paper Shotgun's full walkthrough of the game.

A Mortal Shell 2 screenshot showing the perfect path the player should take through the Blackridge Cliffs according to Rock Paper Shotgun's full walkthrough of the game. A Mortal Shell 2 screenshot showing the perfect path the player should take through the Blackridge Cliffs according to Rock Paper Shotgun's full walkthrough of the game.

Image credit: Rock Paper Shotgun/Playstack

Thankfully, by this point the Infested Stalker can be more or less stunlocked by repeated Light Attacks. Kill it, then loot the Galvanic Shard from the wooden platform next to you. Also, destroy the crates right next to where you used the air current; hiding inside one of them is a Common Moonshine.

A Mortal Shell 2 screenshot showing the perfect path the player should take through the Blackridge Cliffs according to Rock Paper Shotgun's full walkthrough of the game. A Mortal Shell 2 screenshot showing the perfect path the player should take through the Blackridge Cliffs according to Rock Paper Shotgun's full walkthrough of the game.

A Mortal Shell 2 screenshot showing the perfect path the player should take through the Blackridge Cliffs according to Rock Paper Shotgun's full walkthrough of the game. A Mortal Shell 2 screenshot showing the perfect path the player should take through the Blackridge Cliffs according to Rock Paper Shotgun's full walkthrough of the game.

Image credit: Rock Paper Shotgun/Playstack

You'll see what looks like a Beacon in the centre of this area, but first, head beyond it to the opposite side. There are two paths on this side. Take the left path and you'll find all that's there is a Bone Statue you can loot for a Laterite. Then take the right path. This will lead back to the start of the region, but there's a statue on the way which you can loot for a Ventrium.

A Mortal Shell 2 screenshot showing the perfect path the player should take through the Blackridge Cliffs according to Rock Paper Shotgun's full walkthrough of the game. A Mortal Shell 2 screenshot showing the perfect path the player should take through the Blackridge Cliffs according to Rock Paper Shotgun's full walkthrough of the game.

Image credit: Rock Paper Shotgun/Playstack

Now go back to the new Beacon-like structure. As you approach you'll see it's marked as a "Shattered Beacon", and you can't rest at it - but you can enter it. Do so now.

Inside, head down the steps and you'll find a brand new Shell: Proxima.

A Mortal Shell 2 screenshot showing the perfect path the player should take through the Blackridge Cliffs according to Rock Paper Shotgun's full walkthrough of the game. A Mortal Shell 2 screenshot showing the perfect path the player should take through the Blackridge Cliffs according to Rock Paper Shotgun's full walkthrough of the game.

Image credit: Rock Paper Shotgun/Playstack

Inhabit Proxima's Shell to enter her first memory: "The Exchange", in which Proxima converses with Merrick - the trader back in Marrow Keep. Follow the simple prompts to complete the memory and unlock Proxima's Shell for the rest of the game.

Should you use Proxima's Shell? An extra tip from Ollie

The different Shells in Mortal Shell 2 are actually very well-balanced on the whole, although (if you don't mind spoilers) you can always view Jeremy's guide on the best Shell to use if you'd like.

Proxima is a bit tankier than Tiel on the whole thanks to her Grafted Armor passive, and her Biosampler ability is certainly powerful, although not as reliable a panic button as Tiel's Lingering Shadow.

This walkthrough won't confine you to one or the other - use whichever Shell best suits your playstyle and lets you have the most fun!

Mark step as completed.

8. Conquer the Crumbling Tunnel.

A Mortal Shell 2 screenshot showing the perfect path the player should take through the Blackridge Cliffs according to Rock Paper Shotgun's full walkthrough of the game. A Mortal Shell 2 screenshot showing the perfect path the player should take through the Blackridge Cliffs according to Rock Paper Shotgun's full walkthrough of the game.

Image credit: Rock Paper Shotgun/Playstack

Exit the Shattered Beacon where you found Proxima, and now look to the east side. You'll see the entrance to another dungeon behind the tree, so head through the fog and down into the Crumbling Tunnel.

This is a very short dungeon, but you need to be prepared to run back the way you came when you reach the end, to avoid the tunnel collapse. Got that in mind? Good, let's continue.

A Mortal Shell 2 screenshot showing the perfect path the player should take through the Blackridge Cliffs according to Rock Paper Shotgun's full walkthrough of the game. A Mortal Shell 2 screenshot showing the perfect path the player should take through the Blackridge Cliffs according to Rock Paper Shotgun's full walkthrough of the game.

Image credit: Rock Paper Shotgun/Playstack

Head down the elevator and kill the Shield Brigand and Wretch in the corridor beyond. Loot a Ventrium from the statue by the wall, and then kill the next Wretch - and be aware of the massive boulder that drops from the ceiling, giving you a taster of things to come.

Destroy the Bone Statue by the boulder for a Laterite, and then continue down the slope until you see the explosive barrels at the bottom. Shoot one of the barrels to clear the rock.

A Mortal Shell 2 screenshot showing the perfect path the player should take through the Blackridge Cliffs according to Rock Paper Shotgun's full walkthrough of the game. A Mortal Shell 2 screenshot showing the perfect path the player should take through the Blackridge Cliffs according to Rock Paper Shotgun's full walkthrough of the game.

Image credit: Rock Paper Shotgun/Playstack

With the rock cleared, you should see a map inscribed on a piece of white stone in the ground. Interact with it to obtain a map showing the whereabouts of the Triarch Repeater, far to the south.

A Mortal Shell 2 screenshot showing the perfect path the player should take through the Blackridge Cliffs according to Rock Paper Shotgun's full walkthrough of the game. A Mortal Shell 2 screenshot showing the perfect path the player should take through the Blackridge Cliffs according to Rock Paper Shotgun's full walkthrough of the game.

Image credit: Rock Paper Shotgun/Playstack

That's the end of the dungeon, so the moment you exit the map, run back the way you came, all the way out of the dungeon. The ceiling will cave in behind you, and if you stay, you are killed instantly. Don't ask me how I know.

Mark step as completed.

9. Open the second path to the Stones Of Remembrance.

There's just one tiny bit left to explore in the Blackridge Cliffs. As you come out of the dungeon, turn right and hug the wall until you reach the slope opposite the wooden platform. Head down the slope into the corrupted area beyond, where you'll be attacked by two more spider-like Infested Stalkers.

A Mortal Shell 2 screenshot showing the perfect path the player should take through the Blackridge Cliffs according to Rock Paper Shotgun's full walkthrough of the game. A Mortal Shell 2 screenshot showing the perfect path the player should take through the Blackridge Cliffs according to Rock Paper Shotgun's full walkthrough of the game.

A Mortal Shell 2 screenshot showing the perfect path the player should take through the Blackridge Cliffs according to Rock Paper Shotgun's full walkthrough of the game. A Mortal Shell 2 screenshot showing the perfect path the player should take through the Blackridge Cliffs according to Rock Paper Shotgun's full walkthrough of the game.

Image credit: Rock Paper Shotgun/Playstack

Once you kill the second Infested Stalker, Tarred Corpses will rise from the ground as well and attack you. Kill them off too, and then finally you can look around.

In the centre of this area you'll find a Galvanic Shard on the floor, and another Galvanic Shard in a patch of corruption to your left.

Head to the right, and you'll find a statue overlooking a cliff, containing another Ventrium. Opposite, there's another area of corruption which you could cleanse, but there's no need to right now. Just know that this route also takes you into the Stones Of Remembrance later on.

A Mortal Shell 2 screenshot showing the perfect path the player should take through the Blackridge Cliffs according to Rock Paper Shotgun's full walkthrough of the game. A Mortal Shell 2 screenshot showing the perfect path the player should take through the Blackridge Cliffs according to Rock Paper Shotgun's full walkthrough of the game.

Image credit: Rock Paper Shotgun/Playstack

Now head to the left side of this corrupted area, and as you head along the river you'll be attacked by three final Tarred Corpses. Slay them with impunity, and drop off the edge beyond to arrive back at the entrance to the King's Crypt.

A Mortal Shell 2 screenshot showing the perfect path the player should take through the Blackridge Cliffs according to Rock Paper Shotgun's full walkthrough of the game. A Mortal Shell 2 screenshot showing the perfect path the player should take through the Blackridge Cliffs according to Rock Paper Shotgun's full walkthrough of the game.

A Mortal Shell 2 screenshot showing the perfect path the player should take through the Blackridge Cliffs according to Rock Paper Shotgun's full walkthrough of the game. A Mortal Shell 2 screenshot showing the perfect path the player should take through the Blackridge Cliffs according to Rock Paper Shotgun's full walkthrough of the game.

Image credit: Rock Paper Shotgun/Playstack

From here you can ride the air current again, and head across to the other side and all the way back to the Blackridge Pass Beacon. Congratulations on conquering this nasty little area of Fainweald!

Mark step as completed.

Following the steps in this section of our walkthrough, you should have gained quite a handful of materials (including the new Galvanic Shards), as well as a new weapon, a new Shell, and a great deal of experience fighting some nasty new enemy types. Join us in Part 7 for the next instalment with our full Mortal Shell 2 Gloomshade Grove walkthrough!
Share:

More in PlayStation, Xbox, PC

I'm modding GTA 5 every day until it becomes GTA 6 or breaks, starting with a new vehicle and enough missiles to level a city block๐Ÿ–ฅ PlayStation, Xbox, PC

I'm modding GTA 5 every day until it becomes GTA 6 or breaks, starting with a new vehicle and enough missiles to level a city block

Baby steps.

๐ŸŽฎ GTA๐ŸŽฎ Grand Theft Auto
PCNews1 day ago
Mortal Shell 2: Flooded Village walkthrough (Part 5)๐Ÿ–ฅ PlayStation, Xbox, PC

Mortal Shell 2: Flooded Village walkthrough (Part 5)

!(https://assetsio.gnwcdn.com/mortal-shell-2-fighting-grisha-close-up.jpg?width=690&quality=85&format=jpg&auto=webp) By this point in our Mortal Shell 2(https://www.rockpapershotgun.com/games/mortal-shell-2) walkthrough, it's about time you expanded the arsenal of sidearms at your disposal. To that end, our next stop is the Flooded Village. Unlike the very similarly named Sunken Village(https://www.rockpapershotgun.com/mortal-shell-2-walkthrough-part-4-sunken-village) you just came from, the Flooded Village is a mere optional dungeon - but it holds two things of great interest: an optional boss, and a powerful new weapon which will serve you well for the rest of the game. Follow along with the steps below in our Flooded Village walkthrough, and I'll show you how to find and open the path to the Flooded Village dungeon, and how to conquer its interior and lay claim to the prize within. Read more(https://www.rockpapershotgun.com/mortal-shell-2-walkthrough-part-5-flooded-village)

RockGuides / Walkthroughs1 day ago
Mortal Shell 2 Reviews Say It's One of 2026's Best New Soulslikes๐Ÿ–ฅ PlayStation, Xbox, PC, Multi-platform

Mortal Shell 2 Reviews Say It's One of 2026's Best New Soulslikes

Mortal Shell 2 is a hit with critics, as the Soulslike sequel is reviewing much better than its predecessor.

๐ŸŽฎ Mortal Shell 2
PolygonNews1 day ago