Subnautica 2: Where to find all Blueprints
Summary
In Subnautica 2, Blueprints are vital to your progression in the game. Discovering Blueprints is how you unlock crafting recipes from important tools and equipment to simple decorations for your Base. But, in order to get these Blueprints, first you need to find them and then you need to scan them.
Fortunately, with the help of our friends over at MapGenie, we've put together a comprehensive guide on where to find all Blueprints in Subnautica 2, how to unlock them and handy crafting recipes of the resources you'll need. While the Blueprints are first shown in a table below, be sure to click on the item name to discover their locations in more detail. There's a lot to learn, so let's get into it!
In Subnautica 2, Blueprints are vital to your progression in the game. Discovering Blueprints is how you unlock crafting recipes from important tools and equipment to simple decorations for your Base. But, in order to get these Blueprints, first you need to find them and then you need to scan them.
Fortunately, with the help of our friends over at MapGenie, we've put together a comprehensive guide on where to find all Blueprints in Subnautica 2, how to unlock them and handy crafting recipes of the resources you'll need. While the Blueprints are first shown in a table below, be sure to click on the item name to discover their locations in more detail. There's a lot to learn, so let's get into it!
On this page:
To see this content please enable targeting cookies.
Manage cookie settings
How to unlock Blueprints
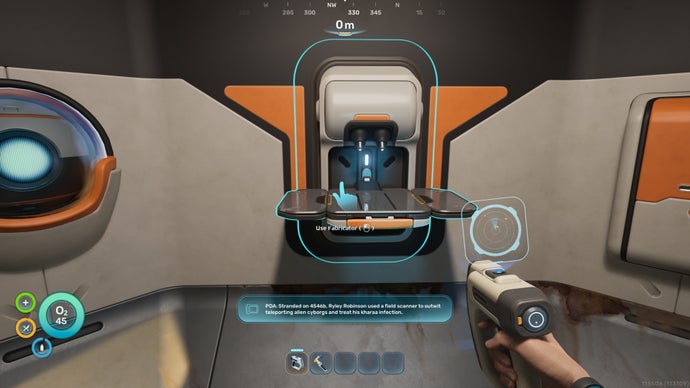
Before we jump into the full Blueprints list, it's important to note that if you want to unlock the Blueprints, you're going to need to scan them. For this, you need to craft a Scanner at your Fabricator using 2x Titanium, 2x Quartz, and 1x Basic Battery. Then, whenever you approach an item that you need, scan it fully to unlock the Blueprint. Note: You may need to scan multiple fragments before you unlock some Blueprints.
All Blueprints: Full List
Basic Materials
| Blueprint | Location | Recipe |
|---|---|---|
| Mild Acid | Unlocked from start | 2x Acidic Raion Pouch, 1x Copper (Fabricator) |
| Salvaged Titanium | Unlocked from start | 1x Metal Salvage (Fabricator) |
| Glass | Unlocked from start | 2x Quartz (Fabricator) |
| Enameled Glass | Unlocked with Fully Functional Fabricator | 1x Glass, 1x Creature Enamel (Fabricator) |
| Fiber | Unlocked from start | 2x Fibrous Pulp (Fabricator) |
| Fiber Mesh | Unlocked with Fully Functional Fabricator | 2x Fiber, 1x Strong Acid (Fabricator) |
| Rubber | Unlocked from start | 2x Lucifer Rotsac (Fabricator) |
| Grease | Unlocked with Fully Functional Fabricator | 1x Lucifer Rotsac (Fabricator) |
| Alcohol | Unlocked from start | 1x Fibrous Pulp, 1x Water (Fabricator) |
Prepared Food
| Blueprint | Location | Recipe |
|---|---|---|
| Sugar of Saturn | Unlocked with Fully Functional Fabricator | 1x Lead, 1x Salt (Fabricator) |
| Halfmoon Jerky (2x) | Unlocked with Fully Functional Fabricator/Catch Fish | 2x Halfmoon, 1x Salt (Fabricator) |
| Threemoon Temaki (3x) | Unlocked with Fully Functional Fabricator/Catch Fish | 1x Halfmoon, 1x Harvestmoon, 1x Bluemoon, 1x Fibrous Pulp (Fabricator) |
| Hoverthorn Souvlaki (3x) | Unlocked with Fully Functional Fabricator/Catch Fish | 3x Hoverthorn, 1x Salt (Fabricator) |
| Cherimoya Chutney (2x) | Unlocked with Fully Functional Fabricator/Catch Fish | 2x Cherimoya Rotsac, 1x Sugar of Saturn (Fabricator) |
| Pavlova | Unlocked with Fully Functional Fabricator/Craft Sugar of Saturn | 1x Deepwing Egg Clump, 1x Sugar of Saturn, 1x Cherimoya Rotsac (Fabricator) |
Cooked Food
| Blueprint | Location | Recipe |
|---|---|---|
| Oily Salad | Unlocked from start | 2x Fibrous Pulp (Fabricator) |
| Cooked Halfmoon | Unlocked from start | 1x Halfmoon (Fabricator) |
| Cooked Harvestmoon | Unlocked from start | 1x Harvestmoon (Fabricator) |
| Cooked Bluemoon | Unlocked from start | 1x Bluemoon (Fabricator) |
| Cooked Geordie | Unlocked from start | 1x Geordie (Fabricator) |
| Nutrient Block | Unlocked from start | 1x Biofuel Block, 1x Salt (Fabricator) |
| Coral Mash | Shallows | 3x Coral Shavings, 1x Sugar of Saturn (Fabricator) |
| Cooked Quadrate | Unlocked with Fully Functional Fabricator/Catch Fish | 1x Quadrate (Fabricator) |
| Cooked Hoverthorn | Unlocked with Fully Functional Fabricator/Catch Fish | 1x Hoverthorn (Fabricator) |
| Cooked Electric Geordie | Unlocked with Fully Functional Fabricator/Catch Fish | 1x Electric Geordie (Fabricator) |
| Cooked Black Hoverthorn | Unlocked with Fully Functional Fabricator/Catch Fish | 1x Black Hoverthorn (Fabricator) |
| Cooked Pneuma | Unlocked with Fully Functional Fabricator/Catch Fish | 1x Pneuma (Fabricator) |
Water
| Blueprint | Location | Recipe |
|---|---|---|
| Water | Unlocked from start | 1x Water Slug (Fabricator) |
| Isotonic Water | Alien Ruins | 1x Flash Slug, 1x Salt (Fabricator) |
Consumables
| Blueprint | Location | Recipe |
|---|---|---|
| Basic First Aid Kit | Unlocked with Fully Functional Fabricator | 1x Fiber (Fabricator) |
| Enhanced First Aid Kit | Unlocked with Fully Functional Fabricator | 1x Fiber, 1x Medical Gel Sac (Fabricator) |
| Distraction Flare (3x) | Unlocked from start | 1x Titanium, 1x Quartz (Fabricator) |
Equipment
| Blueprint | Location | Recipe |
|---|---|---|
| Basic Fins | Unlocked from start | 2x Rubber, 2x Fiber (Fabricator) |
| Improved Fins | Alien Ruins | 1x Basic Fins, 1x Fiber Mesh, 2x Conduit Crystals (Fabricator) |
| Standard Air Tank | Unlocked from start | 2x Titanium, 1x Rubber, 2x Silver (Fabricator) |
| High Capacity Air Tank | Cicada Wreck (Canteen) | 1x Standard Air Tank, 1x Plasteel Ingot (Fabricator) |
| Ultra High Capacity Air Tank | Creative mode only | 1x High Capacity Air Tank, 3x Troilite, 3x Atacamite (Fabricator) |
| Rebreather | Cicada Wreck (Canteen) | 2x Fiber Mesh, 1x System Chip (Fabricator) |
| Blueprint | Location | Recipe |
|---|---|---|
| Survival Multitool | Unlocked from start | 3x Titanium (Fabricator) |
| Flashlight | Shallows, Blighted Coral, North Raceway | 2x Titanium, 1x Quartz, 1x Basic Battery (Fabricator) |
| Scanner | Unlocked from start | 2x Titanium, 2x Quartz, 1x Basic Battery (Fabricator) |
| Bioscanner | Cicada Wreck (EVA Prep) | 1x Scanner, 2x Enameled Glass, 3x Conduit Crystal (Modification Station) |
| Habitat Builder | Shallows, Blighted Coral, Plateaus | 2x Titanium, 1x Glass, 1x Basic Battery, 1x Copper Wire (Fabricator) |
| Repair Tool | Shallows, Graveyard, Cicada Wreck (Canteen), Jelly Barrens | 1x Titanium Ingot, 1x Wiring Kit, 1x Basic Battery, 1x Sulfur (Fabricator) |
| Wakemaker | Shallows, Blighted Coral, Plateaus, North Raceway | 1x Silver, 1x Wiring Kit, 1x Grease, 1x Basic Battery (Fabricator) |
| Air Bladder | Unlocked from start | 2x Titanium, 1x Rubber (Fabricator) |
| Sonic Resonator | Old Habitat, Plateaus, Graveyard, Power Plant | 1x Basic Battery, 2x Titanium Ingot, 2x Lead, 1x Wiring Kit (Fabricator) |
| Feedback Resonator | Cicada Wreck (Therapy Room), Metal Farms | 1x Sonic Resonator, 2x Enameled Glass, 2x Conduit Crystal, 2x Strontium (Modification Station) |
Electronics
| Blueprint | Location | Recipe |
|---|---|---|
| Basic Battery | Unlocked from start | 2x Copper, 1x Acidic Raion Pouch (Fabricator) |
| Advanced Battery | Root Canyon | 1x Conduit Crystal, 1x Strong Acid, 1x Silver Ingot (Fabricator) |
| Copper Wire | Unlocked from start | 2x Copper (Fabricator) |
| Power Cell | Unlocked with Fully Functional Fabricator | 2x Basic Battery, 1x Strong Acid, 1x Salt (Fabricator) |
| Entangled Power Cell | Power Plant | 1x Conduit Crystal, 1x Strong Acid, 1x Gold Ingot, 1x Troilite (Fabricator) |
| Wiring Kit | Unlocked with Fully Functional Fabricator | 1x Silver, 1x Copper Wire (Fabricator) |
| Advanced Wiring Kit | Unlocked with Fully Functional Fabricator | 1x Wiring Kit, 1x Gold, 1x Sulfur (Fabricator) |
| System Chip | Unlocked with Fully Functional Fabricator | 1x Wiring Kit, 2x Quartz (Fabricator) |
| Dedicated Core | Unlocked with Fully Functional Fabricator | 1x Advanced Wiring Kit, 2x Quartz, 1x Strong Acid (Fabricator) |
Base Pieces
| Blueprint | Location | Recipe |
|---|---|---|
| Corridor | Unlocked with Habitat Builder | 2x Titanium (Habitat Builder) |
| Room | Old Habitat | 5x Titanium (Habitat Builder) |
| Hatch | Unlocked with Habitat Builder | 1x Titanium, 1x Quartz (Habitat Builder) |
| Window | Unlocked with Habitat Builder | 1x Glass (Habitat Builder) |
| Nook | Plateaus | 3x Titanium, 2x Glass (Habitat Builder) |
| Half Round Room | Cicada Wreck | 5x Titanium, 5x Glass (Habitat Builder) |
| Moonpool | Tadpole Pens | 5x Titanium (Habitat Builder) |
Furniture
| Blueprint | Location | Recipe |
|---|---|---|
| Dining Chair | Old Habitat | 2x Titanium (Habitat Builder) |
| Lab Chair | Old Habitat | 2x Titanium (Habitat Builder) |
| Stool | Old Habitat | 1x Titanium, 1x Rubber (Habitat Builder) |
| Dining Table | Old Habitat | 3x Titanium, 1x Glass (Habitat Builder) |
| Single Bed | Colonist Bunker | 2x Titanium, 3x Fiber (Habitat Builder) |
| S Shelf | Colonist Bunker | 2x Titanium (Habitat Builder) |
| Trashcan | Old Habitat | 2x Titanium (Habitat Builder) |
| Small Crate | Tadpole Pens | 1x Titanium (Habitat Builder) |
| Sign | Cicada Wreck, Camp One | 1x Titanium, 1x Copper (Habitat Builder) |
| Reaper Leviathan | Unlocked with Habitat Builder | 1x Titanium (Habitat Builder) |
Production
| Blueprint | Location | Recipe |
|---|---|---|
| Fabricator | Unlocked from Habitat Builder | 1x Titanium, 1x Copper, 1x Quartz (Habitat Builder) |
| Processor | Old Habitat | 1x Titanium, 1x Mild Acid, 1x Copper Wire (Habitat Builder) |
| Biolab | Welcome Center | 3x Titanium, 1x Copper wire, 1x Mild Acid (Habitat Builder) |
| Modification Station | Alien Ruins | 2x Titanium, 2x Celestine, 2x Copper (Habitat Builder) |
Power
| Blueprint | Location | Recipe |
|---|---|---|
| Battery Terminal | Old Habitat | 2x Titanium, 2x Quartz, 1x Copper Wire (Habitat Builder) |
| Solar Panel | Unlocked from Habitat Builder | 1x Titanium, 2x Quartz (Habitat Builder) |
| Duplex Solar Panel | Unlocked from Habitat Builder | 1x Titanium, 1x Germanium Ingot, 1x Copper (Habitat Builder) |
| Power Cell Terminal | Cicada Wreck (Lander Garage), Camp One | 3x Titanium, 3x Copper, 1x Wiring Kit (Habitat Builder) |
| Bioreactor | Old Habitat, Cicada Wreck (Lander Garage) | 2x Titanium Ingot, 2x Copper Ingot (Habitat Builder) |
| Hydroelectric Turbine | Old Habitat | 3x Titanium, 3x Copper, 3x Silver (Habitat Builder) |
| Thermal Plant | Hydrothermal Vents | 3x Titanium, 3x Copper, 3x Gold (Habitat Builder) |
| Power Storage | Colonist Bunker, Alien Ruins | 1x Germanium Ingot, 3x Titanium, 2x Salt (Habitat Builder) |
| Power Transmitter | Old Habitat | 1x Titanium, 1x Copper (Habitat Builder) |
Storage
| Blueprint | Location | Recipe |
|---|---|---|
| Wall Locker | Unlocked from Habitat Builder | 2x Titanium (Habitat Builder) |
| Floor Locker | Colonist Bunkers | 3x Titanium, 1x Quartz (Habitat Builder) |
| Tailing Chest | Hydrothermal Vents | 3x Titanium (Habitat Builder) |
| Wall Rack | Cicada Wreck, Camp One | 1x Titanium, 1x Copper (Habitat Builder) |
Utility
| Blueprint | Location | Recipe |
|---|---|---|
| Habitat Beacon | Unlocked from Habitat Builder | 1x Titanium (Habitat Builder) |
| Beacon | Welcome Center | 1x Titanium, 1x Copper (Habitat Builder) |
| Portable Locker | Unlocked from Habitat Builder | 4x Titanium (Habitat Builder) |
| Portable Oxygen Generator | Great Jaw Leviathan | 3x Titanium, 2x Lithium (Habitat Builder) |
| Work Light | Welcome Center, Colonist Bunker (Salvage) | 3x Titanium, 2x Quartz (Habitat Builder) |
| Dive Elevator | Welcome Center, Cicada Wreck (Canteen) | 4x Titanium, 2x Copper, 2x Quartz (Habitat Builder) |
Cultivation Structures
| Blueprint | Location | Recipe |
|---|---|---|
| Growbed | Alien Ruins | 1x Titanium (Habitat Builder) |
| Metal Farm | Metal Farms | 1x Mangalloy Ingot, 1x Axum Bacterial Culture (Habitat Builder) |
Habitat Systems
| Blueprint | Location | Recipe |
|---|---|---|
| Biobed | Colonist Bunker, Alien Ruins | 3x Titanium, 1x Glass, 1x Copper Wire (Habitat Builder) |
| NOA Terminal | Unlocked from Habitat Builder | 3x Titanium, 1x Copper Wire, 1x Glass (Habitat Builder) |
| Scanner Station | Old Habitat | 3x Titanium, 1x Wiring Kit, 1x System Chip (Habitat Builder) |
| Time of Day Display | Alien Ruins, Needler Nest | 1x Titanium, 1x Enameled Glass, 1x Copper (Habitat Builder) |
Vehicles
| Blueprint | Location | Recipe |
|---|---|---|
| Tadpole | Tadpole Pens | 2x Titanium Ingot, 1x Glass, 1x System Chip, 1x Power Cell (Vehicle Fabricator) |
| Tadpole Scout Ray Chassis | Tadpole Pens | 2x Plasteel Ingot, 1x Advanced Wiring Kit, 1x Dedicated Core, 1x Strong Acid (Vehicle Fabricator) |
| Tadpole Haul Chassis | Needler Nest, Cicada Wreck (Therapy Room), Alien Ruins | 4x Titanium Ingot, 3x Strontium, 3x Enameled Glass, 1x Dedicated Core (Vehicle Fabricator) |
| Tadpole Dock | Unlocked with Tadpole | 2x Titanium Ingot, 1x Silver Ingot, 2x Copper Wire (Vehicle Fabricator) |
| Vehicle Fabricator | Unlocked with Tadpole | 2x Titanium Ingot, 1x Copper Ingot, 2x Glass (Habitat Builder) |
Ingots
| Blueprint | Location | Recipe |
|---|---|---|
| Titanium Ingot | Unlocked from Processor | 3x Titanium (Processor) |
| Copper Ingot | Unlocked from Processor | 3x Copper (Processor) |
| Silver Ingot | Unlocked from Processor | 3x Silver (Processor) |
| Gold Ingot | Unlocked from Processor | 3x Gold (Processor) |
| Germanium (From Silver) | Unlocked from Processor | 2x Silver (Processor) |
| Germanium (From Lead) | Unlocked from Processor | 2x Lead (Processor) |
| Plasteel Ingot | Unlocked from Processor | 2x Titanium, 1x Lithium (Processor) |
| Mangalloy Ingot | Unlocked from Processor | 1x Titanium Ingot, 1x Atacamite, 1x Troilite (Processor) |
Refinement
| Blueprint | Location | Recipe |
|---|---|---|
| Strontium | Unlocked from Processor | 2x Celestine (Processor) |
| Strong Acid | Unlocked from Processor | 2x Necrolei Cyst (Processor) |
Divisional
| Blueprint | Location | Recipe |
|---|---|---|
| Interior Wall | Old Habitat | 1x Titanium (Habitat Builder) |
| Interior Arch | Unlocked with Interior Wall | 1x Titanium (Habitat Builder) |
| Interior Door | Unlocked with Interior Wall | 3x Titanium, 1x Glass, 1x Copper Wire (Habitat Builder) |
| Ladder | Unlocked with Room | 2x Titanium (Habitat Builder) |
Lighting
| Blueprint | Location | Recipe |
|---|---|---|
| Exterior Wall Light | Unlocked with Spotlight | 1x Titanium, 1x Copper (Habitat Builder) |
| Spotlight | Old Habitat | 1x Titanium, 2x Copper (Habitat Builder) |
| Small Ceiling Light | Unlocked with Habitat Builder | 1x Titanium, 1x Copper (Habitat Builder) |
| Rectangular Ceiling Light | Camp One | 2x Titanium, 1x Copper (Habitat Builder) |
| Wall Light Small | Unlocked with Habitat Builder | 1x Titanium, 1x Copper (Habitat Builder) |
| Wall Light Large | Unlocked with Habitat Builder | 2x Titanium, 1x Copper (Habitat Builder) |
| Axum Wall Lamp | Tadpole Pens | 1x Titanium, 1x Celestine (Habitat Builder) |
Tailing Furniture
| Blueprint | Location | Recipe |
|---|---|---|
| Tailing Table | Tailings Village | 2x Titanium (Habitat Builder) |
| Tailing Drum | Tailings Village | 2x Titanium, 2x Fiber Mesh (Habitat Builder) |
| Tailing Barrel | Tailings Village | 2x Titanium (Habitat Builder) |
| Coral Jar | Tailings Village | 2x Coral Shavings (Habitat Builder) |
| Small Coral Jar | Tailings Village | 1x Coral Shavings (Habitat Builder) |
| Tailing Jar | Tailings Village | 1x Fiber, 1x Salt (Habitat Builder) |
| Hanging Tailing Jar | Tailings Village | 2x Fiber, 1x Salt (Habitat Builder) |
| Tailing Rug | Tailings Village | 3x Fiber (Habitat Builder) |
Axum Furniture
| Blueprint | Location | Recipe |
|---|---|---|
| Small Axum Jar | Tailings Village | 1x Glass, 1x Copper (Habitat Builder) |
| Axum Jar | Tailings Village | 1x Glass, 2x Copper (Habitat Builder) |
| Tall Axum Jar | Tailings Village | 1x Glass, 3x Copper (Habitat Builder) |
Decorations
| Blueprint | Location | Recipe |
|---|---|---|
| Wall Unit Small | Unlocked with Small Crate | 1x Titanium (Habitat Builder) |
| Wall Panel | Unlocked with Small Crate | 1x Titanium (Habitat Builder) |
| Wall Unit Large | Unlocked with Small Crate | 3x Titanium (Habitat Builder) |
| Wall Vent | Unlocked with Small Crate | 2x Titanium (Habitat Builder) |
| Wall Vent Large | Unlocked with Small Crate | 3x Titanium (Habitat Builder) |
| Roof Pump | Hydrothermal Vents | 1x Titanium (Habitat Builder) |
| Roof Pump Double | Unlocked with Roof Pump | 2x Titanium (Habitat Builder) |
| Roof Cylinder | Cicada Wreck (Empty Hold) | 1x Titanium (Habitat Builder) |
| Roof Panel Large | Unlocked with Roof Cylinder | 2x Titanium (Habitat Builder) |
| Roof Antenna | Hydrothermal Vents | 1x Titanium (Habitat Builder) |
| Roof Antenna Large | Unlocked with Roof Antenna | 3x Titanium (Habitat Builder) |
| Roof Listening Dish | Unlocked with Roof Antenna | 3x Titanium (Habitat Builder) |
Posters
Tadpole Upgrade Modules
| Blueprint | Location | Recipe |
|---|---|---|
| Cavitation Muffler | Metal Farms | 3x Titanium, 3x Strontium (Modification Station) |
| Engine Efficiency | Alien Ruins | 1x Titanium Ingot, 2x Glass, 1x System Chip (Modification Station) |
| Photovoltaic Charger | Cicada Wreck (EVA Prep) | 1x Copper Ingot, 1x Strong Acid, 1x Troilite (Modification Station) |
| Strike Armor | Alien Ruins | 2x Enameled Glass, 2x Strontium (Modification Station) |
| Tadpole Depth Module MK 1 | Needler Nest | 3x Celestine, 2x Enameled Glass, 1x System Chip (Modification Station) |
Detailed Blueprint locations
Coral Mash
Scan any Dragon's Scale Coral around the Shallows biome, which is located just around your Biome. They appear as hard coral around the edges of caverns and archways. You'll need a Survival Multitool to collect Coral Shavings, so be sure to craft that first.
Isotonic Water
To unlock the Isotonic Water Blueprint, you'll need to catch a Flash Slug. These are located in the Alien Ruins near the Angel Comb around 1000 meters east of your Lifepod and descending around 300 meters deep. They shine bright blue, so should be easy to spot, but make sure to scan them before you pick them up. And watch out for their bright flash.
Improved Fins
You'll need to scan three Blueprints to unlock the Improved Fins. Head to the Alien Ruins around 800 to 100 meters east of your Lifepod. They'll be found on a ledge a little south of the Alien Ruins, then swim around 230 meters east-southeast to a tall rock where you'll find a platform. Then, drop down to 260 meters deep and look southeast. You should see a blue light and next to this is a crate with the final fragment to scan.
High Capacity Air Tank
The High Capacity Air Tank appears as a data card which can be found on the top floor of the Cicada Wreck (Canteen) located in the Tufa Towers biome around 280 meters south-southwest of your Lifepod. You'll need to swim around 90 meters deep.
Rebreather
In the Cicada Wreck (Canteen), located around 280 meters south-southwest of your Lifepod at 90 meters deep, you can also find the Rebreather to scan.
Flashlight
The Flashlight requires two fragment scans. One can be found in the cave directly below your Lifepod and the second is in a cave just a few meters east of your Lifepod.
Bioscanner
The Bioscanner Blueprint can be found within the Cicada Wreck (EVA Prep) located around 1200 meters east of your Lifepod to the Alien Ruins and then head around 600 meters east-southeast directly. You'll need a Repair Tool to get through the door, follow the rooms through, head down the hole in the far corner, follow the tunnels and it'll be on the floor.
Habitat Builder
The Habitat Builder requires two fragment scans. One is just outside the Welcome Center and the second is in a hole in the middle of the Welcome Center.
The Repair Tool requires three fragment scans. The first is laying on a couch inside the Cicada Wreck (Canteen) located around 280 meters south-southwest of your Lifepod at about 90 meters deep. The second is by Chap's black box 200 meters southeast of your Lifepod. The third is in the Colonist Bunker (Salvage) located around 200 meters north-northeast of your Lifepod, between the Digestion Angel Comb and the Old Habitat.
Wakemaker
The Wakemaker requires three fragment scans. The first is at an outpost 200 meters northeast of your Lifepod. The second is around 90 meters east of your Lifepod, just before the Digestion Angel Comb. The third is in a crate just southwest of the Digestion Angel Comb.
Sonic Resonator
The Sonic Resonator requires two fragment scans. Both can be found in the Old Habitat, one near Wu's audio log and the other in the next room.
Feedback Resonator
The Feedback Resonator requires two fragment scans. One can be found inside the Cicada Wreck (Therapy Room). First, head to the Alien Ruins around 800 to 1000 meters from your Lifepod. Then, head 760m east-southeast. It's around 300 meters east-northeast of ISO's black box. The second is in a mine just southeast of the Metal Farms, though there's two other fragments in this location around the structures.
Advanced Battery
First, head to the Alien Ruins around 800 to 1000 meters east of your Lifepod. Head east to the Power Plant until you reach the Axum Vision Angel Comb beneath. Then, head 475 meters east at around 200 meters deep to locate a cliffside research platform.
Entangled Power Cell
The Entangled Power Cell requires two fragment scans. Head 1300 meters east of your Lifepod until you reach the Power Plant around 200 to 300 meters deep. On the cliffside northeast, you should find both scans needed, one under a light and one in a box.
Room
Head to the Old Habitat located around 350 to 400 meters north-northwest of your Lifepod. On the top floor, the Room data card will be resting on a desk by the NOA Terminal.
Nook
Head 330 meters southeast of your Lifepod until you reach a wreckage. The Nook data card will be glowing blue at around 40 meters deep.
Half Round Room
Head to the Tadpole Pens located around 670-700 meters east of your Lifepod. Then, advance to the Cicada Wreck (Empty Hold) around 190 meters west. The Half Round Room data card can be found inside.
Moonpool
Head to the Tadpole Pens located around 670-700 meters east of your Lifepod. The Moonpool data card can be found inside resting on a bottom bunk.
Dining Chair
The Dining Chair requires three fragment scans. Head to the Old Habitat around 400 meters north of your Lifepod. Floating furniture will be found throughout this area.
Lab Chair
The Lab Chair requires two fragment scans. Head to the Old Habitat around 400 meters north of your Lifepod. Floating furniture will be found throughout this area.
Head to the Old Habitat around 400 meters north of your Lifepod. Floating furniture will be found throughout this area.
Dining Table
The Dining Table requires two fragment scans. Head to the Old Habitat around 400 meters north of your Lifepod. Floating furniture will be found throughout this area.
Single Bed
The Single Bed requires two fragment scans. Head to the base at Chap's black box located 200 meters southeast of your Lifepod. The second is inside the Colonist Bunker (Unauthorized NOA Modification) located around 200 meters southwest of your Lifepod at around 70 meters deep.
S Shelf
Head inside the Colonist Bunker (Unauthorized NOA Modification) located around 200 meters southwest of your Lifepod at around 70 meters deep.
Trashcan
Head to the Old Habitat around 400 meters north of your Lifepod. Floating furniture will be found throughout this area, but the Trashcan will be at the base buried in the sand.
Small Crate
Head around 650 meters northeast of your Lifepod to a destroyed building just outside the Tadpole Pens. You'll want to dive around 145 meters deep to retrieve it.
Sign
The Sign requires three fragment scans. You'll scan wall racks located at the Cicada Wreck 90 meters northeast of your Lifepod. Head further northeast to a research outpost for the second scan. The third scan is located at a research outpost southwest of Camp One located 200 meters north of your Lifepod.
Processor
Head to the Old Habitat around 400 meters north of your Lifepod.
Biolab
Head inside the Welcome Center around 100 meters southeast of your Lifepod.
Modification Station
Head inside the Alien Ruins Research Lab around 800 to 1000 meters east of your Lifepod.
Battery Terminal
The Battery Terminal requires two fragment scans. Head inside the Welcome Center around 100 meters southeast of your Lifepod to find both.
Power Cell Terminal
The Power Cell Terminal requires two fragment scans. The first is inside the Cicada Wreck (Lander Garage) located around 600 meters northeast of your Lifepod. You'll need a Repair Tool to get inside. The second can be found on a metal dish outside Camp One located around 250 meters north-northeast of your Lifepod around 25 meters deep.
Bioreactor
The Bioreactor requires three fragment scans. Head to the Old Habitat around 400 meters north of your Lifepod. You'll find the first scan by the ladder. For the second scan, head 150 meters east of the Old Habitat. It'll be in a semi-buried crate at around 35 meters deep. The third scan can be found inside the Cicada Wreck (Lander Garage) located around 600 meters northeast of your Lifepod or 300 meters east of the Old Habitat.
Hydroelectric Turbine
The Hydroelectric Turbine requires two fragment scans. Head to the Old Habitat around 400 meters north of your Lifepod and the first scan is just south near the water current. Just east of the Old Habitat, you'll also find the second scan at an abandoned research station.
Thermal Plant
The Thermal Plant requires two fragment scans. Head around 500 meters east of your Lifepod and around 80 meters deep to reach a cliff at the edge of the Hydrothermal Vents for the first scan. The second is at a cave directly below the first fragment scan.
Power Storage
The Power Storage requires two fragment scans. Head to the Colonist Bunker (Unauthorized NOA Modification) located around 200 meters southwest of your Lifepod at around 70 meters deep. The first scan is on the wall. The second is inside the Alien Ruins Research Lab located around 800 to 1000 meters east of your Lifepod.
Power Transmitter
Head to the Old Habitat around 400 meters north of your Lifepod and then go slightly east next to a water current to find an abandoned research outpost. The Power Transmitter fragment will be inside a box.
Floor Locker
Head to the Colonist Bunker (also known as Quaker’s Meetinghouse) located around 250 meters southwest of your Lifepod. You’ll need to dive around 90 meters deep to spot the bunker entrance.
Tailing Chest
Head to the Tailings Village around 500 to 600 meters southeast of your Lifepod at around 90 meters deep. Search the pods on cliff tops until you find one hidden underneath.
Wall Rack
The Wall Rack requires three fragment scans. The first can be found in the Cicada Wreck (EVA Prep) around 90 meters northeast of your Lifepod. The second will be further northeast from here on an abandoned outpost. The final one is at Camp One, located 200 meters north of your Lifepod. Head further southwest and you’ll find it on another abandoned outpost.
Beacon
The Beacon requires two fragment scans. Head to the Welcome Center around 100 meters southeast of your Lifepod. A cave where an upward current is emerging from has the first scan. The second is at the bottom of small cliff just 80 meters east of the Welcome Center at around 40 meters deep.
Portable Oxygen Generator
The Portable Oxygen Generator requires two fragment scans. Follow our guide to finding all the Leviathans in Subnautica 2. The Great Jaw Leviathan is where you'll find both fragments you need.
Work Light
The Work Light requires two fragment scans. Head to the Welcome Center around 100 meters southeast of your Lifepod. Then, head 80 meters east and around 40 meters deep to a cave. The strong water current above will help you access it. The second scan is in the Colonist Bunker (Salvage) around 200 meters north-northeast of your Lifepod at around 80 meters deep. The entrance is marked by glowing flowers.
Dive Elevator
The Dive Elevator requires two fragment scans. Head to the Welcome Center around 100 meters southeast of your Lifepod. Then, head 50 meters southwest to a wreckage. The second will be found at the Cicada Wreck (Canteen) around 280 meters south-southwest of your Lifepod.
Growbed
The Growbed requires two fragment scans. Both can be found in the Alien Ruins Research Outpost around 1300 meters east of your Lifepod. One is on the top and the other is on the seabed west of the Outpost.
Head to the Karakorum Metal Farms located around 400 to 500 meters east of the Alien Ruins. There are several scannable fragments dotted around.
Biobed
Biobeds can be found at abandoned shelters. The nearest one you'll find is near Chap's black box around 220 to 250 meters south-southeast of your Lifepod.
Scanner Station
Head to the Old Habitat around 400 meters north of your Lifepod. There's a Scanner Station inside to scan.
Time of Day Display
The Time of Day Display requires two fragment scans. Head to the Rosetta Stone around 225 meters south of the Alien Ruins Research Outpost (1300 meters east of your Lifepod). The second is by the Needler Nest around 300 meters southeast of the Alien Ruins. You'll find it on a ledge around 260 meters deep.
Tadpole
The Tadpole requires three fragment scans. These can all be found at the Tadpole Pens around 675 meters east of your Lifepod at around 150 meters deep.
Tadpole Scout Ray Chassis
Check out our guide to unlocking all Tadpole upgrades in Subnautica 2.
Tadpole Haul Chassis
Check out our guide to unlocking all Tadpole upgrades in Subnautica 2.
Interior Wall
Head to the Old Habitat around 400 meters north of your Lifepod. The Interior Wall is located around 130 meters east of here on a research platform by a strong current.
Spotlight
Head to the Old Habitat around 400 meters north of your Lifepod. You'll find the Spotlight on a shelf.
Rectangular Ceiling Light
Head to Camp One around 250 meters north-northeast of your Lifepod. Head to the wreckage located around 100 meters west of here to find the Rectangular Ceiling Light.
Axum Wall Lamp
Head to the Tadpole Pens around 675 meters east of your Lifepod at around 150 meters deep. You'll need to know how to investigate the Tadpole Pens to unlock the room where the Axum Wall Lamp is.
Tailing Table
Head to the Tailings Village around 500 to 600 meters southeast of your Lifepod at around 90 meters deep. It's in a round purple structure to the north.
Tailing Drum
Head to the Tailings Village around 500 to 600 meters southeast of your Lifepod at around 90 meters deep. It's in a structure that's around 135 meters deep.
Tailing Barrel
Head to the Tailings Village around 500 to 600 meters southeast of your Lifepod at around 90 meters deep. Multiple scans can be found around the area.
Coral Jar
Head to the Tailings Village around 500 to 600 meters southeast of your Lifepod at around 90 meters deep. The Coral Jar is hidden inside a round structure.
Small Coral Jar
Head to the Tailings Village around 500 to 600 meters southeast of your Lifepod at around 90 meters deep. The Small Coral Jar is hidden inside a round structure.
Tailing Jar
Head to the Tailings Village around 500 to 600 meters southeast of your Lifepod at around 90 meters deep. It's in a round purple structure to the north.
Hanging Tailing Jar
Head to the Tailings Village around 500 to 600 meters southeast of your Lifepod at around 90 meters deep. It's in a round purple structure to the north.
Tailing Rug
Head to the Tailings Village around 500 to 600 meters southeast of your Lifepod at around 90 meters deep. It's under some purple coral and a large rock on the south side of this area.
Small Axum Jar
Head to the Tailings Village around 500 to 600 meters southeast of your Lifepod at around 90 meters deep. It's outside a round purple structure to the north.
Axum Jar
Head to the Tailings Village around 500 to 600 meters southeast of your Lifepod at around 90 meters deep. It's outside a round purple structure to the north.
Tall Axum Jar
Head to the Tailings Village around 500 to 600 meters southeast of your Lifepod at around 90 meters deep. It's outside a round purple structure to the north.
Roof Pump
Head to the Hydrothermal Vents biome around 490 meters east-southeast of your Lifepod. You need to enter the cave structure located on the western side of the biome until you find a small hole around 250 meters deep.
Roof Cylinder
Head to the Tadpole Pens located around 670-700 meters east of your Lifepod. Then, advance to the Cicada Wreck (Empty Hold) around 190 meters west. Dive into the cave underneath the Cicada Wreck until you find the Tallshroom. The Roof Cylinder is on top of it.
Roof Antenna
Head to the Hydrothermal Vents biome to a coral structure around 375 meters east of your Lifepod and around 70 meters deep.
Keep Calm Poster
Head to Camp One around 250 meters north-northeast of your Lifepod. Find the wreckage west of Camp One. You'll need a Sonic Resonator to enter.
Just Keep Swimming Poster
Follow our guide to finding all the Leviathans in Subnautica 2. The wreck to the south of Great Jaw is where you'll find this Poster.
Safety First Poster
Head to the Old Habitat located around 350 to 400 meters north-northwest of your Lifepod. The Safety First Poster is inside.
Scout Ray Poster
Head to the Tadpole Pens around 675 meters east of your Lifepod at around 150 meters deep. You'll need to know how to investigate the Tadpole Pens to unlock the room where the Scout Ray Poster is.
New Life Poster
Head inside the Welcome Center around 100 meters southeast of your Lifepod.
Painted Tree Poster
Head to Camp One around 250 meters north-northeast of your Lifepod. The Painted Tree Poster is inside.
CHBC Live Poster
Head inside the Cicada Wreck (Canteen) located around 280 meters south-southwest of your Lifepod at about 90 meters deep.
Pioneer Program Poster
Head to Camp One around 250 meters north-northeast of your Lifepod. The Pioneer Program Poster is in a wreck just west of here.
Cavitation Muffler
Check out our guide to unlocking all Tadpole upgrades in Subnautica 2.
Engine Efficiency
Check out our guide to unlocking all Tadpole upgrades in Subnautica 2.
Photovoltaic Charger
Check out our guide to unlocking all Tadpole upgrades in Subnautica 2.
Strike Armor
Check out our guide to unlocking all Tadpole upgrades in Subnautica 2.
Tadpole Depth Module MK 1
Check out our guide to unlocking all Tadpole upgrades in Subnautica 2.
Collecting all these Blueprints will give you plenty to do in Subnautica 2. But, before you do so it's helpful to get clued up on how to reach max oxygen as well as unlocking all the Tadpole upgrades to make your discovery trips a bit easier!